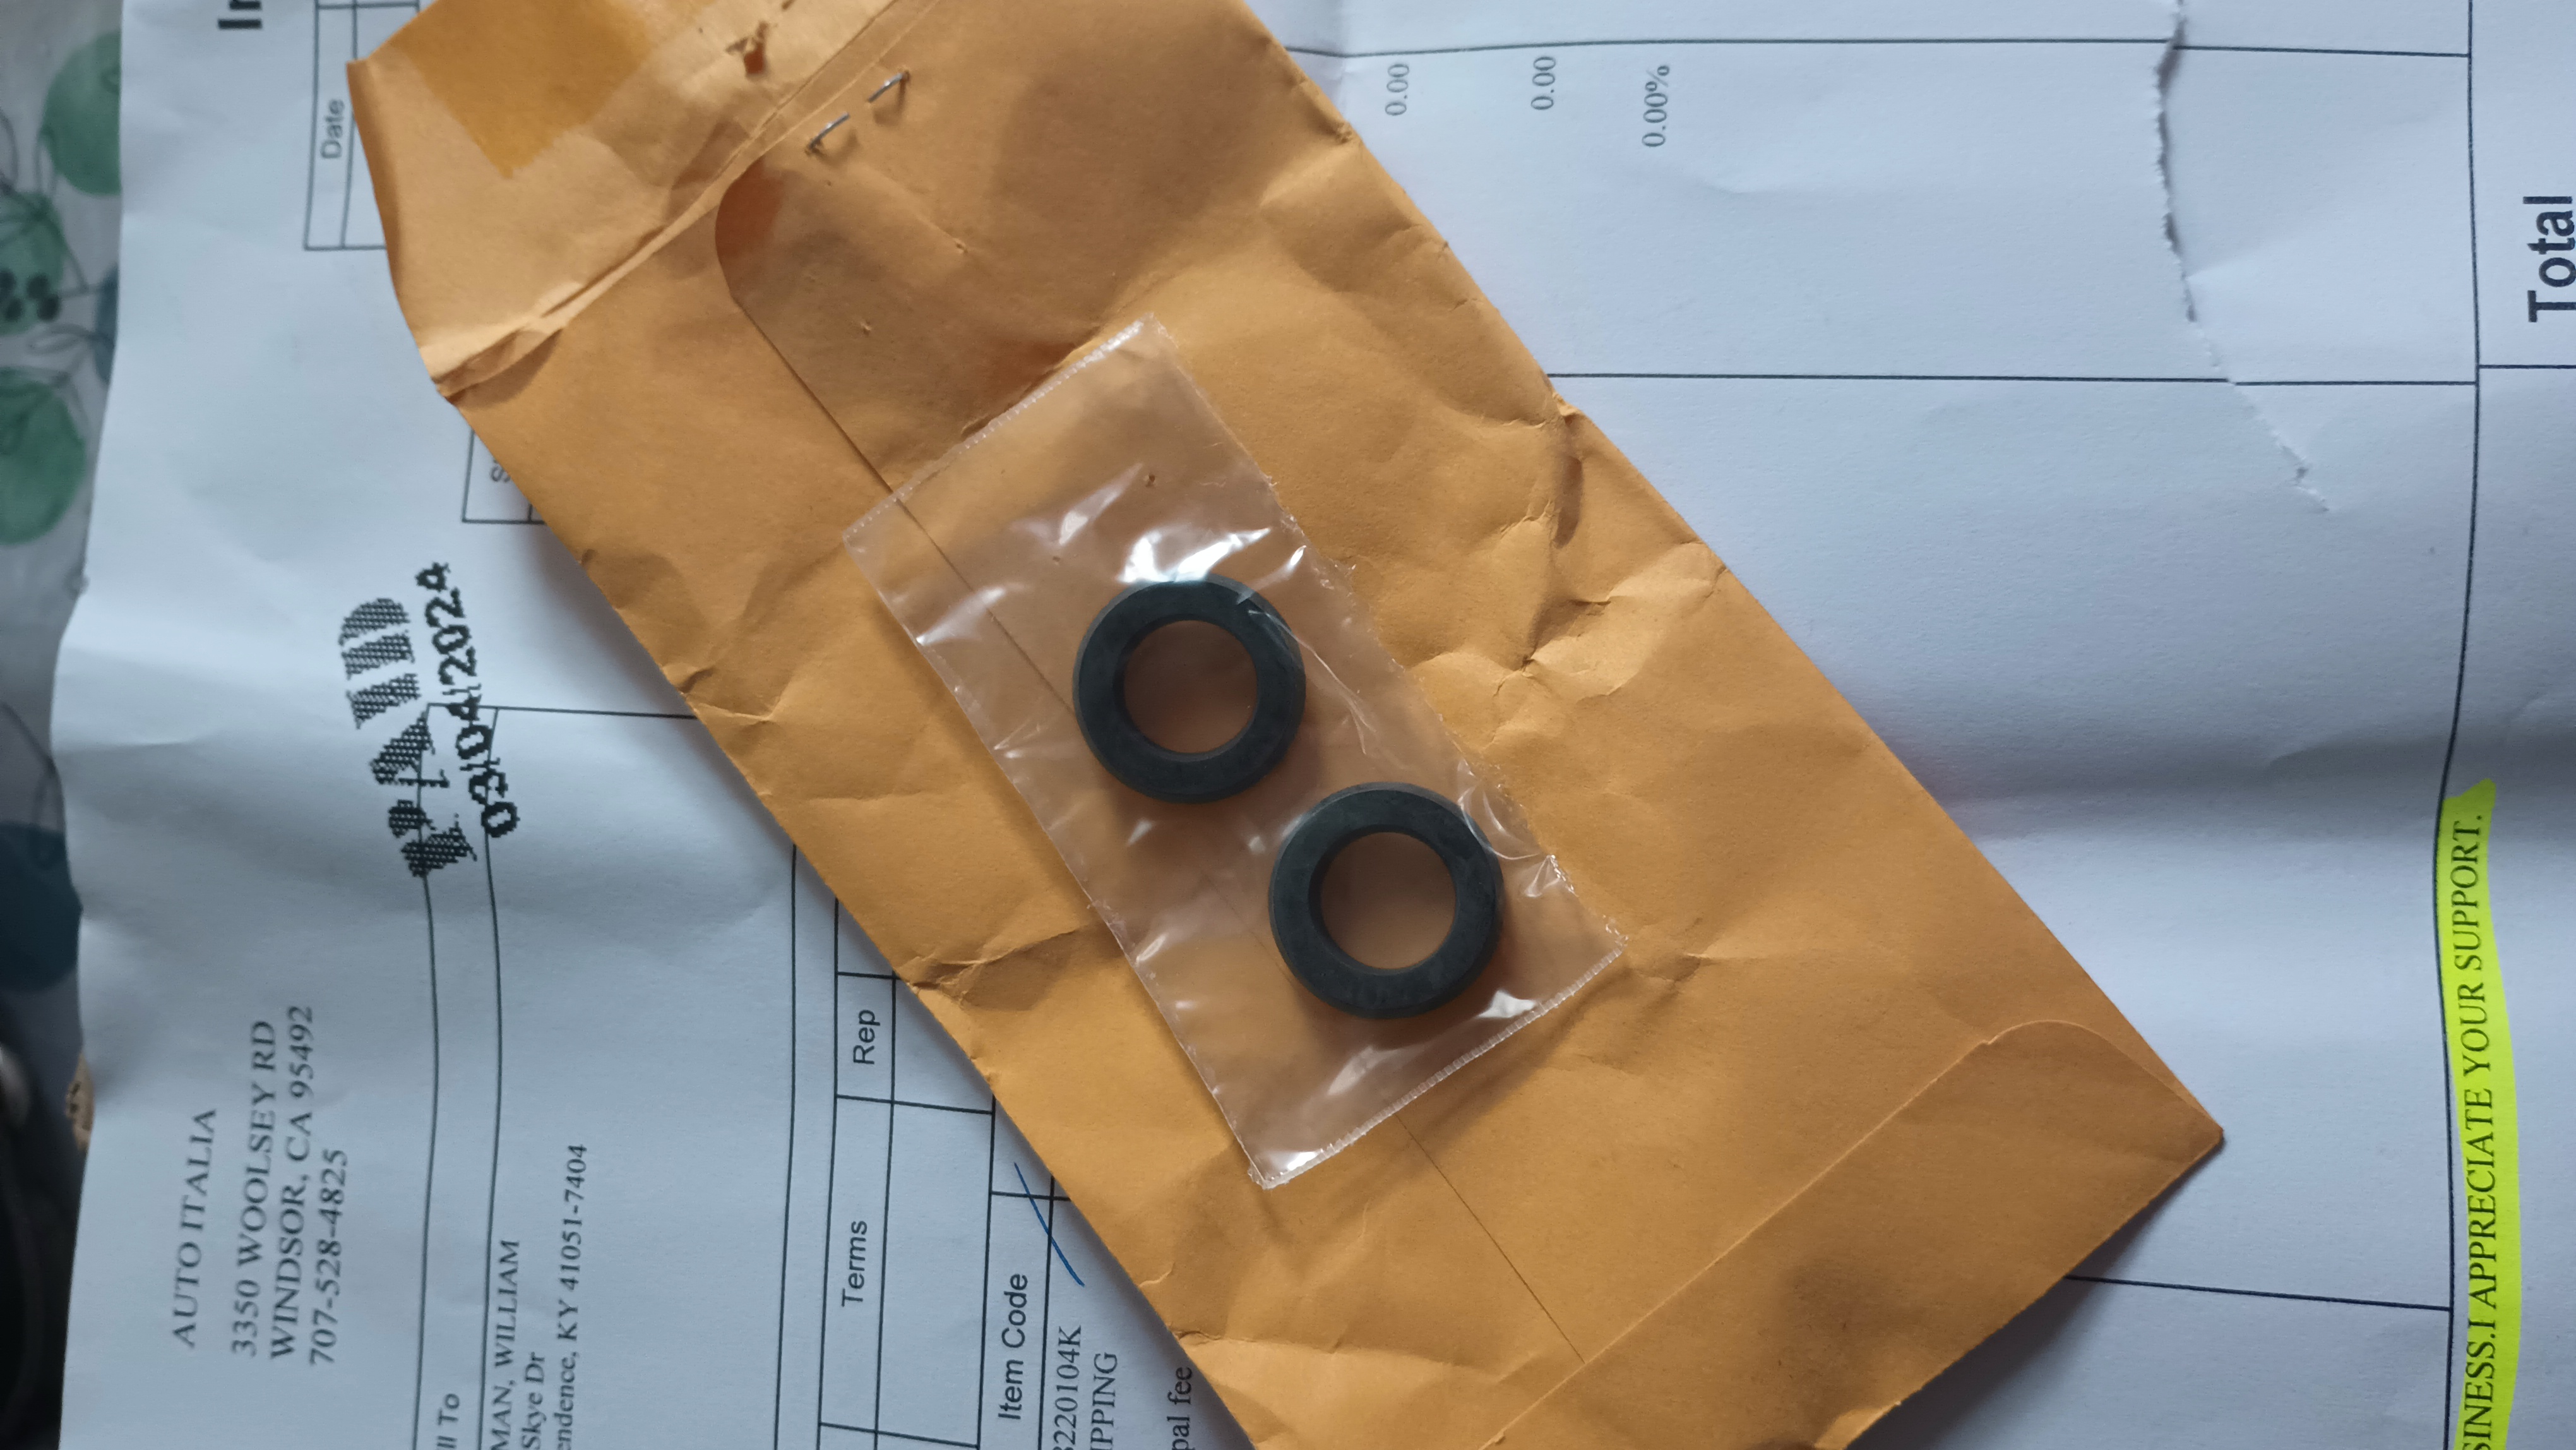
My wrenching time got interrupted by a minor work crisis, so I did not get as far as I had hoped. Before things went pear-shaped, though, I started with the slave cylinder.
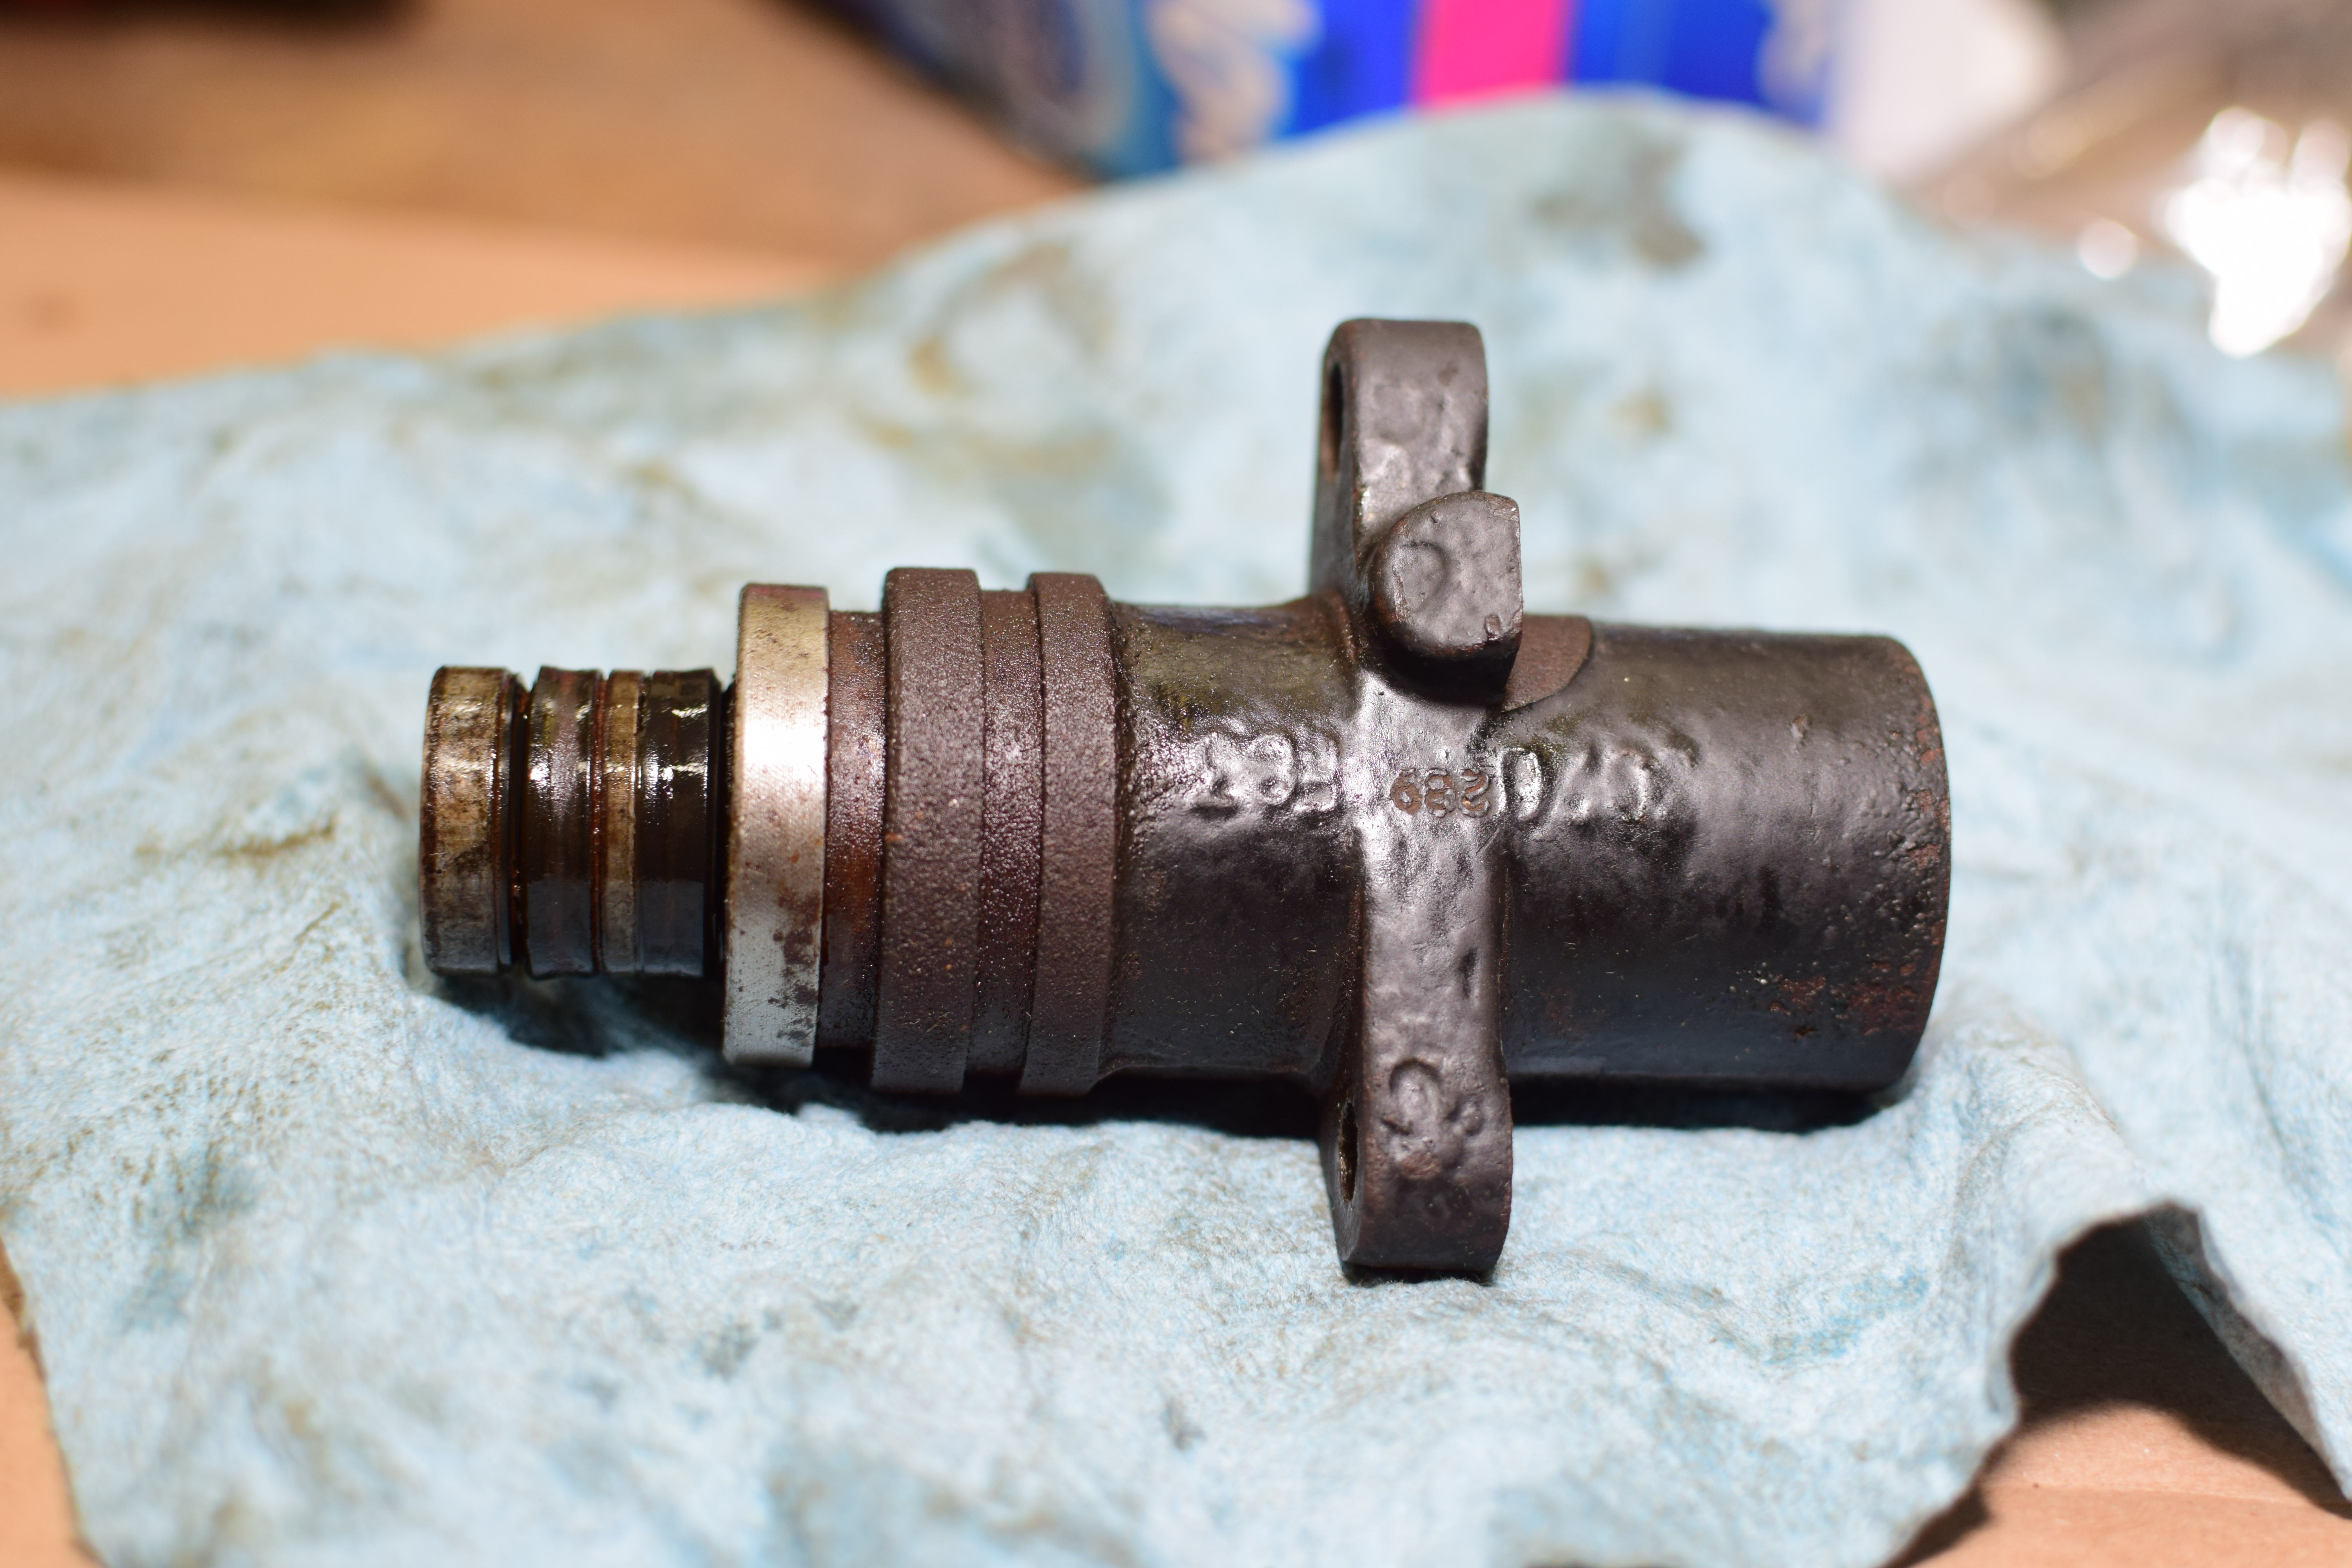
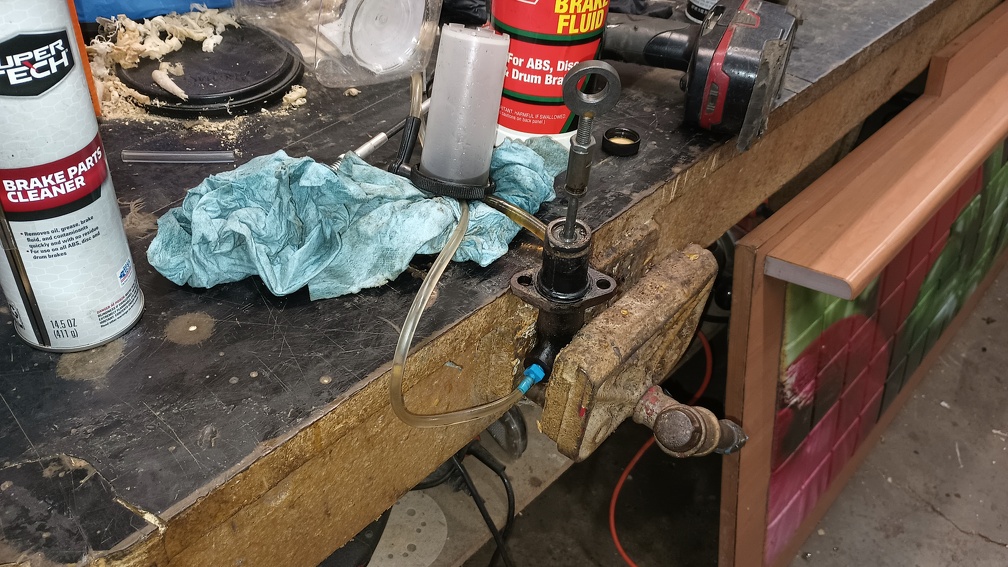
The new seals arrived in the mail, and getting the old ones out started with putting a drift through the banjo bolt connection on the back of the slave cylinder and giving it a quick tap.
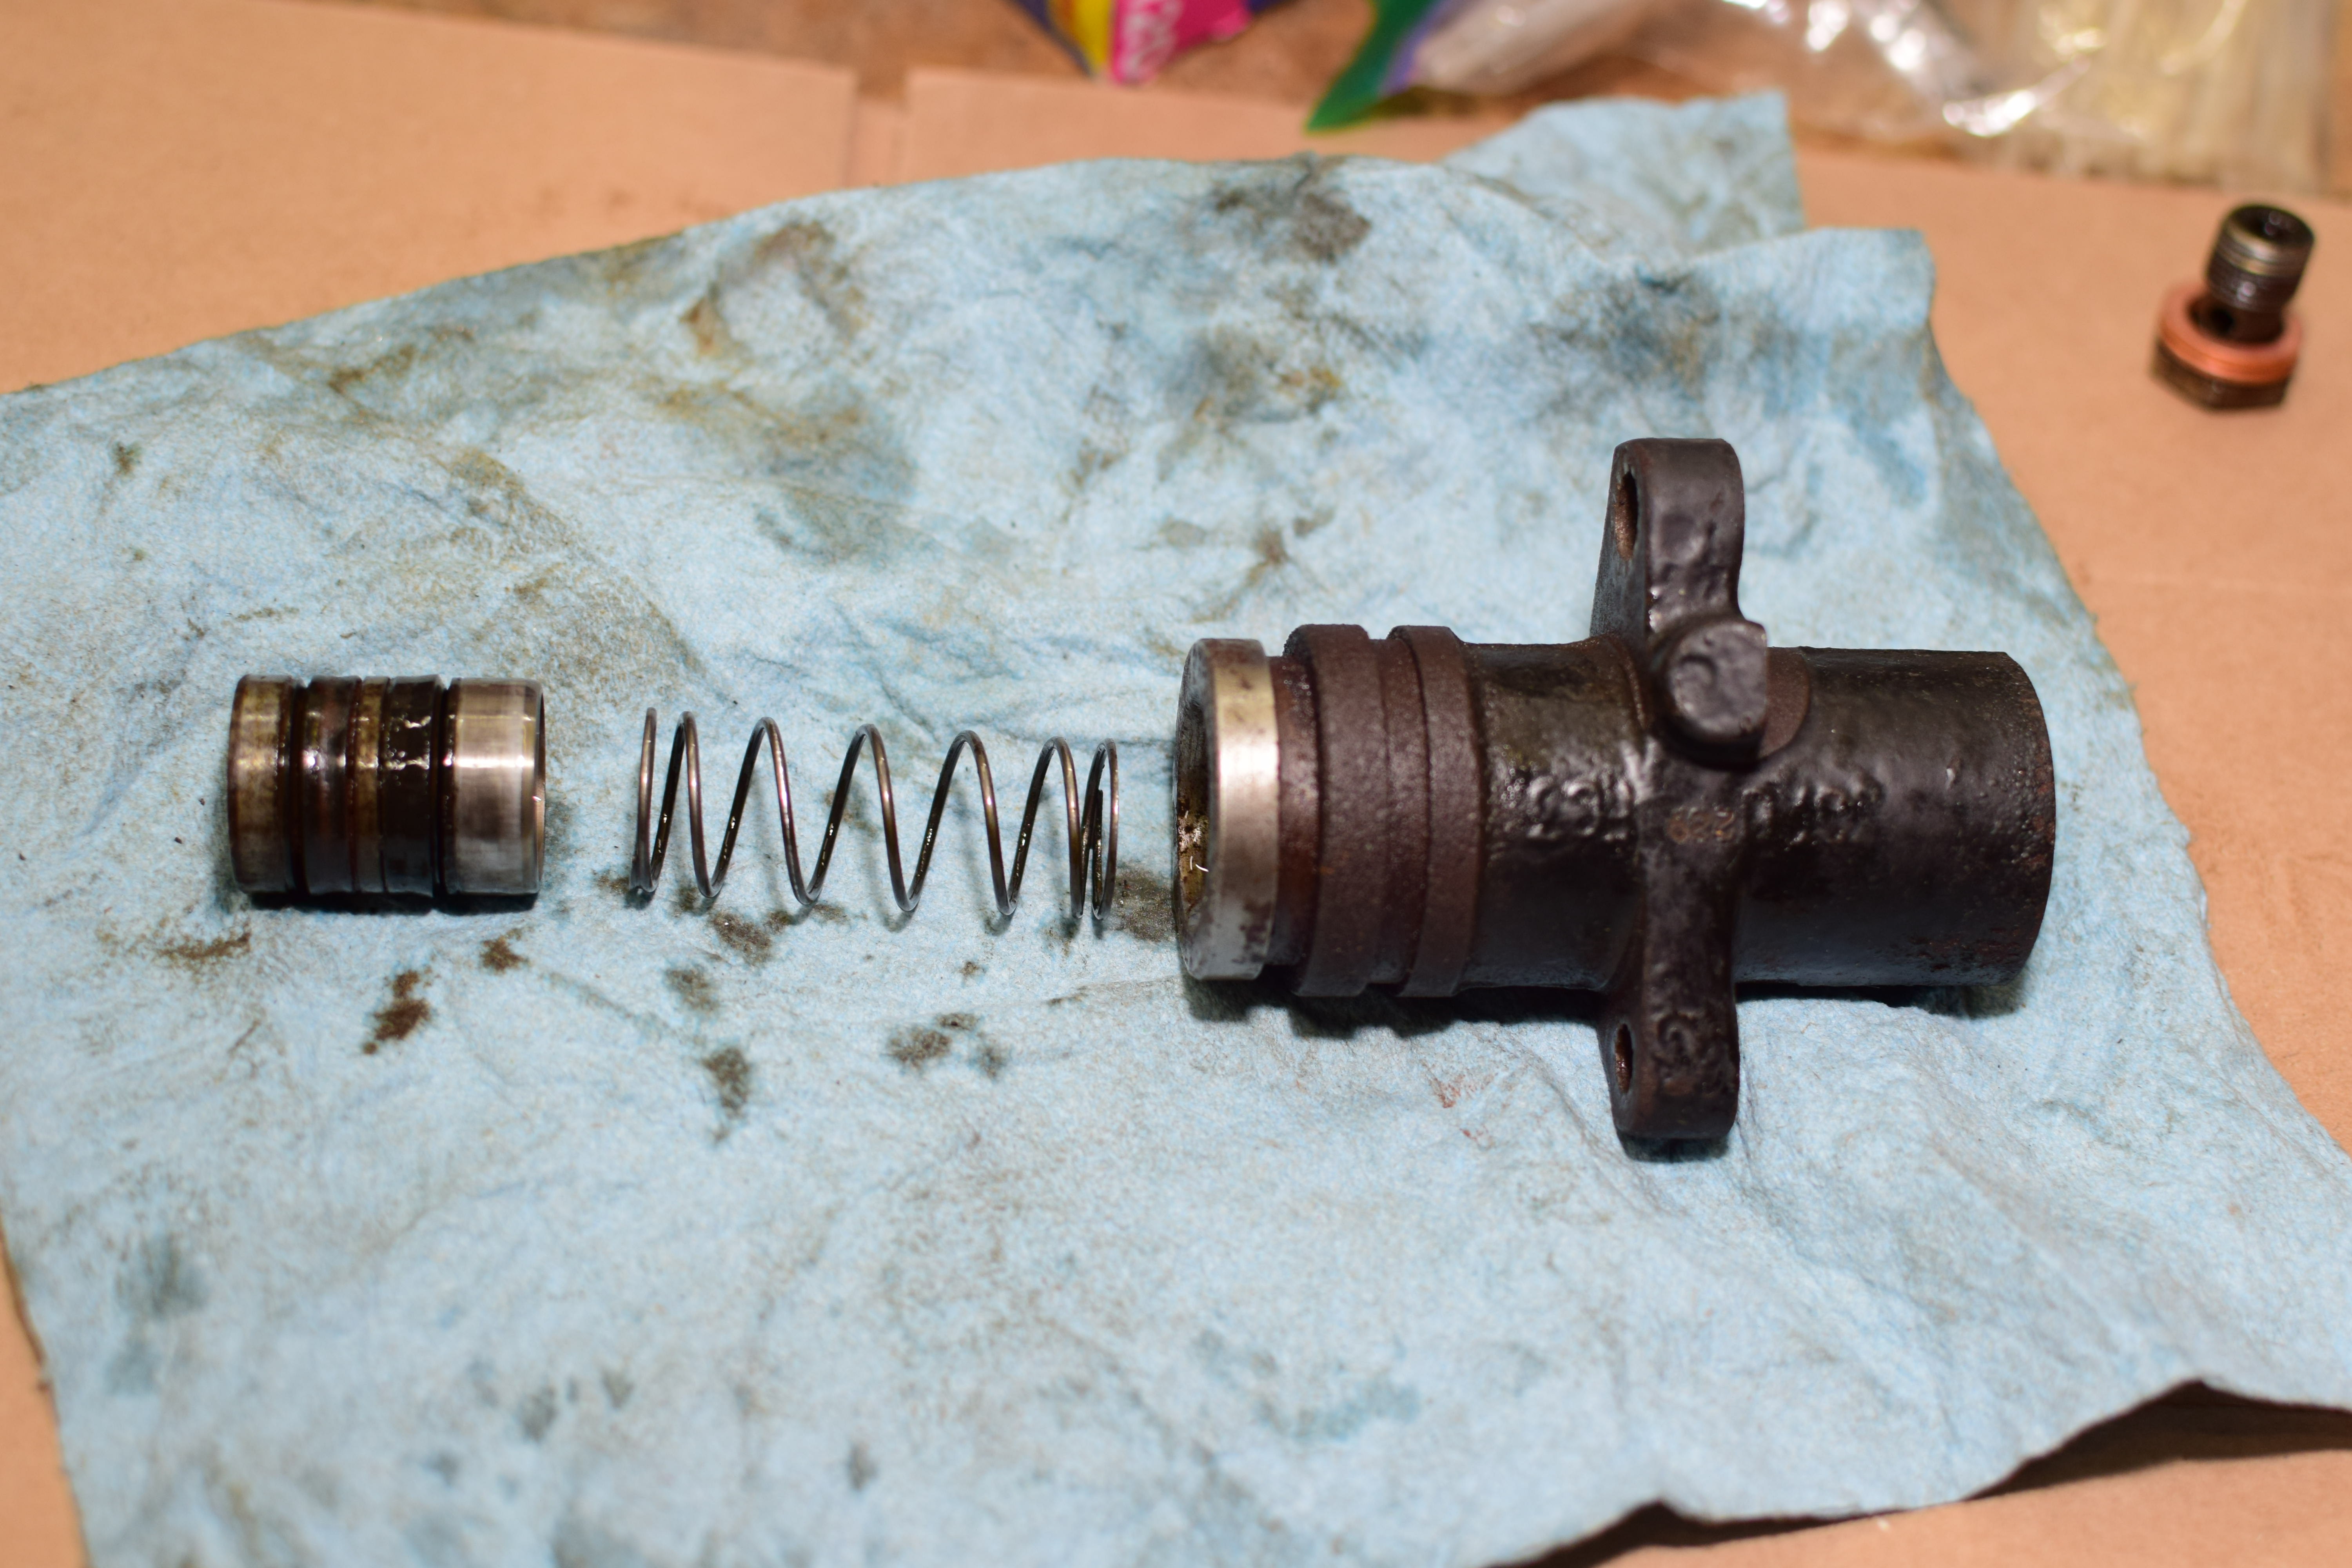
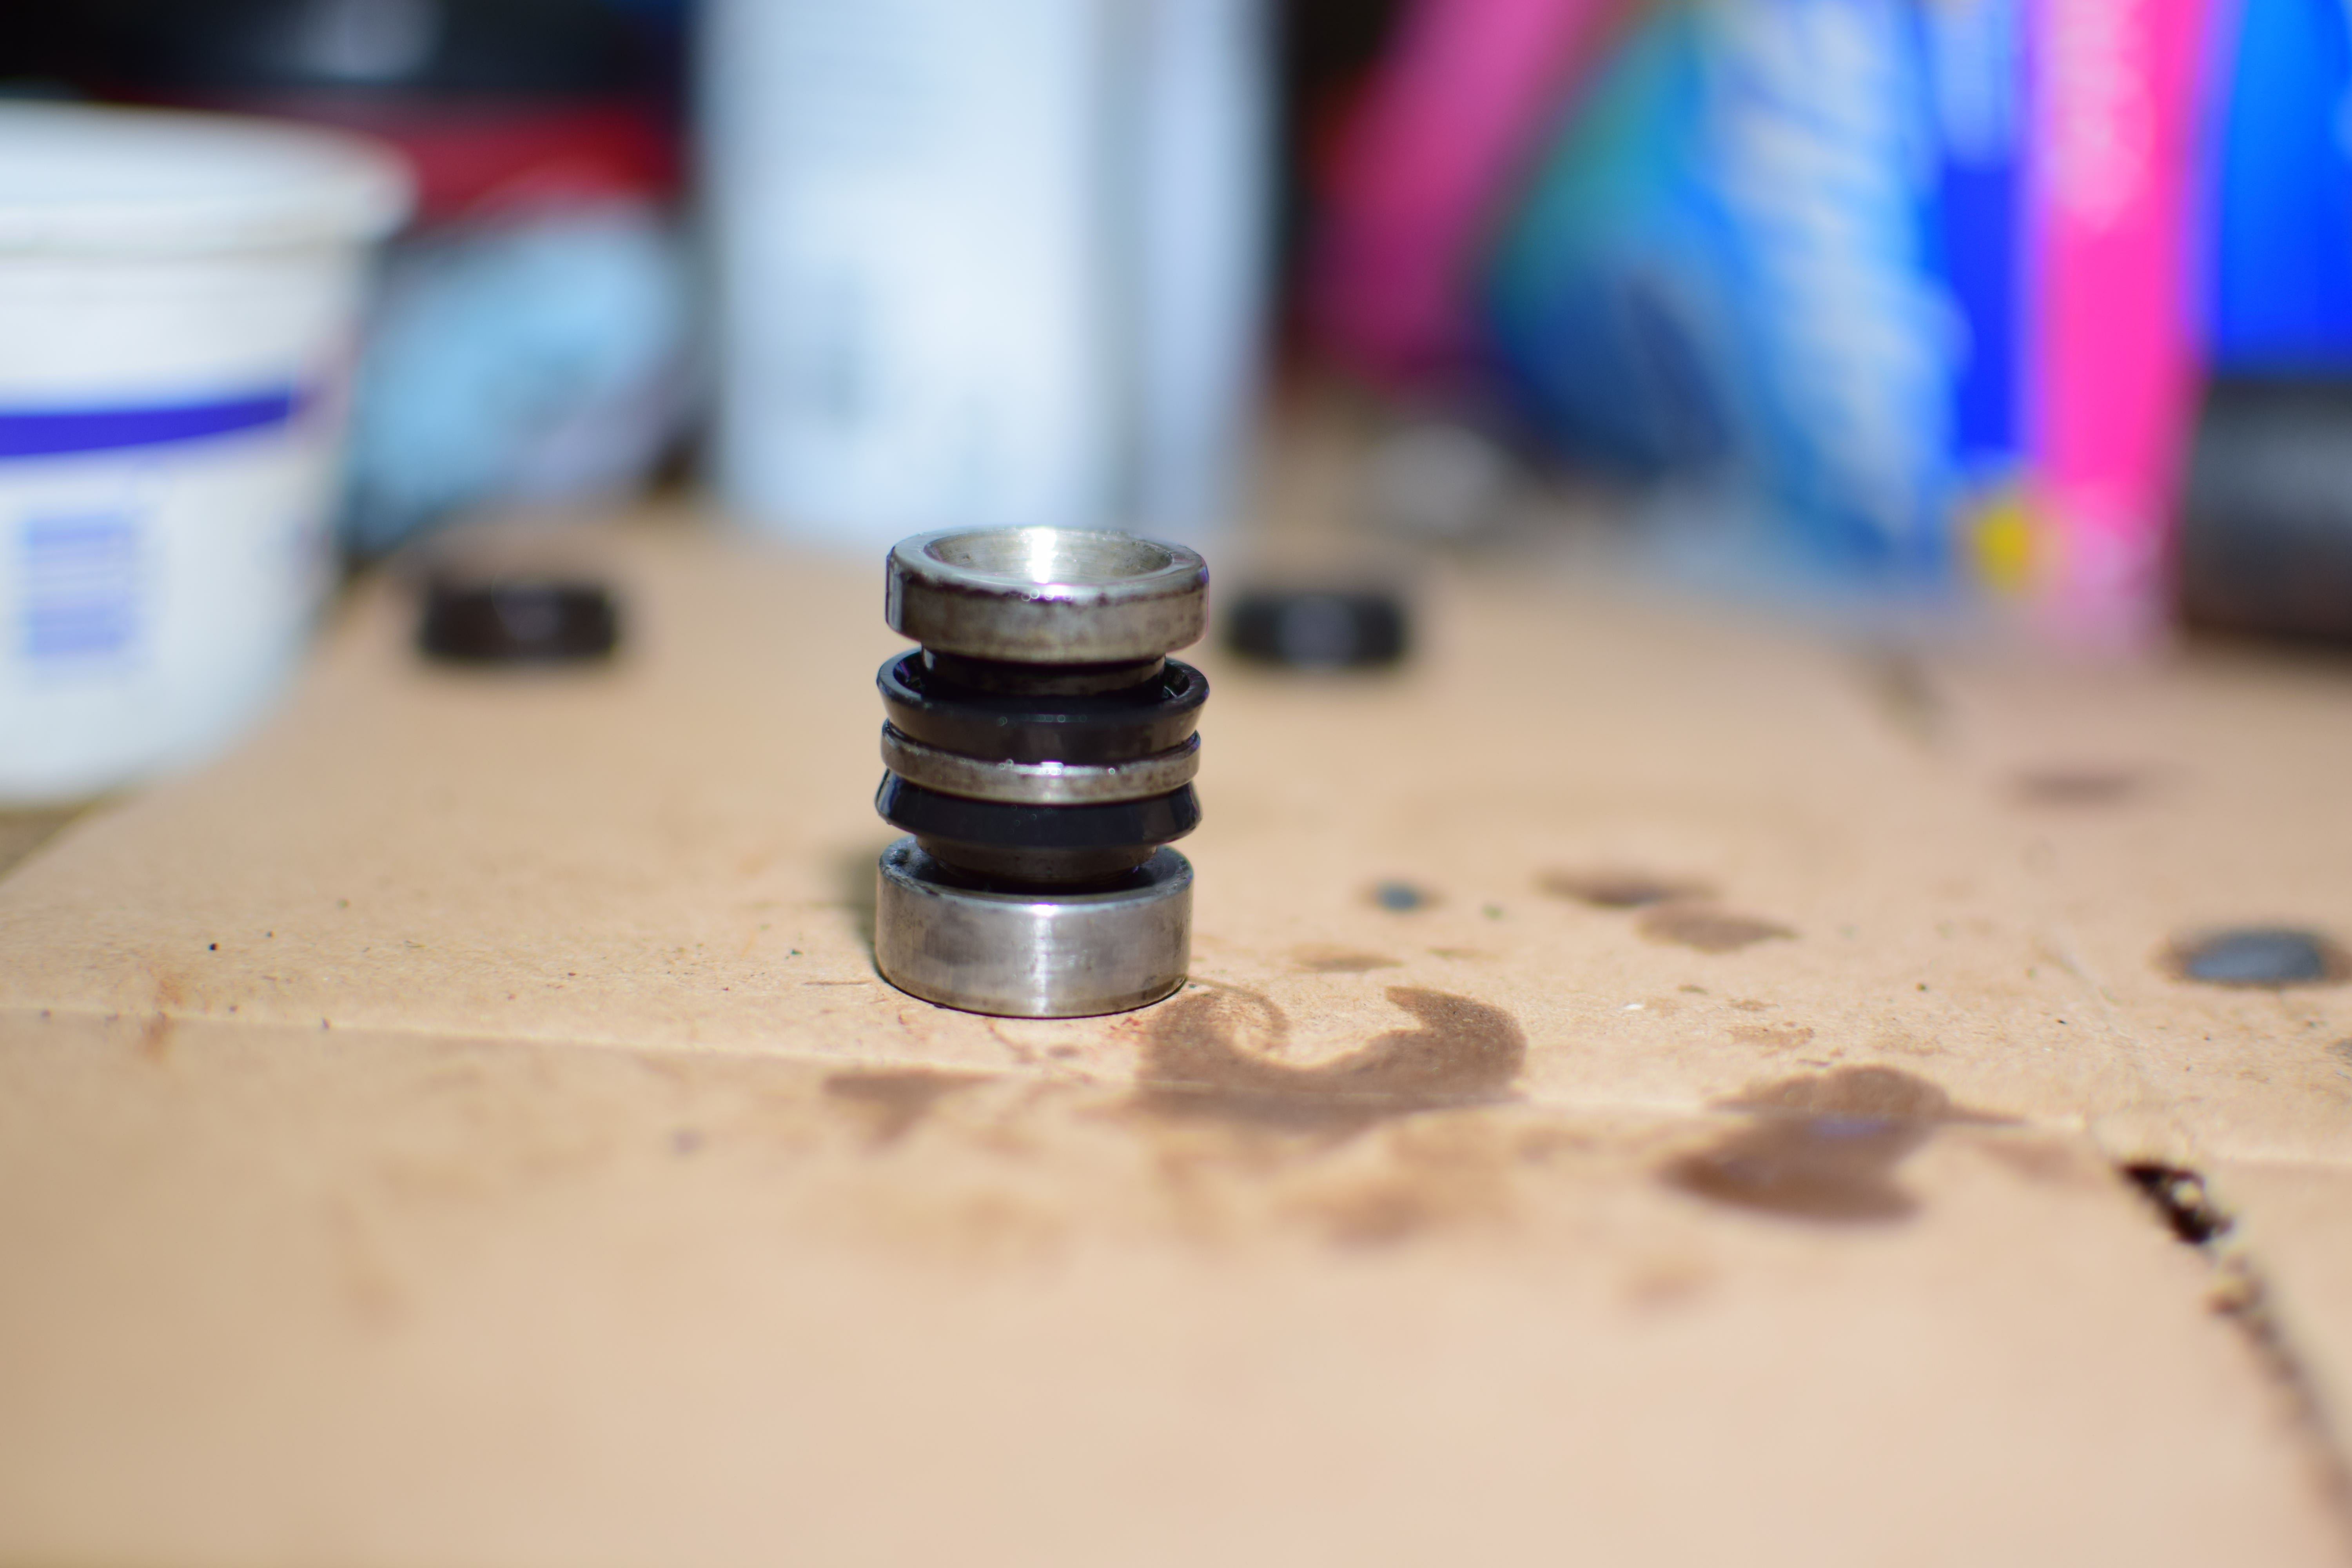
Once the piston was sticking out, it was easy to pull out of the cylinder and start cleaning off.
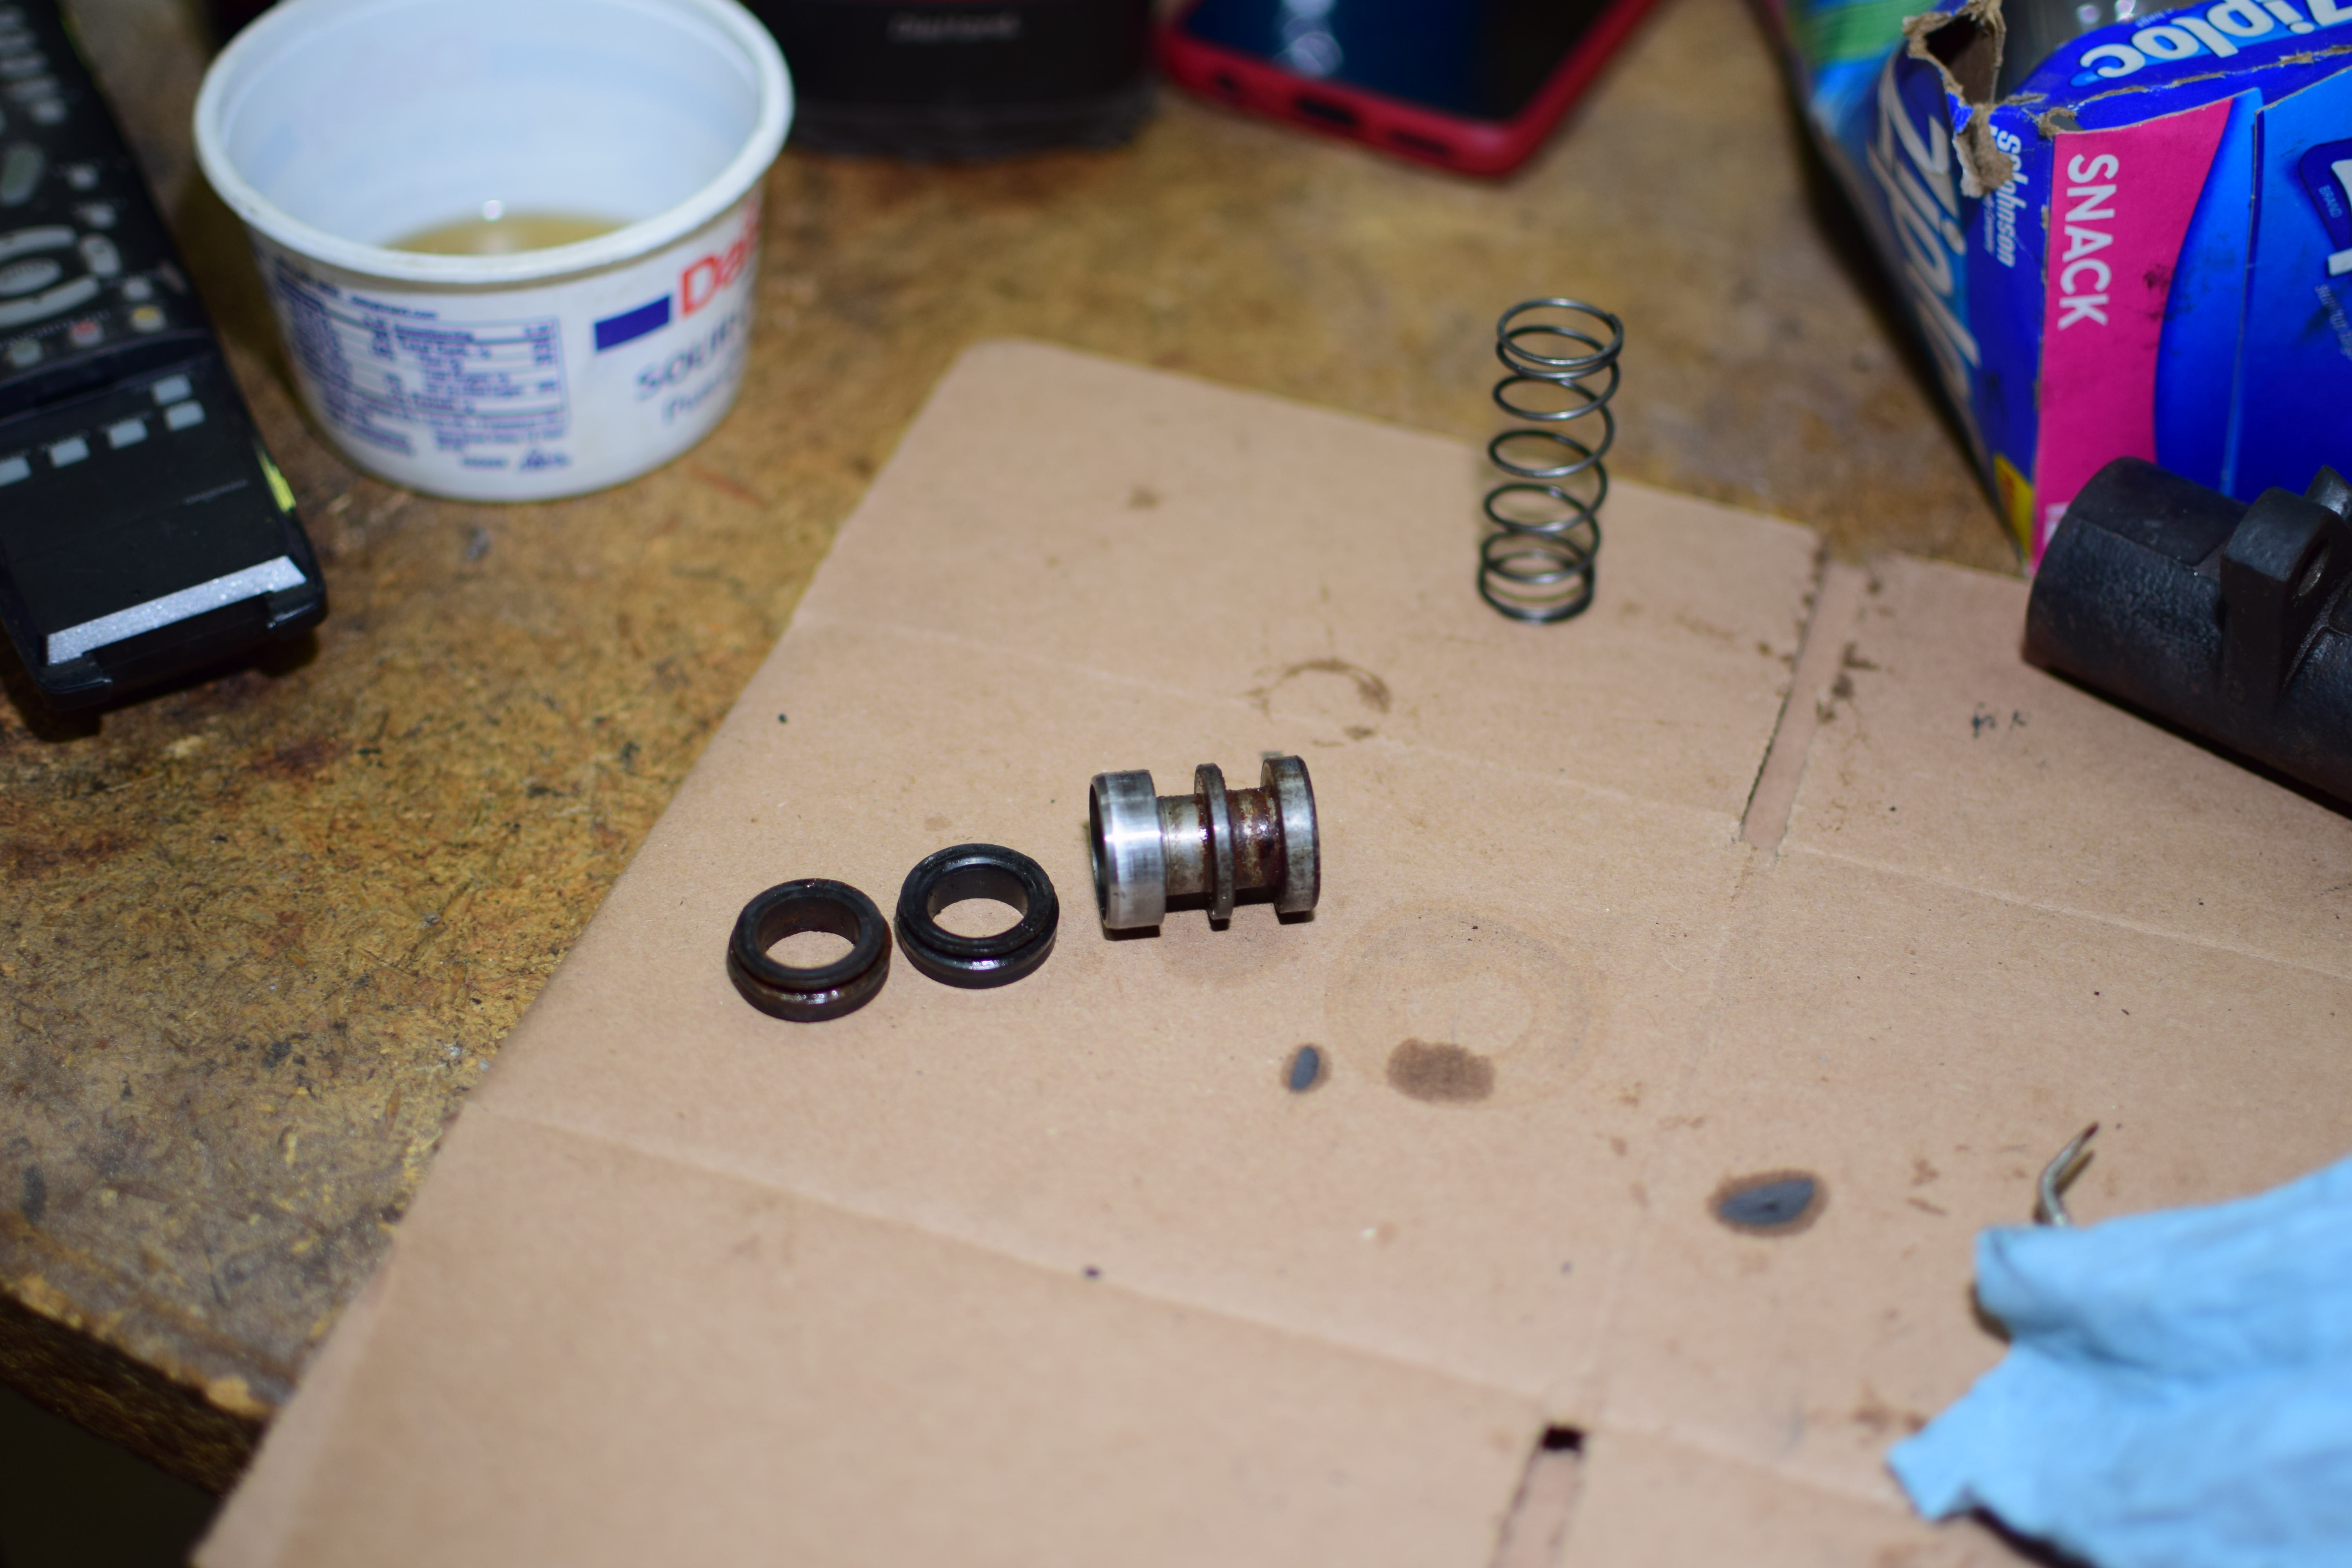
The old seals were pretty toast and, with the use of a small pick, came off without a fight. I hit the inside of the cylinder with the hone while I cleaned up the piston with a wire brush and some brake cleaner.
Getting the new seals on was definitely more difficult than removing the old ones, but with a screwdriver to provide leverage, it only took a couple minutes to have both seals installed.
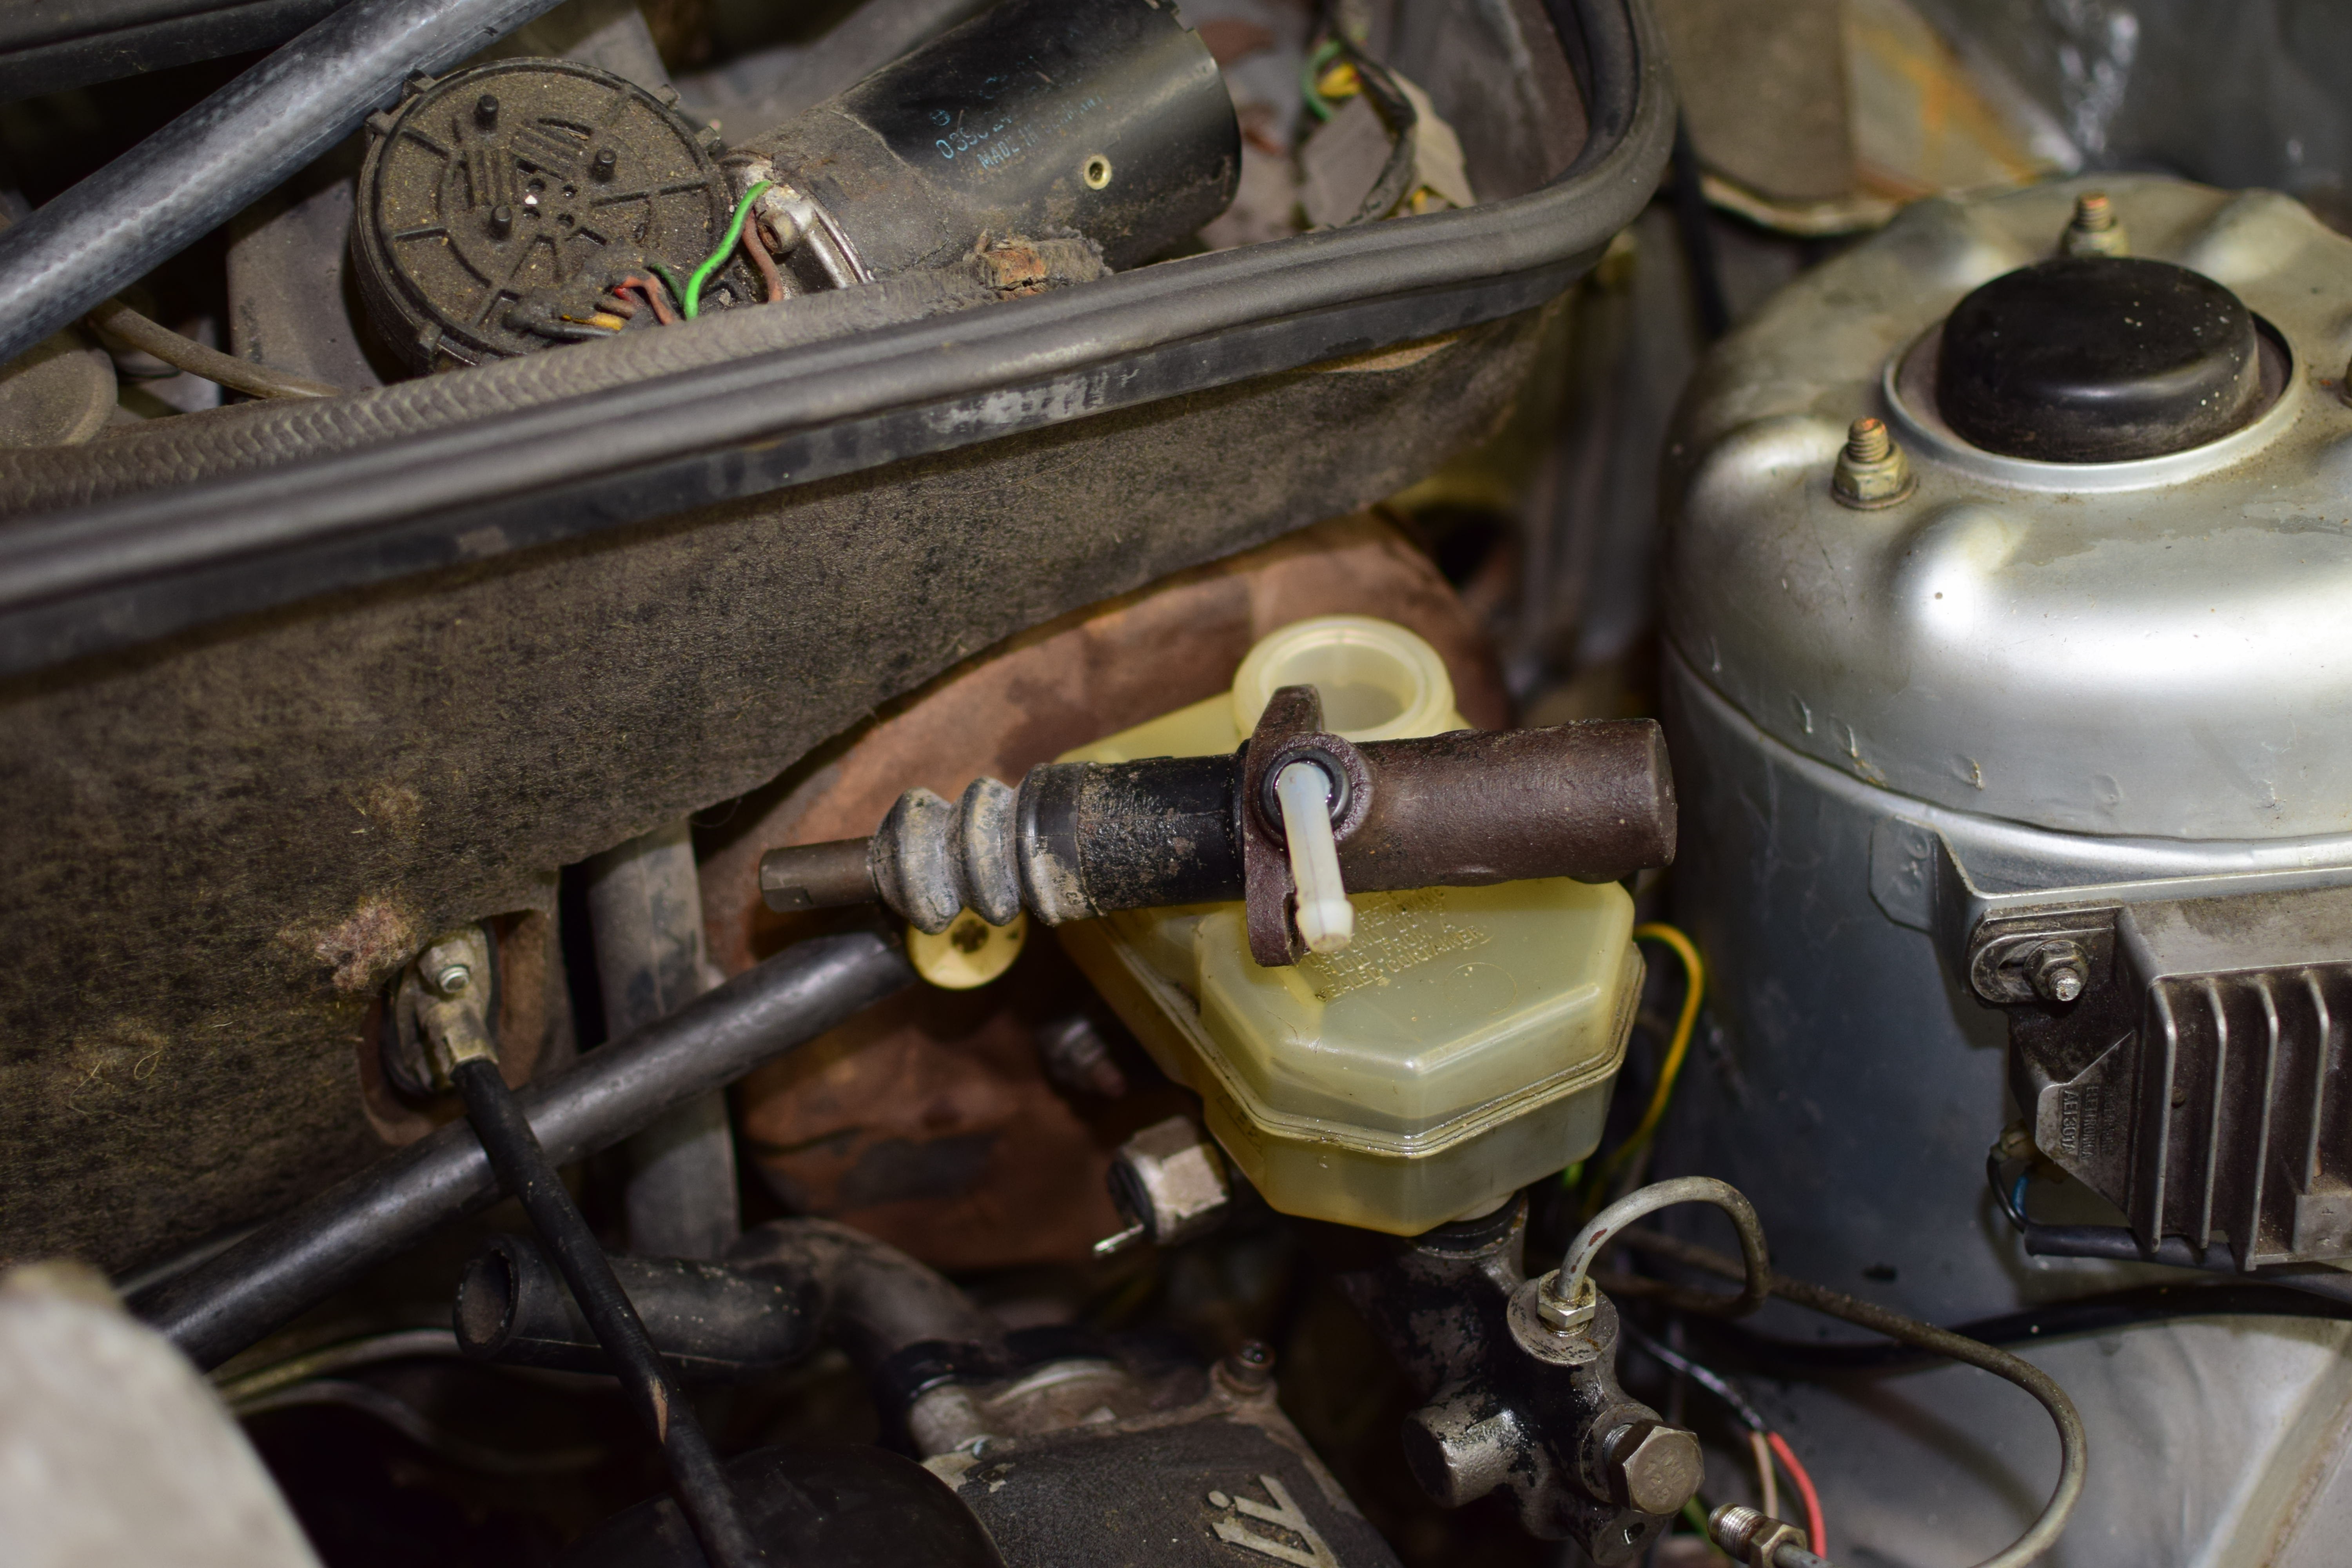
I did some basic bleeding of the system, but it required more than the two hands God blessed me with, so for now, I put the new rubber boot on the master, hooked up all the fluid lines, and went about threading it back into the car.
I left the clutch lined up with the hole in the firewall and the clutch hose routed under the brake lines in such a way that it shouldn’t rub and abrade like the old one did. I think the connection to the slave cylinder will also need to be re-clocked about 180 degrees by just loosening the banjo bolt and giving everything a quick twist. When I have some help, we’ll bolt the master cylinder back to the firewall, re-install the clutch pedal linkage, and then finish up with the bleeding.
Moving back to the brakes, I finished flushing out and vacuum bleeding all three ports on the left brakes. As I was getting ready to move to the right side, I got interrupted, but at least I know that the two brake hoses on the left side are not collapsed.
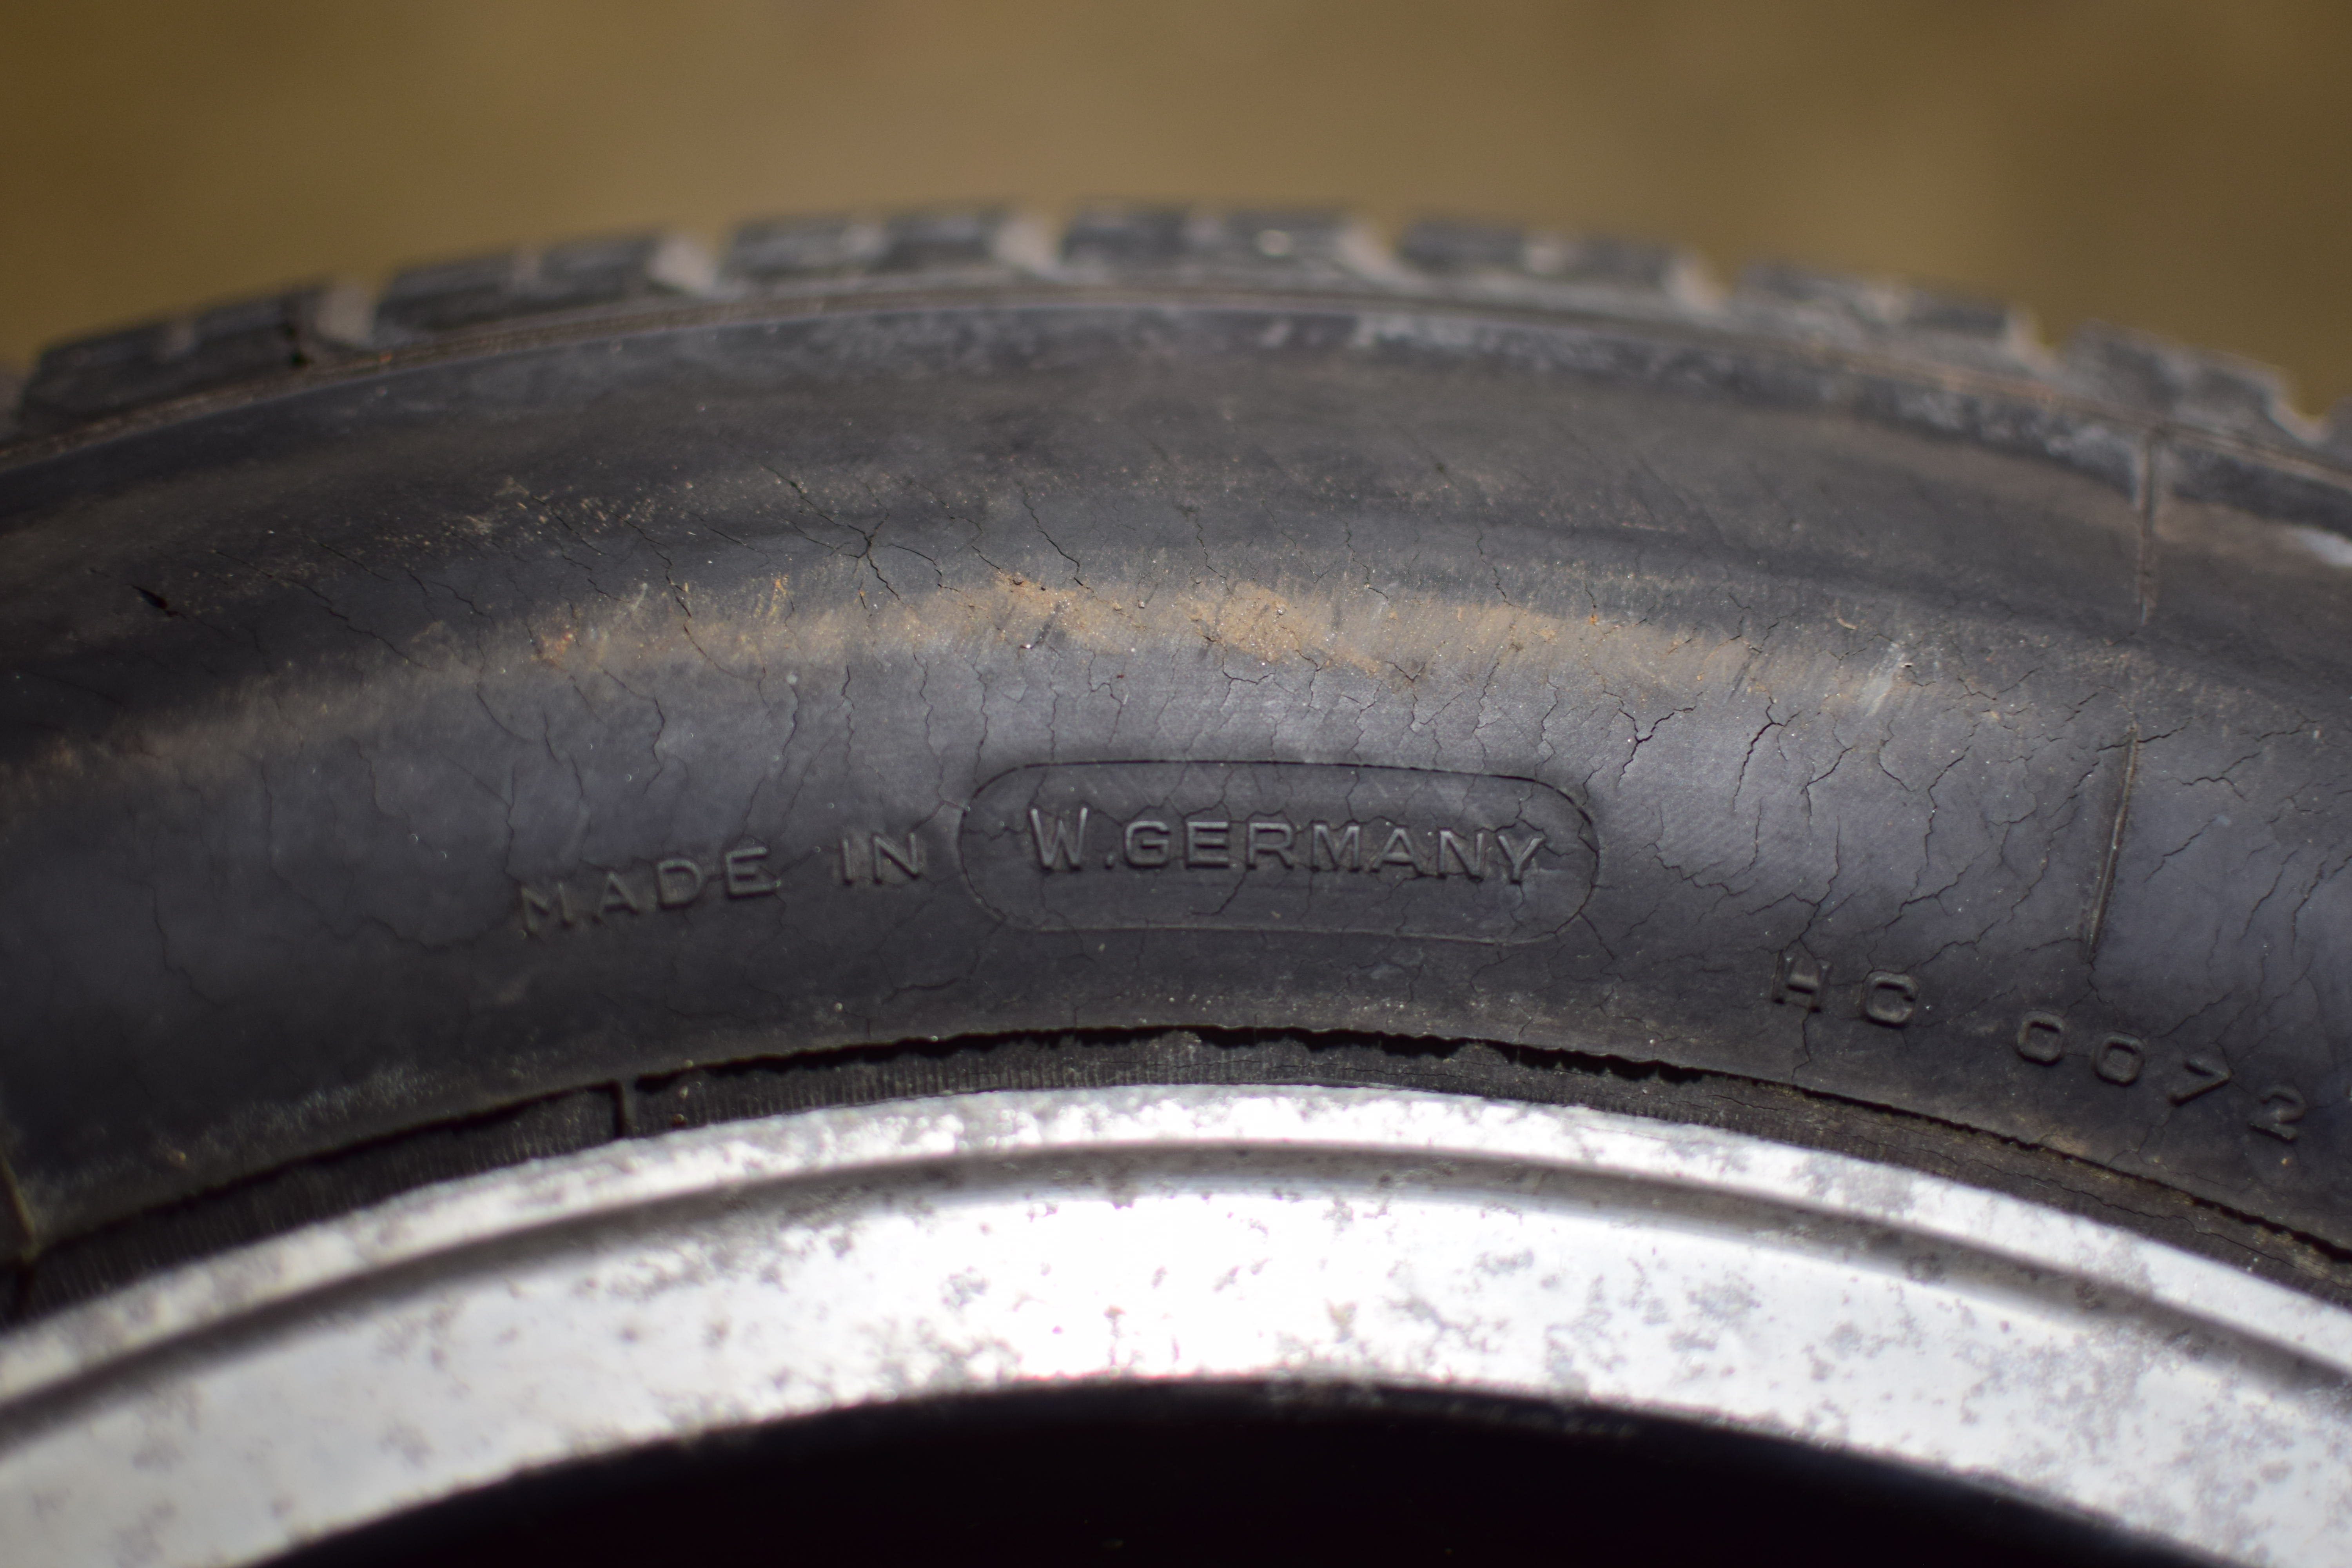
Before I had to go, I took a quick look at the tires that were on the car and noticed the “Made In” notation. Now I knew the tires were really old, but I had no idea they were this old.
The date code is 324 which means the 32nd week of a year before 2000 that ended in a 4. By 1994, West Germany wasn’t around any more. So are these tires from 1984???
While I wait for the slave cylinder to arrive, I can work on getting the braking system functional again. Ordinarily, I would start with the right rear and work my way closer to the brake master cylinder, but in this case, the car is up against the wall on the right side, so it’s a lot easier to start on the left.
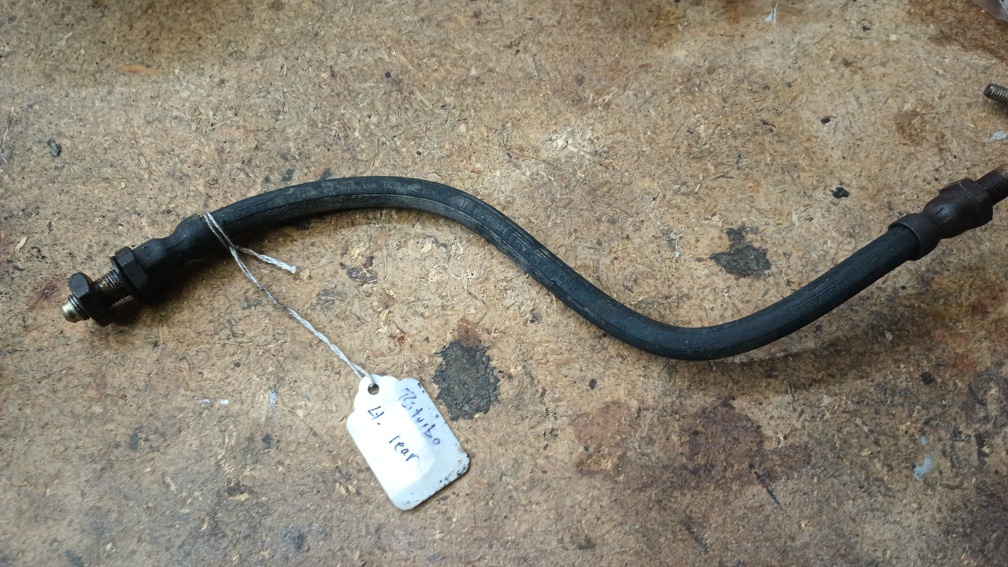
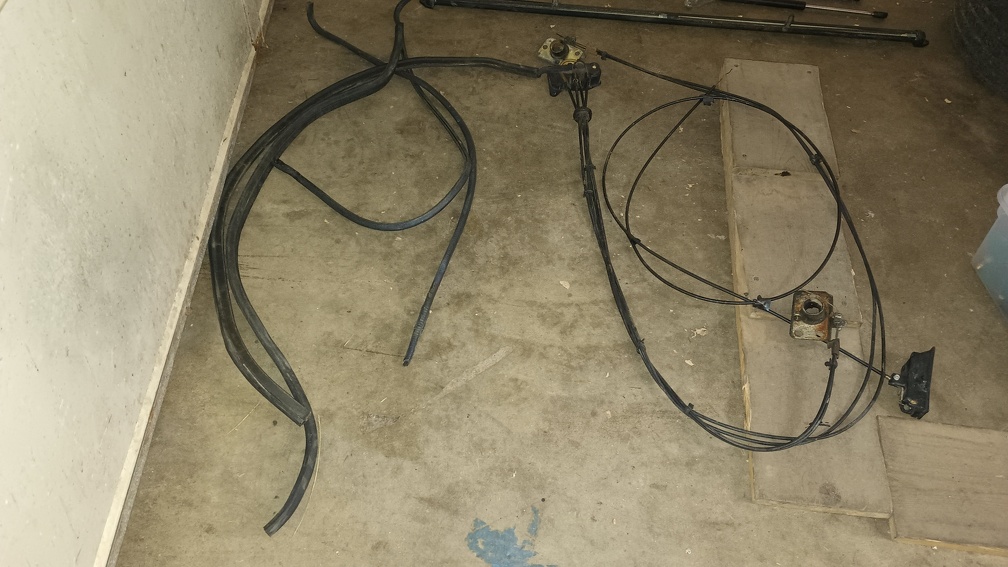
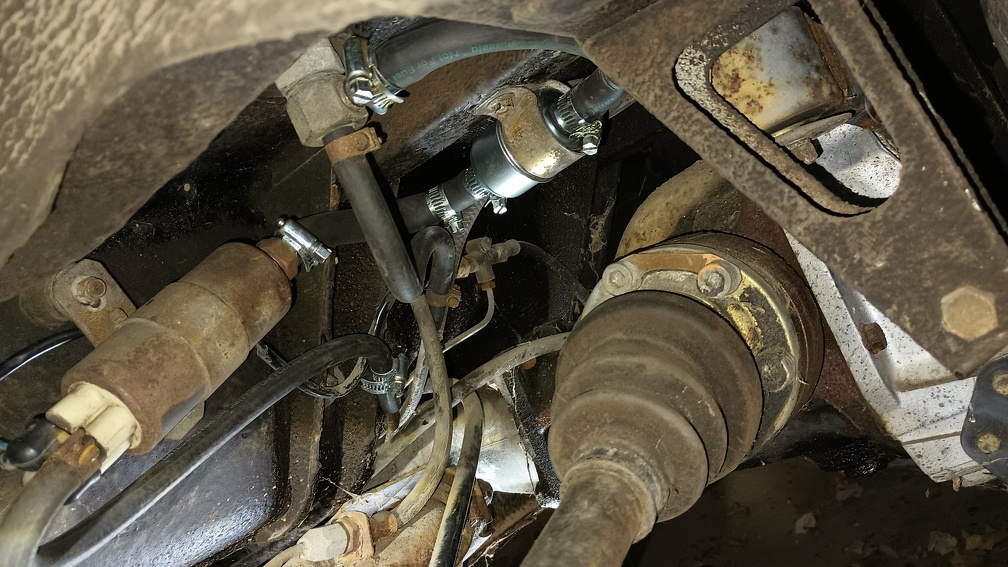
The left rear bleeder cracked open with no problem, but there was no fluid at all, even after sitting for a bit. The vacuum bleeder got me no fluid either, so I pulled the brake line off of the caliper. I haven’t done a lot of work on cars of this era, and I’ve never touched anything from Italy before, so maybe this isn’t as weird as I think it is, but the brake plumbing comes off of the master cylinder as a hard line – normal – tracks under the car – normal – and then reaches a proportioning valve at the back of the car, forward of the rear suspension – still normal. Coming out of the prop valve, however, it transitions to soft lines to make the jump to each rear control arm and then returns to a hard line to make the connection to the caliper. That seems weird to me.
That minor digression aside, with the brake line off the caliper, I tried pulling a vacuum and instead of getting brake fluid, the pump held a pretty serious vacuum. To isolate the problem further, I disconnected the rearward brake line from the master and plugged the master with an M10x1.0 bolt and still held a vacuum. So the problem was not likely in the master rebuild job I did, which is good news. Next, I connected the shop air to the brake line that was disconnected from the master and it was unable to push air to the back of the car. Finally, I removed the hard line connection from the rear proportioning valve and was finally able to push air through the brake hard line. It made a mess, but it also got all the old, nasty fluid out of the line, so I’ll take the win.
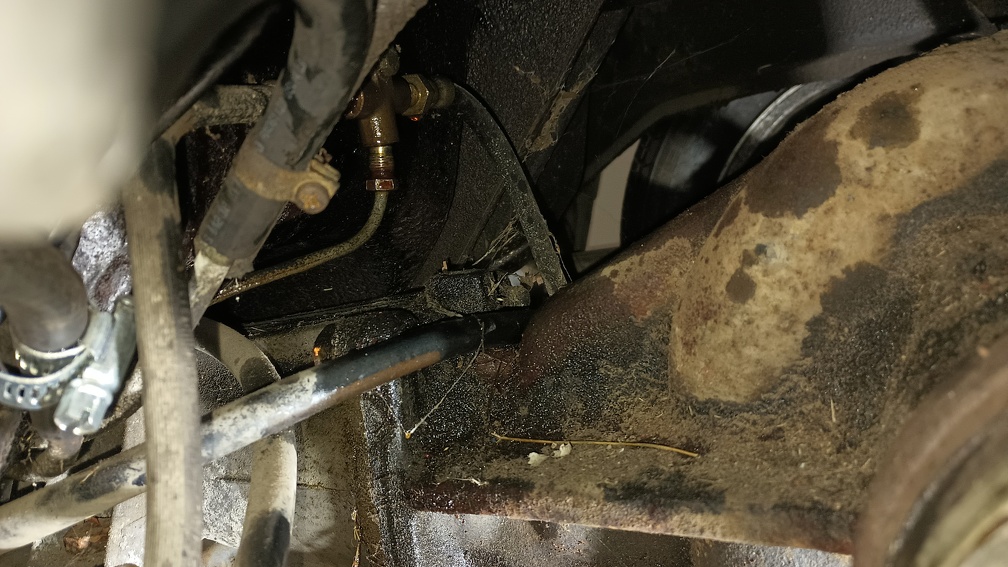
Surprisingly, the brake plumbing came apart with relative ease. I pulled the hard line off the rest of the way so I could get the soft line out.
You can see in that picture how the soft line connects to the control arm. The prop valve is mounted up on the unibody around and behind the fuel pump.
The soft line was a little bit harder to remove on the proportioning valve side and I didn’t want to risk breaking anything. My solution was to disconnect the right side hose from its hard line caliper connection, take the 10mm mounting bolt out, and remove the valve and hoses from the car as a unit. Once the assembly was out of the car, I put the valve in a vice – okay, I didn’t use a vice, I actually just put it in the hydraulic press to hold it still, but same time – and the hoses came off pretty easily.
As it happens, the car has 6 of these hoses in total, all mounted in the same fashion. One for each rear brake and two for each one in the front. They’re all used to go from a hardline on the car to a hardline that connects to the brake caliper and they’re all the same part number. The hose is about 13″ long and has a male M10x1.0 fitting on each end. I was able to find a source to get new hoses that are the “right” part, but at $25 each plus shipping and only $672 left in my budget, I decided that there had to be a better option. And by better, I absolutely meant cheaper.
As it happens, in the late 70s, Jaguar used an almost identical brake hose. Now theirs had a longer hose in the front than the hose in the rear, but the rear hose is very close in length and they both have M10x1.0 male threads on both ends. I’ve ordered up a pair of the cheapest set from Rock Auto, the Sunsong 2202540 for just under $8.50 each, after the 5% discount and shipping. When they arrive next week, I’ll get to see if they get the job done. I’m hoping that they’re not just good; they’re good enough.
Ordinarily, I would have waited to order those hoses until after I checked the front, but time is getting short, so I decided to go ahead and get those moving and if I need more, I’ll order them up later. Moving to the front left, I was again able to easily crack the bleeders open and started bleeding one of the circuits. Once again, I started with some really nasty fluid, but after a couple pumps with the Mity-Vac, I was starting to drain the reservoir and clean fluid was coming through.
I ran out of time before I got too much farther with that, but that’s confirmation that 25% of the front hoses are in good shape, so I’ll take that win. My next trip over to the shop, I’ll check out the other three circuits and, hopefully, will have good front brakes.
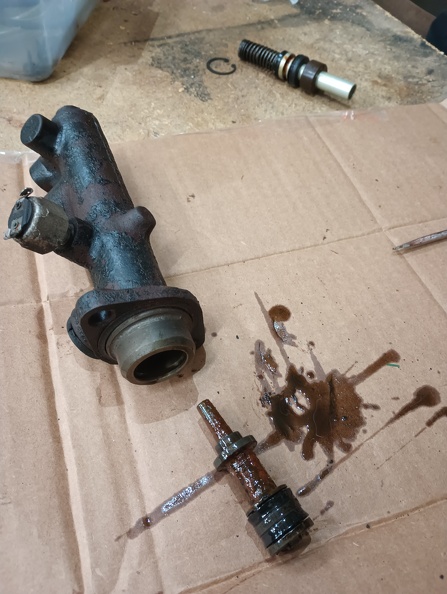
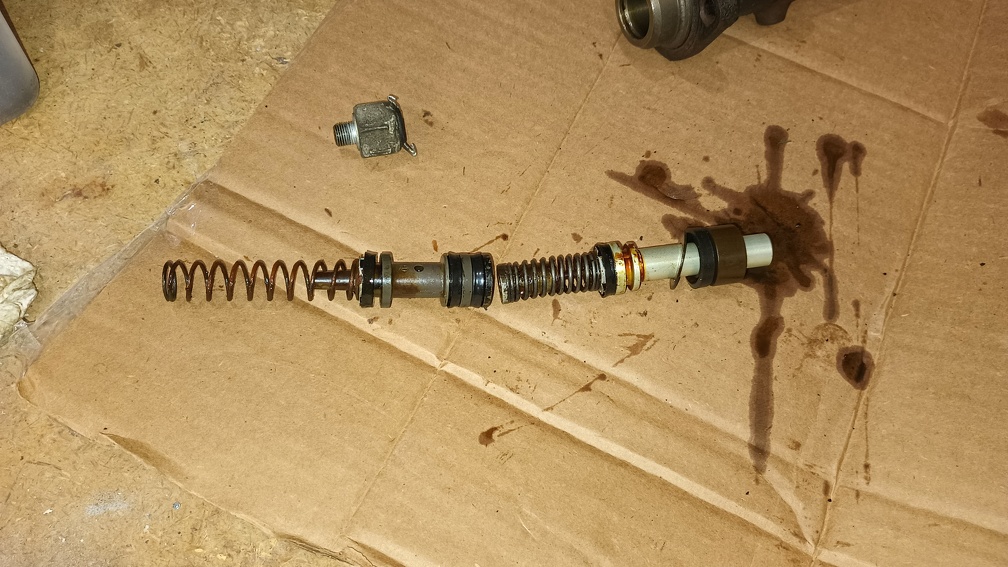
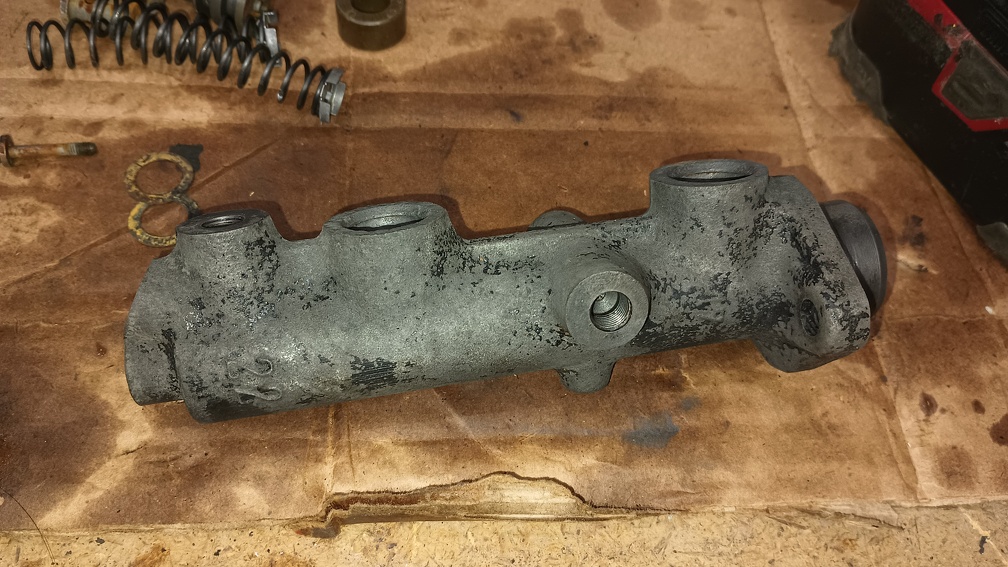
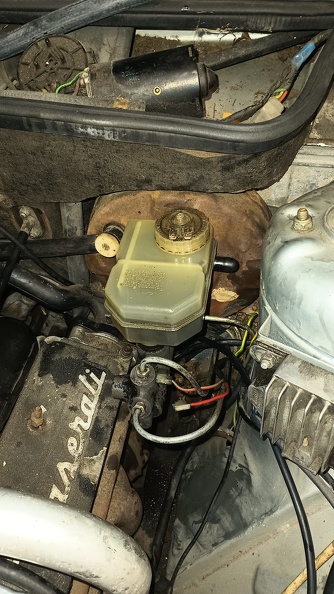
With the car able to start, we need to make sure that it will stop. When the car came in, the shared brake fluid reservoir was dry. The first troubleshooting step was to put brake fluid in and try to bleed the brakes, but we weren’t able to get any fluid to come through the line. The most likely cause, then, was a failure of the master cylinder, so off it came. Once the pistons were out, it was pretty obvious that the seals were well past their prime.
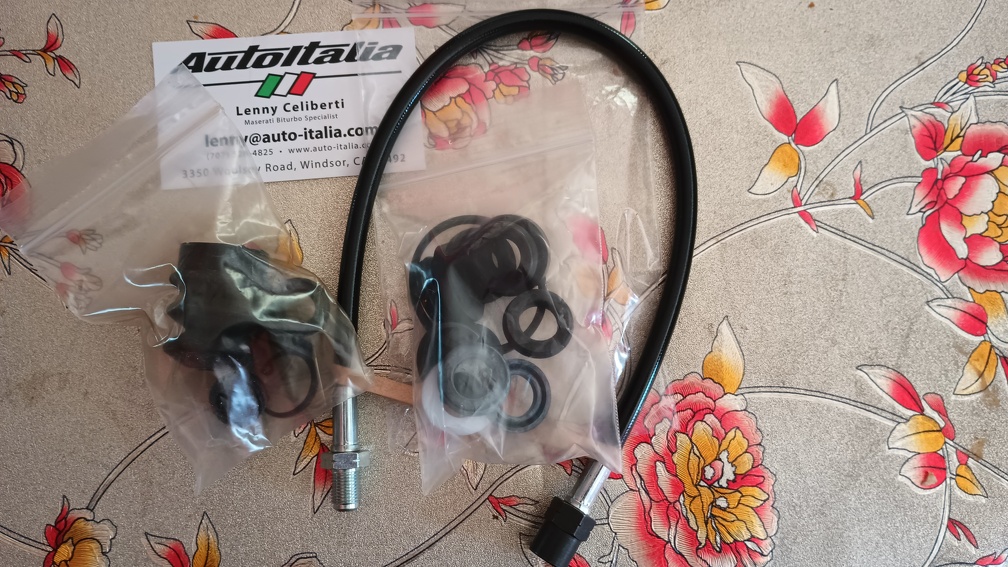
For $143.60, Lenny from AutoItalia sent me the rebuild kits for the clutch and brake master cylinders as well as a new hose for the clutch.
Once the cylinder was disassembled, I used a hone to clean it up, dropped the whole thing in some Evaporust in the ultrasonic cleaner, and got it looking pretty good.
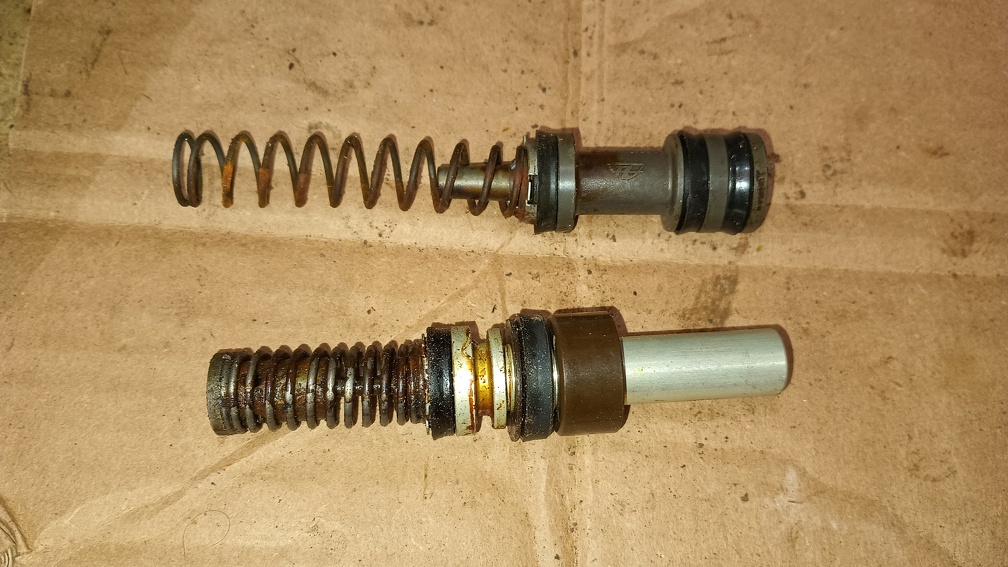
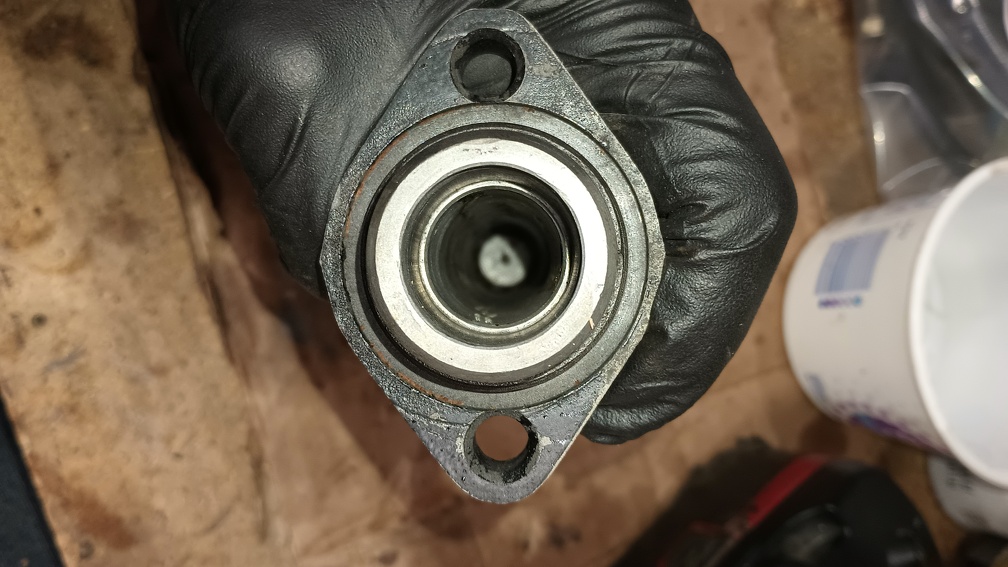
Once the new seals were installed and the pistons were back in the cylinder, it was time to bench bleed.
There are a total of four ports on the master cylinder – three for brake circuits and one for the brake switch. Each of them have M10x1.0 threads. I used a Dorman bench bleeding kit for two of the fittings and then a couple bolts to block off the others. Once the first two were bled, I swapped the plastic fittings and the bolts and bled the other two and after very little effort, I had no air bubbles.
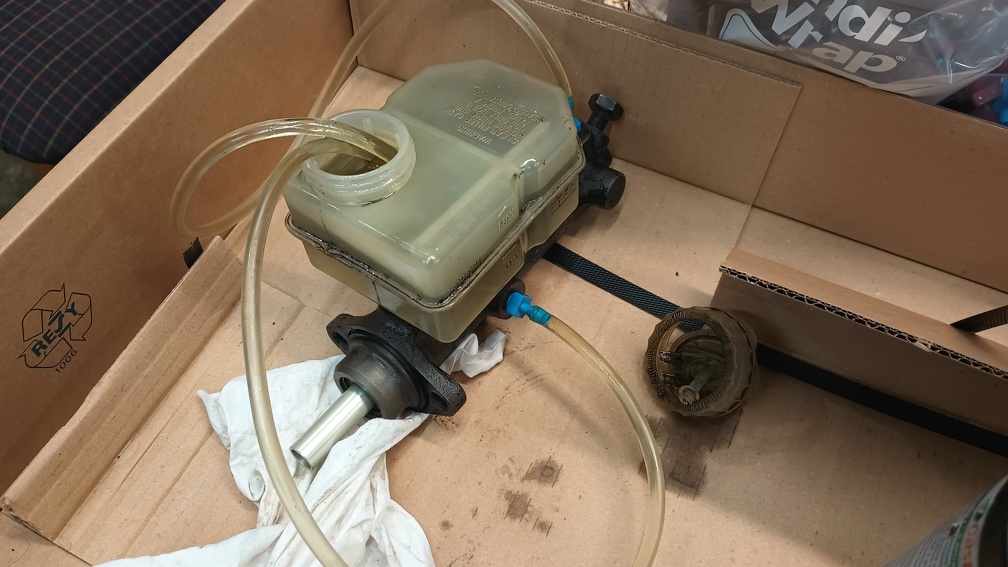
With that bled, I got it bolted back onto the booster and hooked up the brake lines. The next step is to vacuum bleed the brakes to see if the caliper seals are also in need of replacement.
The clutch master cylinder also got a rebuild kit installed. I followed the same basic process of tearing it down, hitting it with the hone, and cleaning it up in the ultrasonic cleaner. Bench bleeding it was a little easier since it only has the one port. The most difficult part was coming up with a reservoir for it, since it shares with the brake master cylinder.
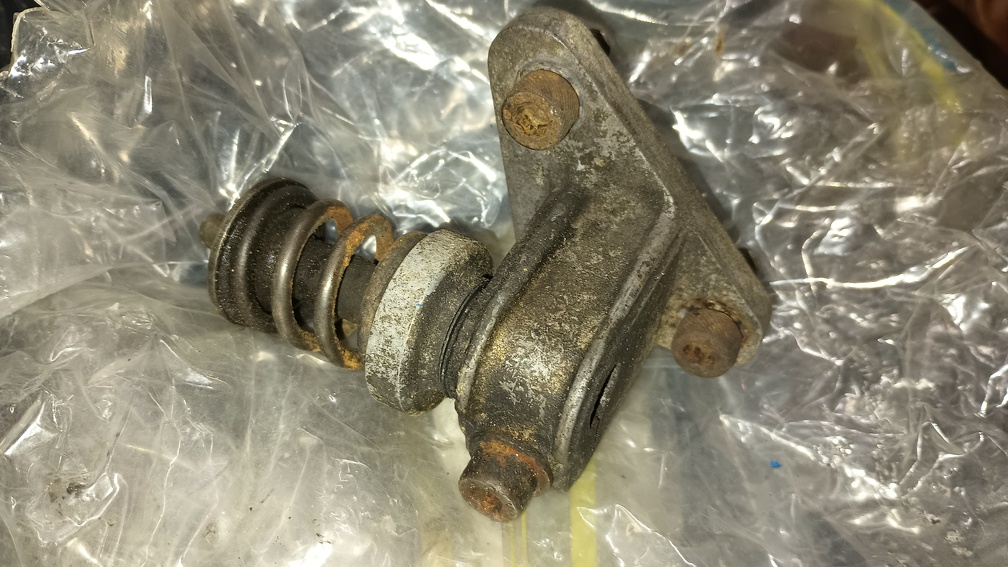
Both the clutch slave that was installed on the car and the one that was supposed to be a “good spare” were frozen up. I was able to knock the installed one loose, but it’s leaking enough that it also needs a rebuild kit. Once that comes in, I’ll get the slave rebuilt, bleed the whole system on the bench, and then install it in the car.
Not much work done tonight. The choke cable was seized up, so I lubed it up with some P’Blaster and worked it back and forth. After some work, that’s moving smoothly again.
When I initially inquired about the car, the seller assured me that along with the car that was pictured, there were enough parts that were to go with it that I’d have 99% of what I needed to make a full car. At the time that I picked the car up, I didn’t have a chance to go through everything bit-by-bit, but I did manage to fill the back of the truck with parts. Now that it’s actually starting up and running, it was time to take inventory of what I have.
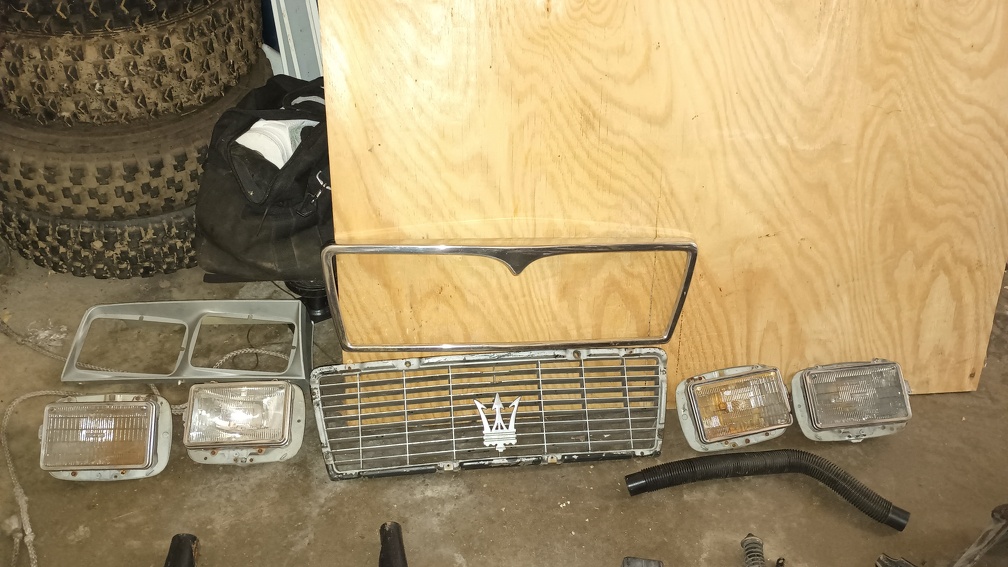
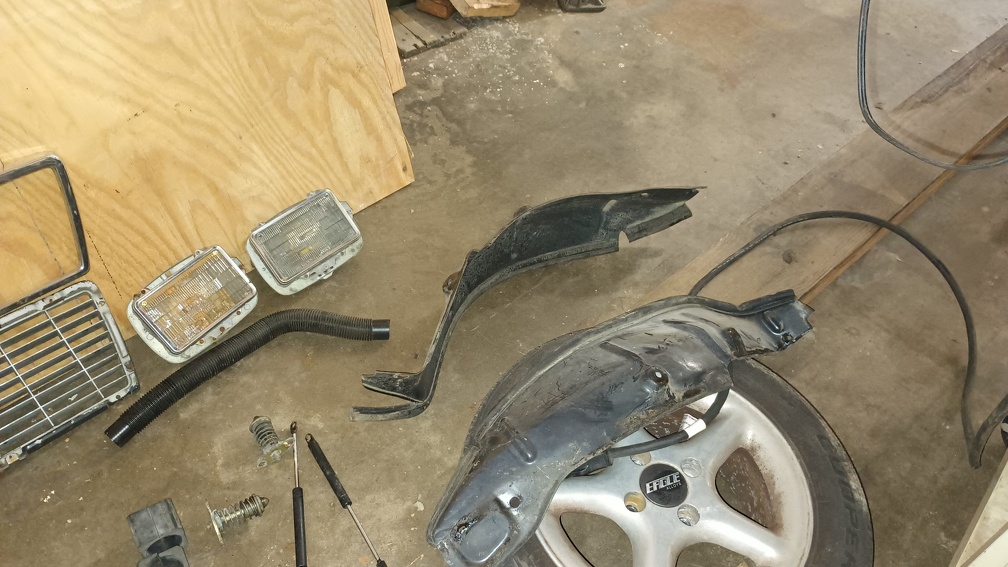
Both headlight surrounds were in the trunk – only one is shown in this picture, but the other is there – along with the headlights, the grille, and the grille frame. That tube is probably part of the airbox, but I’m not 100% sure. Both of what I believe are the low beam bulbs are busted, so they’ll need to be replaced. The metal frame that goes around the grille is supposed to have some tabs to which the grille bolts as well as some threaded attachments that are used to bolt it to the hood. All of those have broken off and the frame-to-hood attachments are completely missing, so that will need to be repaired. Also, the grille that I have is for a regular Biturbo, not the Biturbo E. That doesn’t matter for $2000 Challenge purposes, but if I ever come across an E grille for not much money, I may snag it just in case.
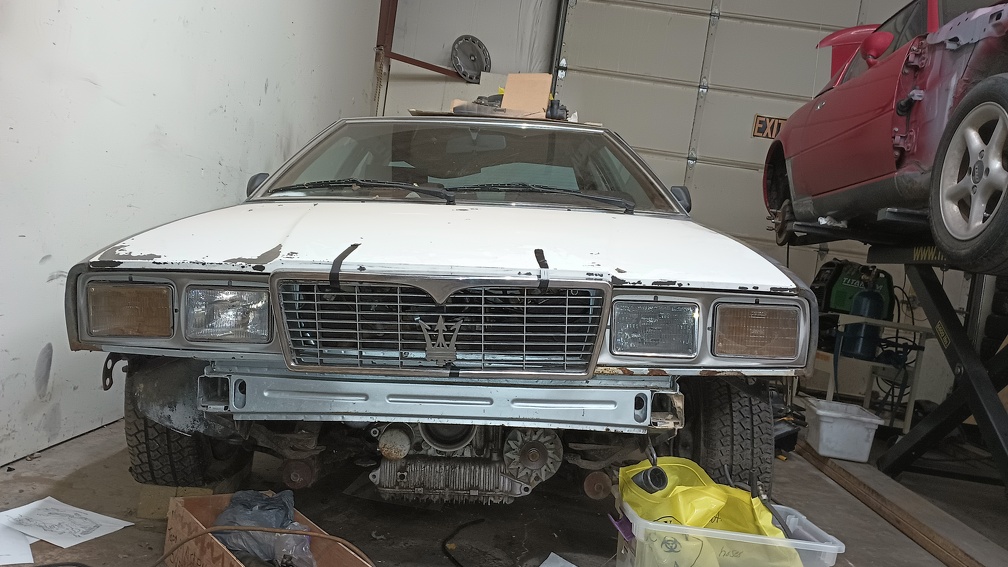
I took an opportunity to mock up the front end a little:
All of the latching mechanisms for the hood are missing right now with the exception of the hood release handle itself. It uses a pair of latches instead of a single one in the center. Good news is that there’s a full assembly – including another handle – in the trunk.
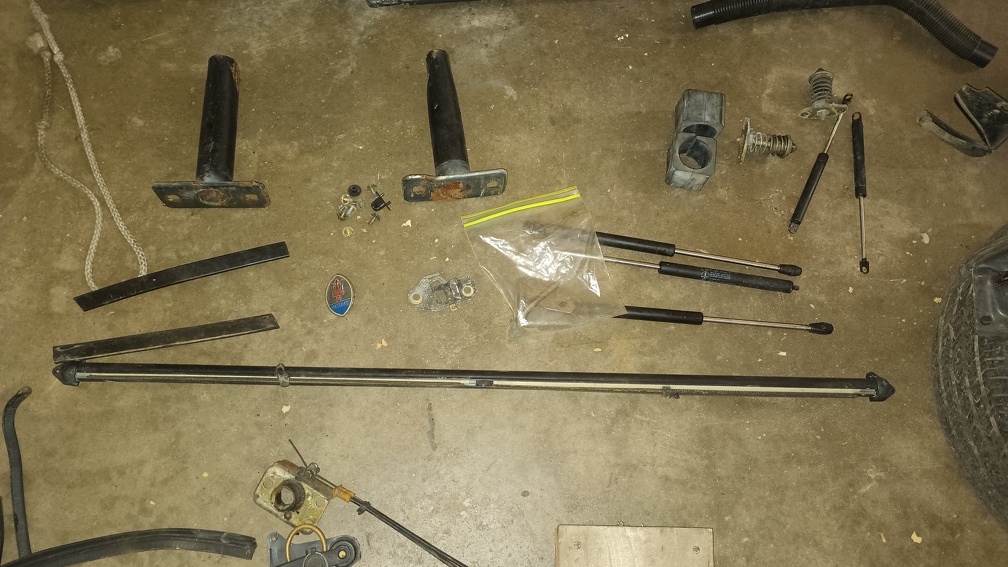
There’s an extra rear window screen, what I assume are the mounts for the front bumper, an oval Maserati emblem, a couple black trim bits of some sort, and the strikers for the hood. I believe the trunk striker is in the zip-top bag. There are also a bunch of hood and trunk support struts, but they’re all blown. I don’t know if it’s possible or worth rebuilding them or if they’re just trash. It looks like new ones for the trunk are about $12 each and the ones for the hood are about $32 each. I don’t see having $87 worth of room in the budget (after shipping, of course) to replace them, but at least it’s something that is readily available.
The front fender liners were also in the trunk.
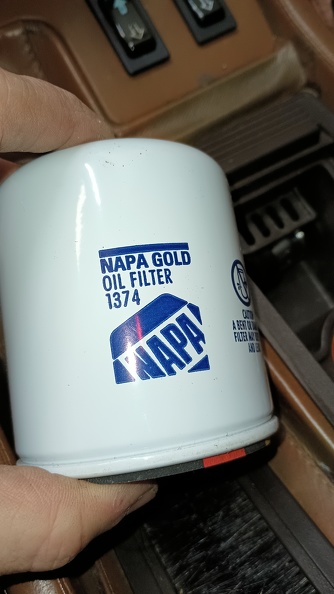
Moving to the inside of the cabin, there were more boxes and bags of parts, and I didn’t photograph all of them. Importantly, there is a new oil filter:
There is also a spare timing belt tensioner.
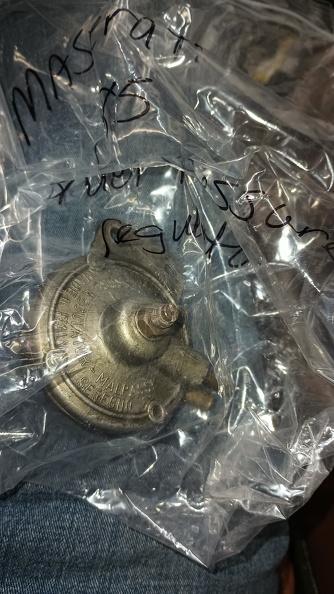
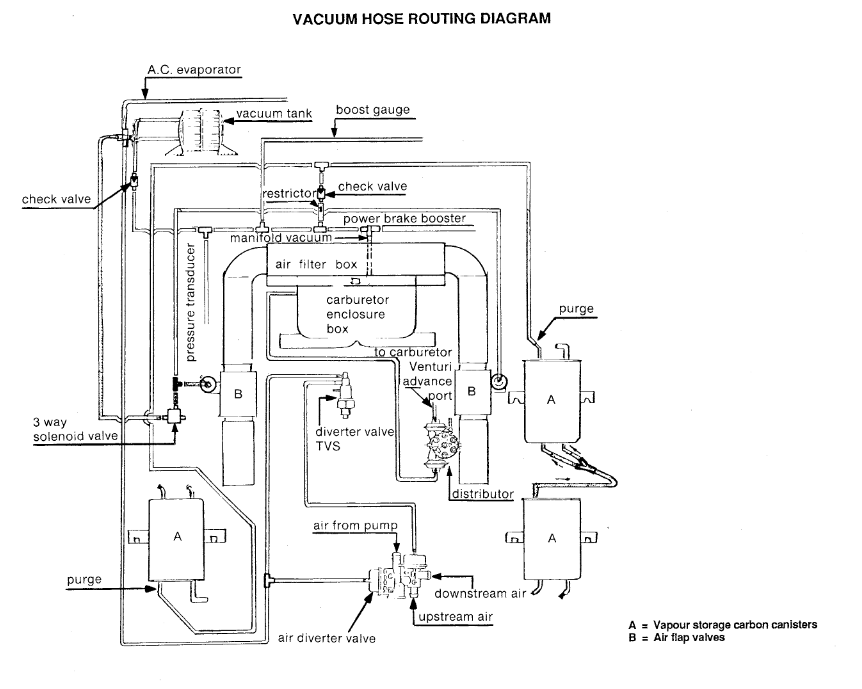
Another fuel pressure regulator.
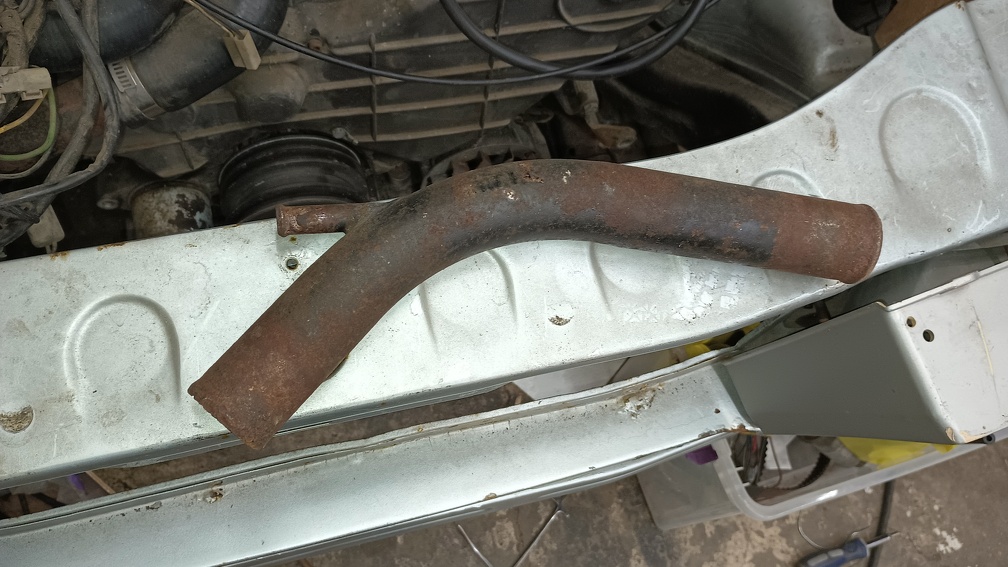
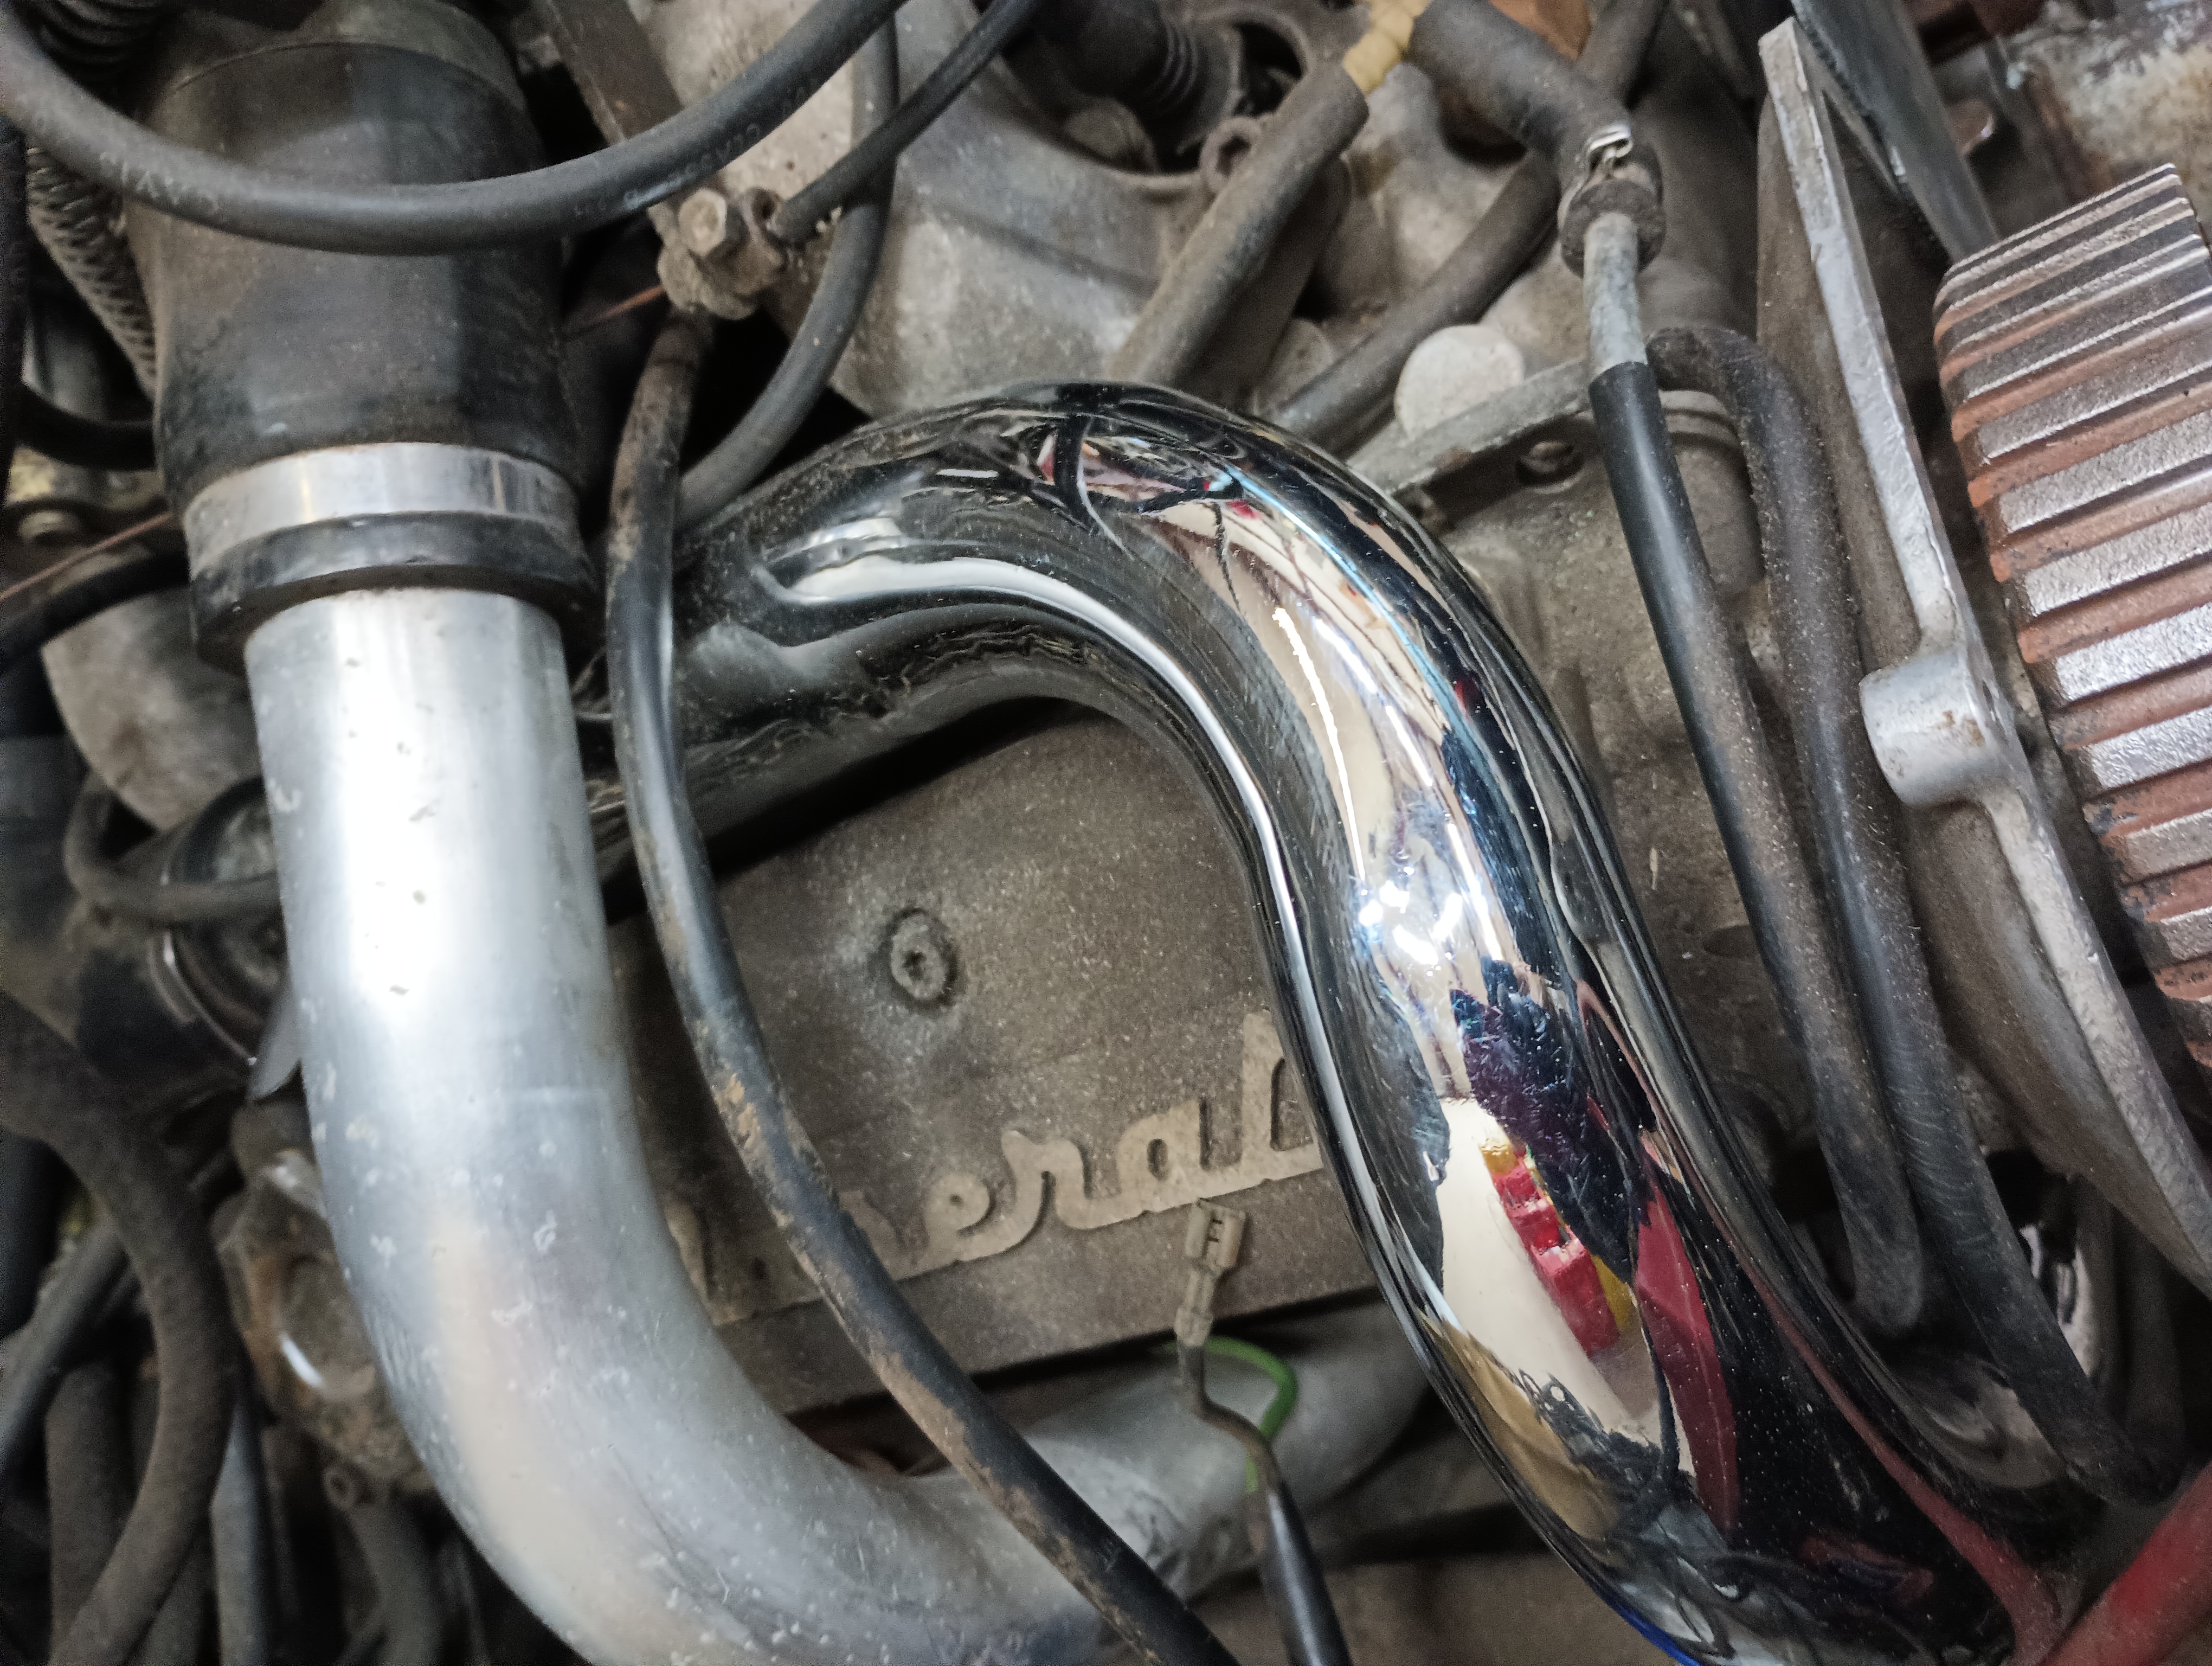
I was glad to have a spare coolant Y-pipe in there as well. This I can put in the blasting cabinet to clean up and then give it a nice coat of paint so it can class up the engine bay a bit.
Front(?) bumper isolators – but no front bumper.
Other parts that I didn’t get pictures of include:
A/C condenser
Red trunk lid with spoiler
A rear bumper
Alternator
Slave cylinder
Vacuum hoses
Coolant hoses
A dizzying array of floor mats
Extra fuel filler neck and gas cap
Door cards – they’re pretty beat up, though
Spare woodgrain trim bits
Shifter boot and trim plate
Power steering rack and tie rods
Wiring harness for A/C
Extra trunk release cable and handle
Various weatherstripping
Swaybar endlinks and bushings
And there are probably a few other smaller things that I’m missing from the list. The big things that I know I’m missing are a front bumper, shift knob, and the A/C compressor. Also, the Nardi wheel is missing, but there is a regular Biturbo steering wheel in its place.
While there are certainly still some things that I’m missing, the spares that are available should significantly reduce what I’ve got to buy in order for this car to see Challenge glory.
We gathered at the shop last night to see if this Italian creation was ready to be awakened from its slumber. I brought the battery from the Neon and Tim brought some starting fluid. Initially, the Neon battery was drawn down enough that there wasn’t enough juice to engage the starter, so we added the jump box and put the battery charger on it. With a couple squirts of starting fluid and a twist of the key, the car coughed to life for a few seconds before dying. We closed off the remaining open vacuum lines and tried again, this time holding the choke mostly closed – the linkage for the carb all depends on the hat being in place and we had it off to the side.
Amazingly, with the choke held in place, the car started – without any more starting fluid! – and as we eased the choke off, it idled on its own and would even rev! It’s a little bit of a rough idle for now, but it’s close enough to call it a running car! It didn’t make any nasty sounds and it appears to be making good oil pressure, if the dash gauge is any indication. The left turbo is spitting out a not-insignificant amount of oil, so it seems like that turbo is likely to need a rebuild. When we took the hat off initially, we found a bunch of oil pooled around the carb, so at least we know the culprit of that now. The plugs were all a bit carboned up, so we pulled them out, hit them with some sandpaper, and re-gapped them. But now, it’s time to make decisions.
At this point, I still do not know what my long range plans for the car will be. I don’t really want to try to build it for any sort of motorsports activities, but I haven’t decided if it’s something that I want to keep long-term as a resto-mod on the original engine, do some sort of engine swap to either a FI biturbo engine or something else entirely, or just unload the car and likely make a little bit of a profit on the deal. In any case, I want to be careful to not destroy the value of the car, little though that might be.
As of right now, there are a number of things that I know need to be done to be driveable:
All four tires need to be replaced, and a spare wouldn’t be the worst thing either
Airbox
Straps are missing
Filter is missing
Cracks and holes in the plastic
At least 1 of the fresh air tubes appears to be missing
Clutch and brake hydraulic system is completely dry
Coolant hoses need to be replaced
Radiator and cooling fans need to be re-installed
The thermoswitch on the heater hose is probably failed
Headlights and front marker lights need to be re-installed
Making the assumption that all the pieces are there
Gas door release is not working
Alternator belt needs to be replaced and installed
Coolant reservoir is hanging loose
Needs a battery
Needs to be filled with coolant
Should have an oil change
Hood latch needs to be installed
There are also a number of things that I know are wrong that may or may not be fixed for the Challenge:
Front and rear bumper
I have a bumper, and I think it’s the front. Not sure.
Turbo oil leak
Missing Maserati emblem on left rear C-pillar
Interior cleaning
Paint for hood and front fenders
Some rust on the bottoms of the doors
Continuing to apply the theory of working in small steps, I think the right thing to do is to start doing the minimum effort to put the car back to a point where it can be driven on the road. By doing that, at least, we will be able to find out the condition of everything else.
We gathered around the temple of stupid on the day after Thanksgiving to potentially get the car in a position where we might try to start it. Very exciting. There were a handful of simple tasks that needed to happen first, but as you can probably imagine by now, with this car there’s no such thing.
Before the car could be fired, it’s going to need fuel. Step one was to finish putting the fuel fuel lines in place, mount the new fuel filter, and re-mount the old pump. In order to maintain clearance with the differential and the axles, the fuel pump/filter are packaged fairly tight with some pretty serious bends in the fuel lines. I assume that the official parts book would call for some molded fuel lines to fit in there, but this project doesn’t have the budget to pay Ferrari prices for fuel line. If they’re even available anywhere!
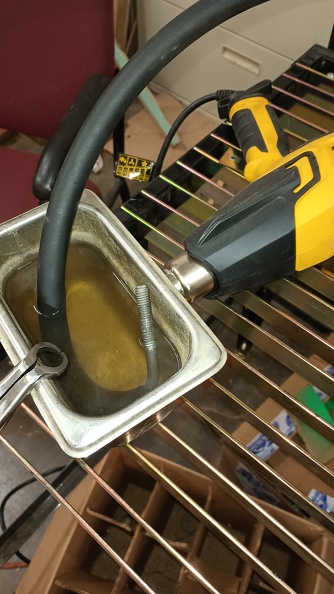
Following some advice that Tim found on the Internet, we decided to make our own molded lines using the freebie 1/2″ fuel hose that I got. We used the U-bolt out of an exhaust clamp to put a bend in the hose and then submerged the hose in water that we were boiling with a heat gun. Nothing sketchy about this at all!
It didn’t come out looking like a “real” molded hose, however, it did put enough of a natural bend in it that there is no longer a kink in the hose when it makes the turn necessary to clear all the various parts that could chafe it. After sorta-molding both ends of the hose, I had a new fuel hose that would clear everything without kinking. It took a little fiddling, but the new filter, old pump, and new lines were all hooked up.
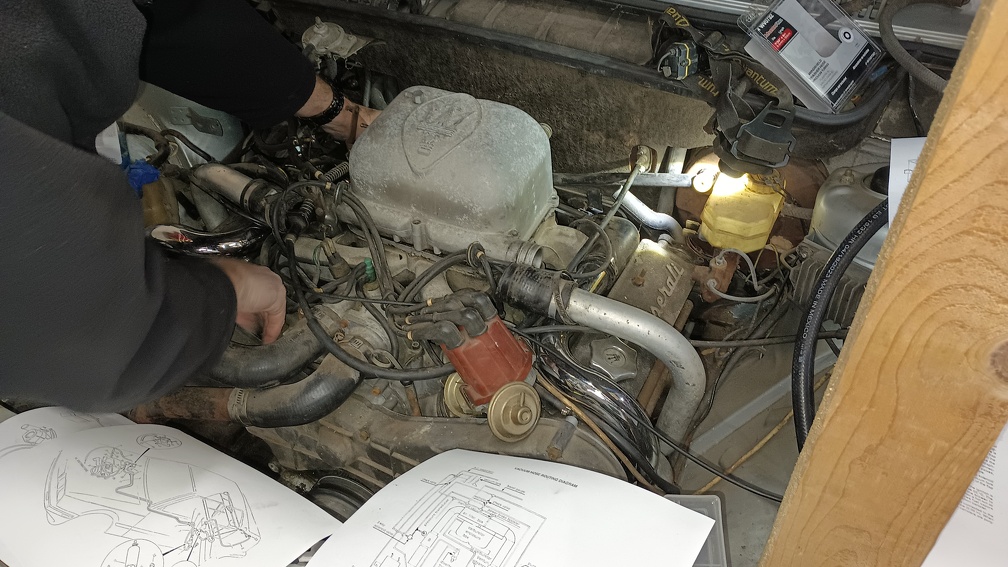
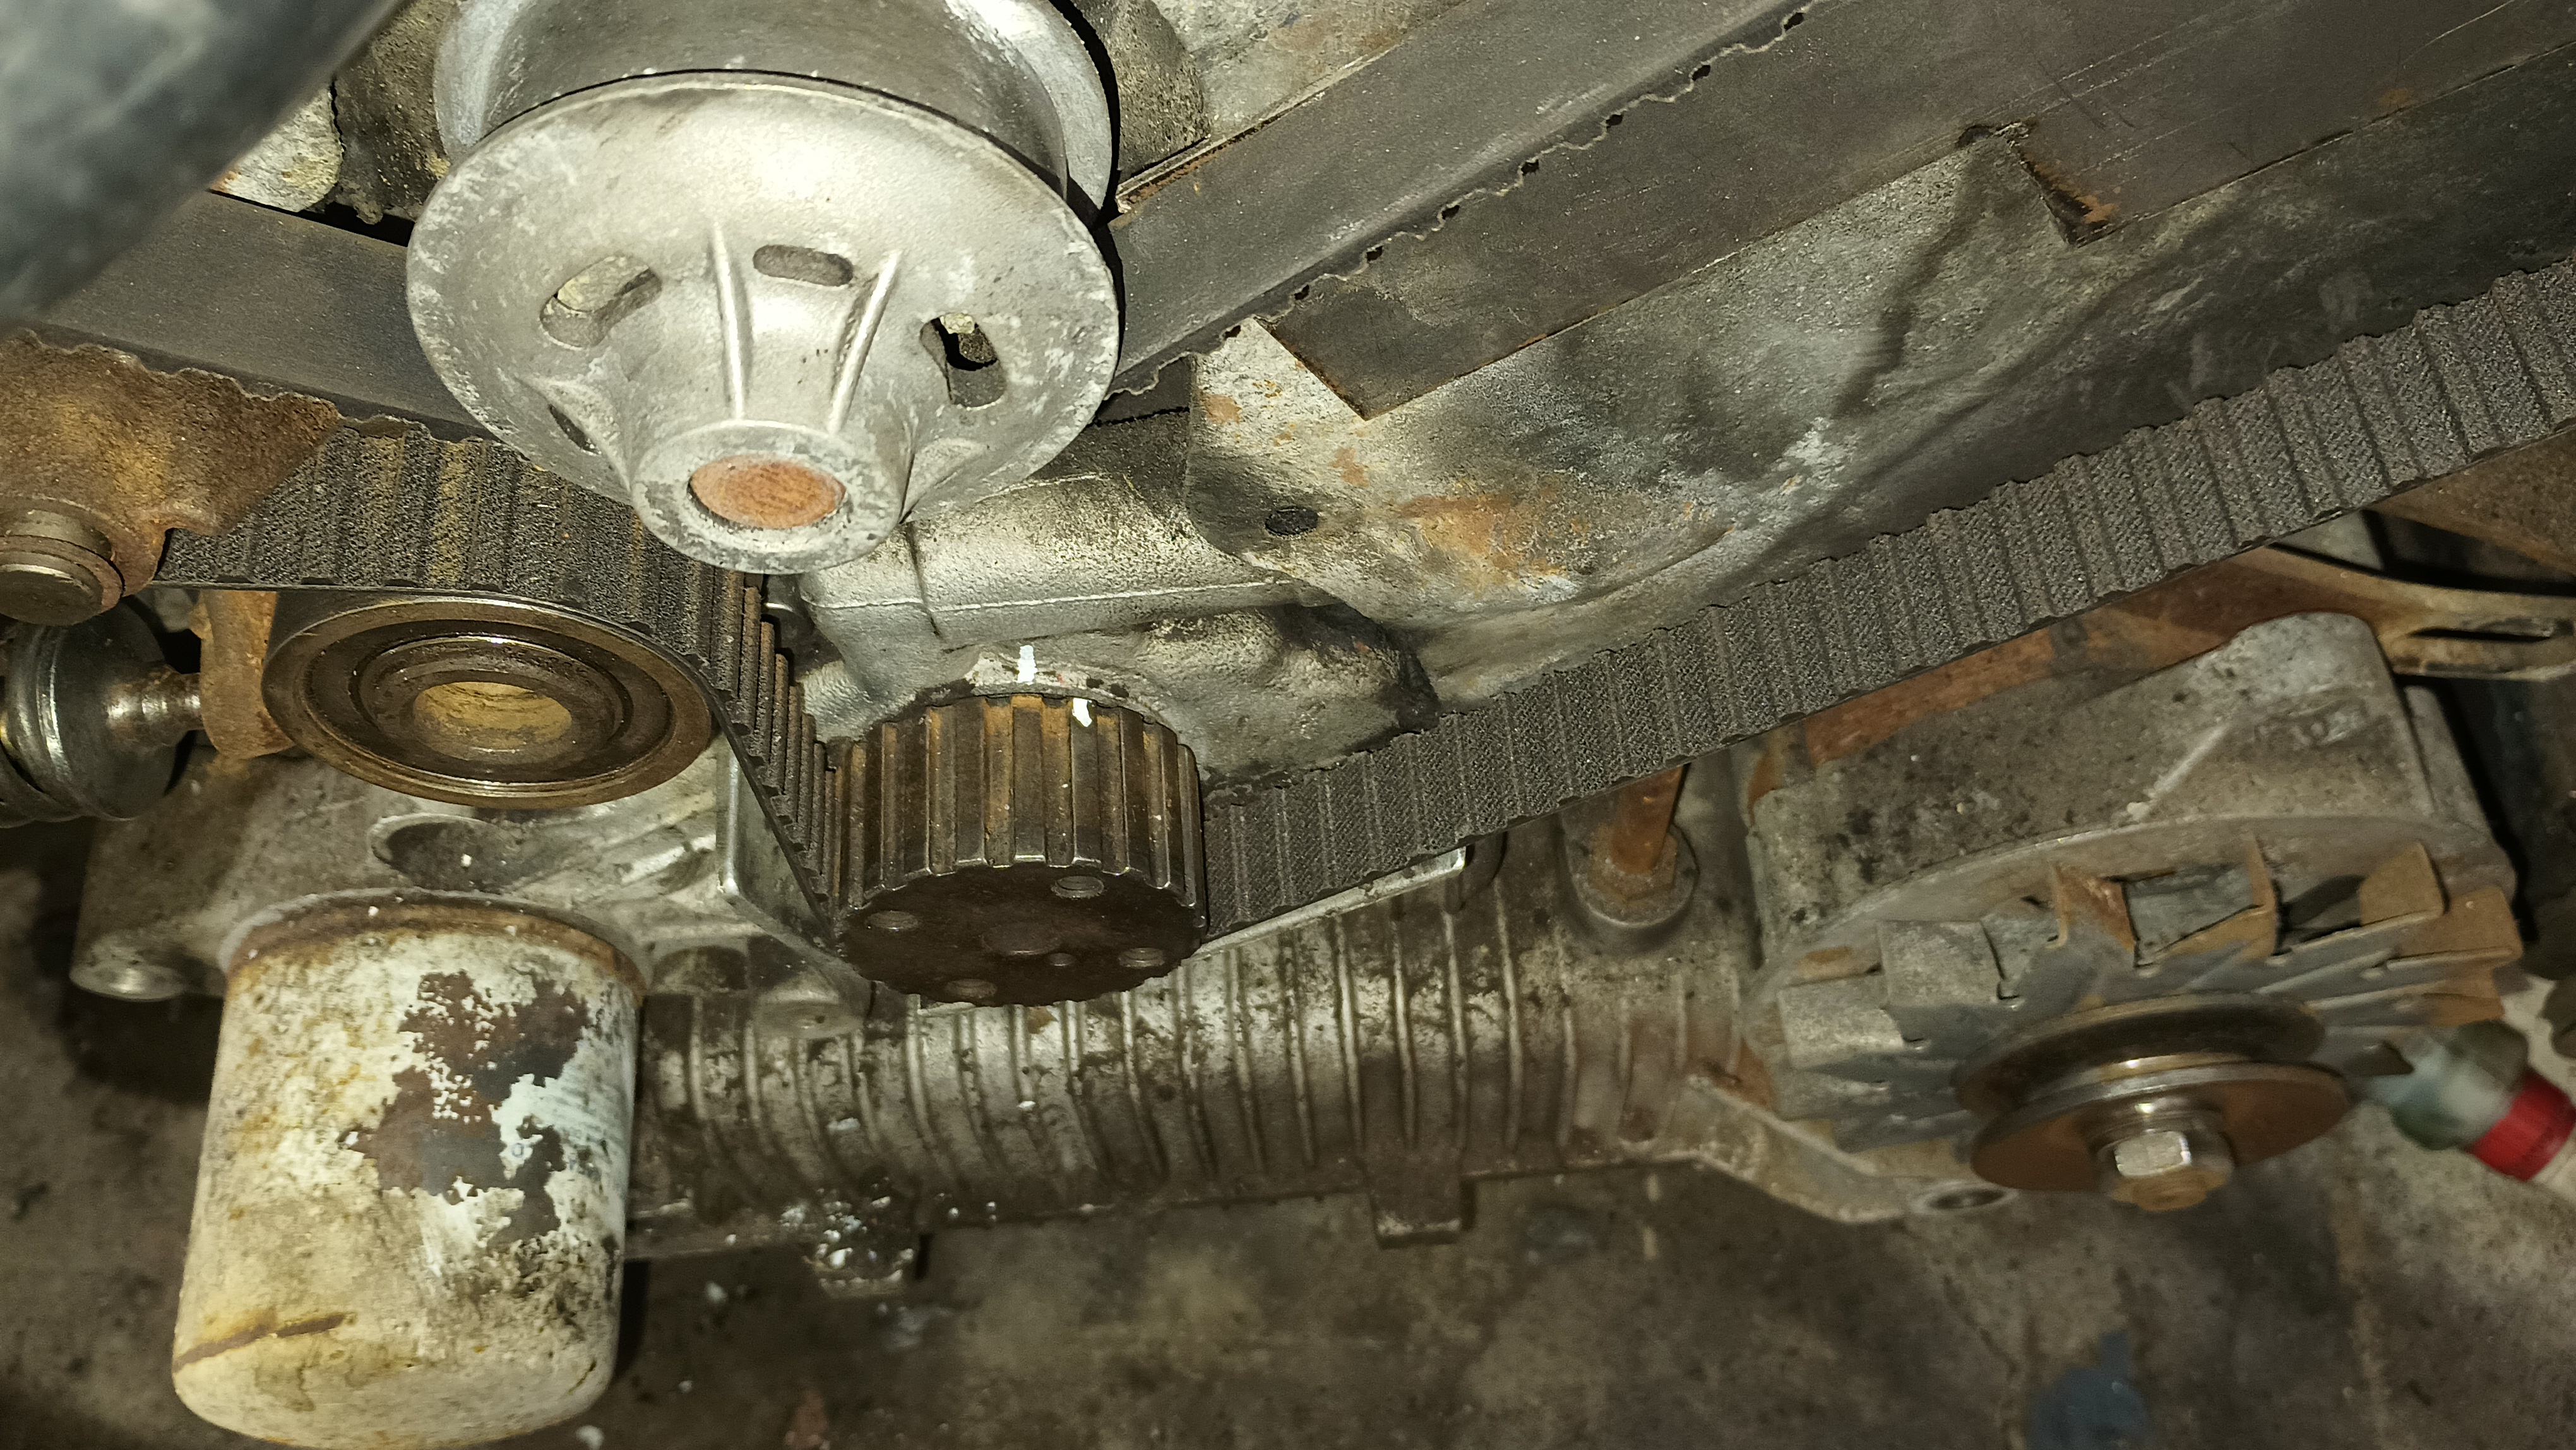
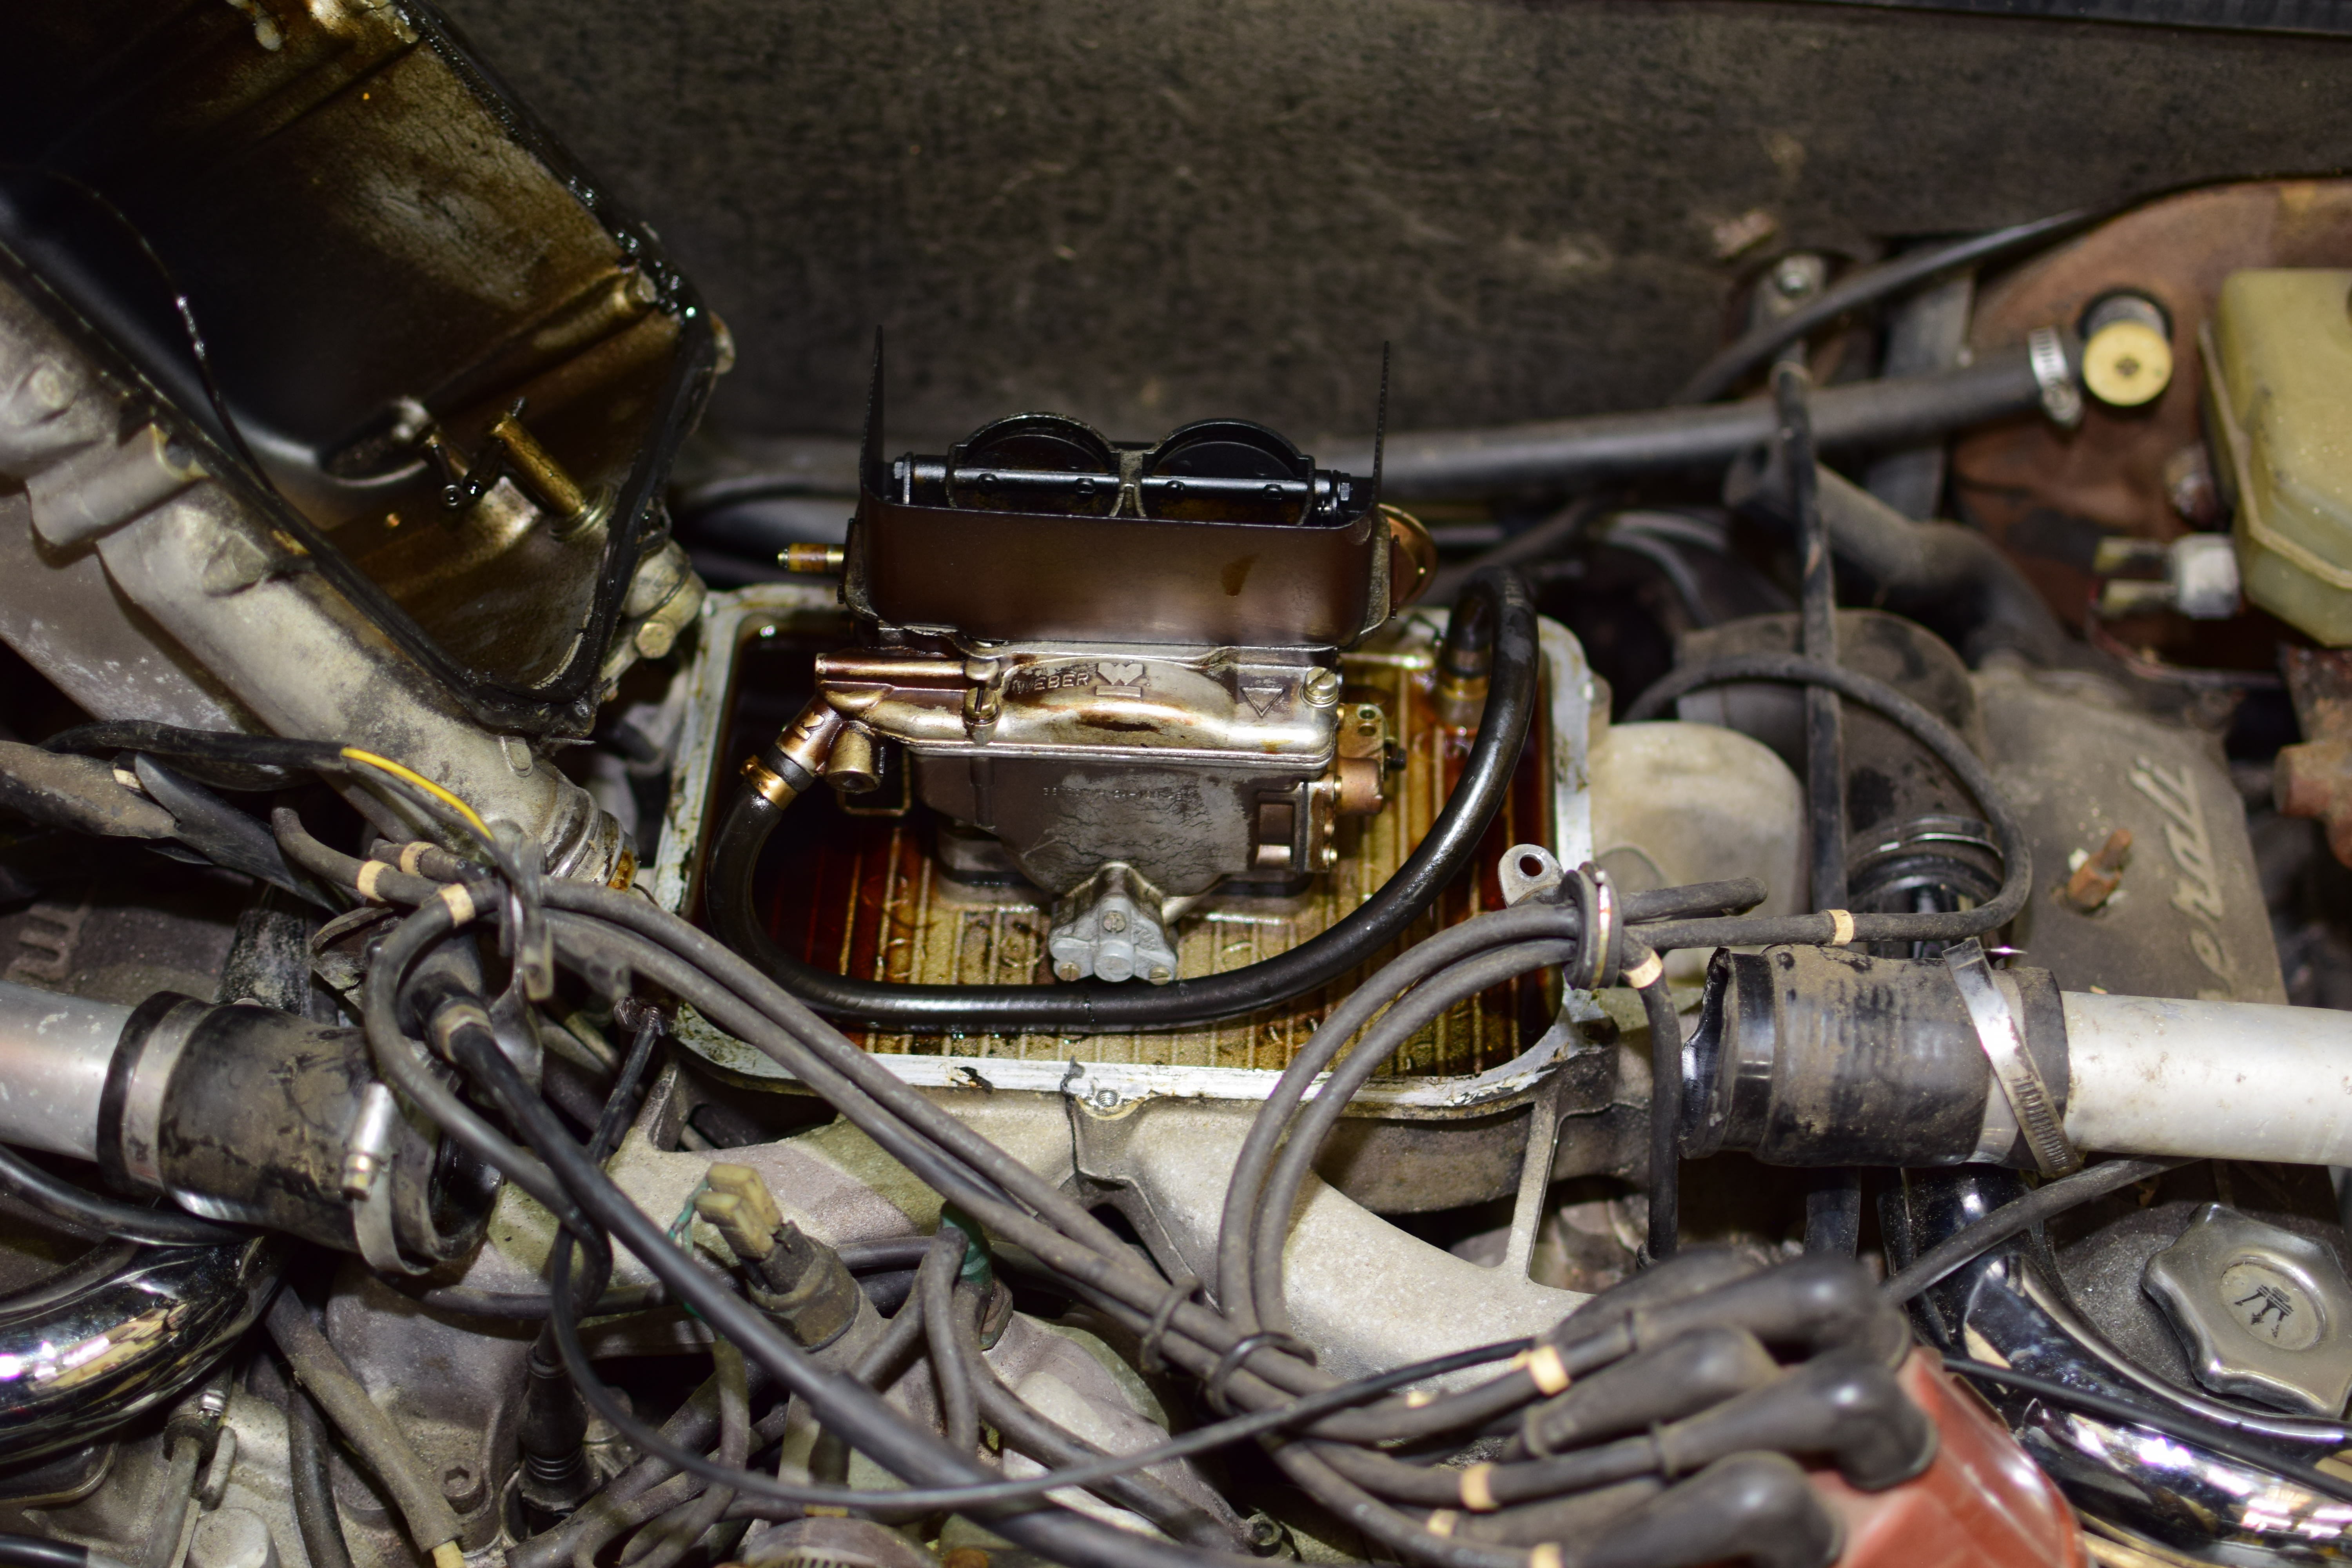
We turned our attention to the vacuum lines under hood next.
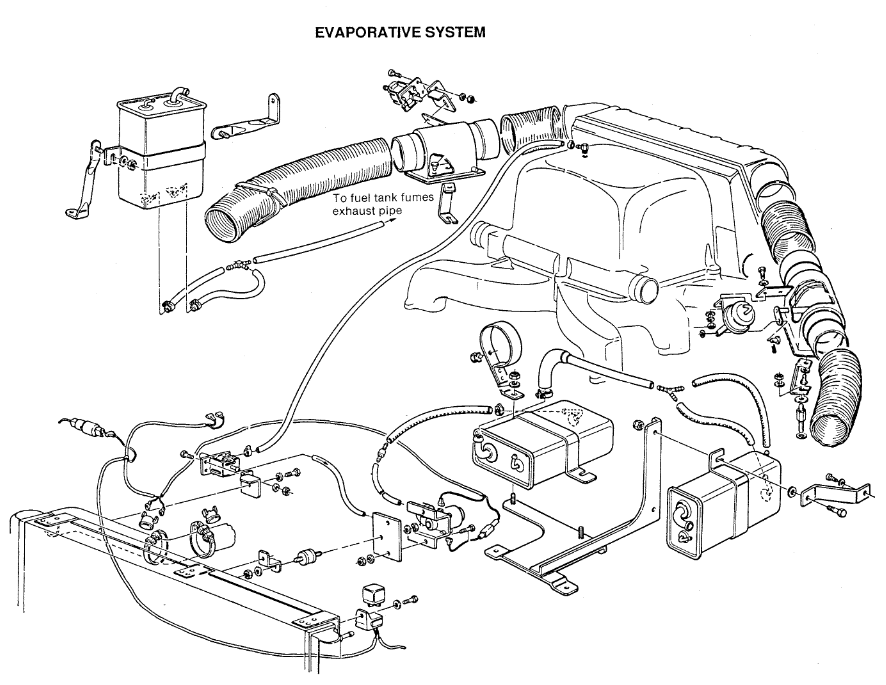
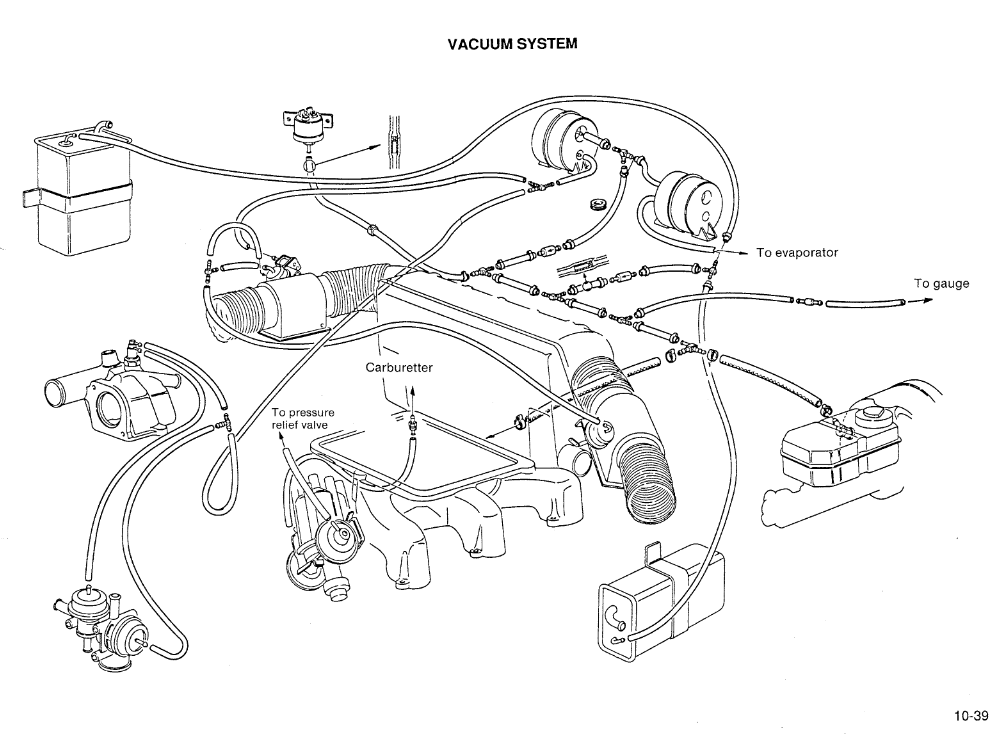
Damn, there are a lot of vacuum lines under there! And it’s not all that well documented. We had these diagrams from the service manual to work with:
We quickly realized that the “Vapour storage carbon canisters” were long gone. The “Air flap valves” that appear in the last diagram as “B” were also nowhere to be found. The two outputs on diverter valve were teed together, and there were plenty of other missing and disconnected hoses.
Apparently the “Air flap valves” are part of the evaporative emissions control system. Because there would be fuel vapors in the carb box when the car was shut off, those flaps were in place to be held open by vacuum when the car was running and then snap shut when the car was off to keep the fuel in the carb box. So the good news there is that we don’t need to care about those at all and it sounds like it’s something that was just born to break anyway.
We decided that we’d hook up the vacuum lines that we absolutely knew for certain had to be there, and then we’d give it an attempt at a start. After connecting the jumpbox, we turned the key on to see if the fuel pump would come alive, and it did. Next, we put some fuel into the tank and turned on the key to see if we had any leaks. The fuel lines in the rear all stayed dry and we could see the fuel spraying in the carb when we worked the linkage. So far, so good. We got the fire extinguisher handy, the camera rolling, and…
All of a sudden there was absolutely no power in the car at all. No interior lights, no dash buzzers, no fuel pump, no nothing. the jumpbox still had power and there was good ground, but nothing else. It was getting a little late, so on that terrible disappointment we called it a night. Just a Maserati being a Maserati, I guess.
Coming back to the problem the next day resulted in a discovery that the issue wasn’t so much with the Italian-ness of the car, but the partially-disassembled state that it’s in. I poked around with a test light and couldn’t really find anything that jumped out at me, but the big clue came when I started noticing that when I opened the door, the oil pressure light came on. Sure, it could just be an Italian car doing Italian car things, but that seemed more like a bad ground somewhere. Looking at the engine compartment, the negative battery cable immediately disappeared under the intake manifold. So the engine was grounded, but the chassis wasn’t! There is a little bracket on the negative cable that is supposed to bolt to a stud along the inside of the fender. Once I bolted that down, all the electrics started working properly again. We must have been making incidental contact with something before and when we moved things around to get ready to start it, we broke whatever that contact was.
Now that the electrics seem to be sorted, I’ll wait for the next opportunity that the guys have to come over so we can attempt to see a Maserati Biturbo start and run.
With the constraints of the $2000 Challenge budget, the intent was to use the replacement fuel pump to get the car running, but to also attempt to repair the original fuel pump to be used for the competition. Granted, $50 isn’t a lot a money in the grand scheme of things, but it is 2.5% of the budget and that makes it worth the effort. The original fuel lines were actually seeping gasoline, so as mentioned in the last post, before replacing the fuel pump, I wanted to get the lines replaced. Out came the calipers and we determined the following:
Fuel tank to filter/pump
12mm or 1/2″
Gates 27006
2ft
$3.69/ft
O’Reilly
Fuel pump to hard line/underhood
8mm or 5/16″
Gates 27003
5ft
$2.99/ft
O’Reilly
Vacuum lines
5.5mm or 7/32″
Masterpro WV0732
6ft
$5.99/ 6 ft
O’Reilly
Intake to brake booster vacuum
15/32″
Gates 27231
2ft
$3.49/ft
O’Reilly
All-in, that should be around $35 (plus tax) worth of new hoses. The fuel lines I don’t trust because they’re old. The vacuum lines I don’t trust because I can see that they’re either missing or cracked. I may wind up needing more of the 7/32″ vacuum line than that 6ft roll, but we’re going to start there and see where things end up.
Rather than just bolt the replacement fuel pump to the car, I wanted to attempt to isolate it from vibration as much as I could. To that end, I wanted to get the rubber isolators off of the original pump, so I brought the whole thing over to the workbench.
While it was sitting there, we pulled the jumpbox out of the back of the Merc and hooked it up to the pump to see if it would run. At first, there was nothing from the pump, but one gentle nudge from a bit of iron pipe and it started humming along! We tried all manner of additional vibration and movement on the pump to see if it would stop again, but it seems like it’s going to keep going!
The new plan is to keep the replacement fuel pump and get it all built up and ready to install. The inlet will need to be adapted – the line from the tank is 1/2″ while the inlet on the new pump is 5/16″ – and I’ll need to get some new rubber isolators and some long bolts. Basically, I want it ready to install with minimal work in the event that the fuel pump dies again, but I think the pump was simply stuck from sitting and has been revived.
Things got fairly busy around here due to a couple unplanned projects that cropped up and consumed a few weekends. On the 10th of November, however, with the day off work, we set about trying to get the car to attempt to fire.
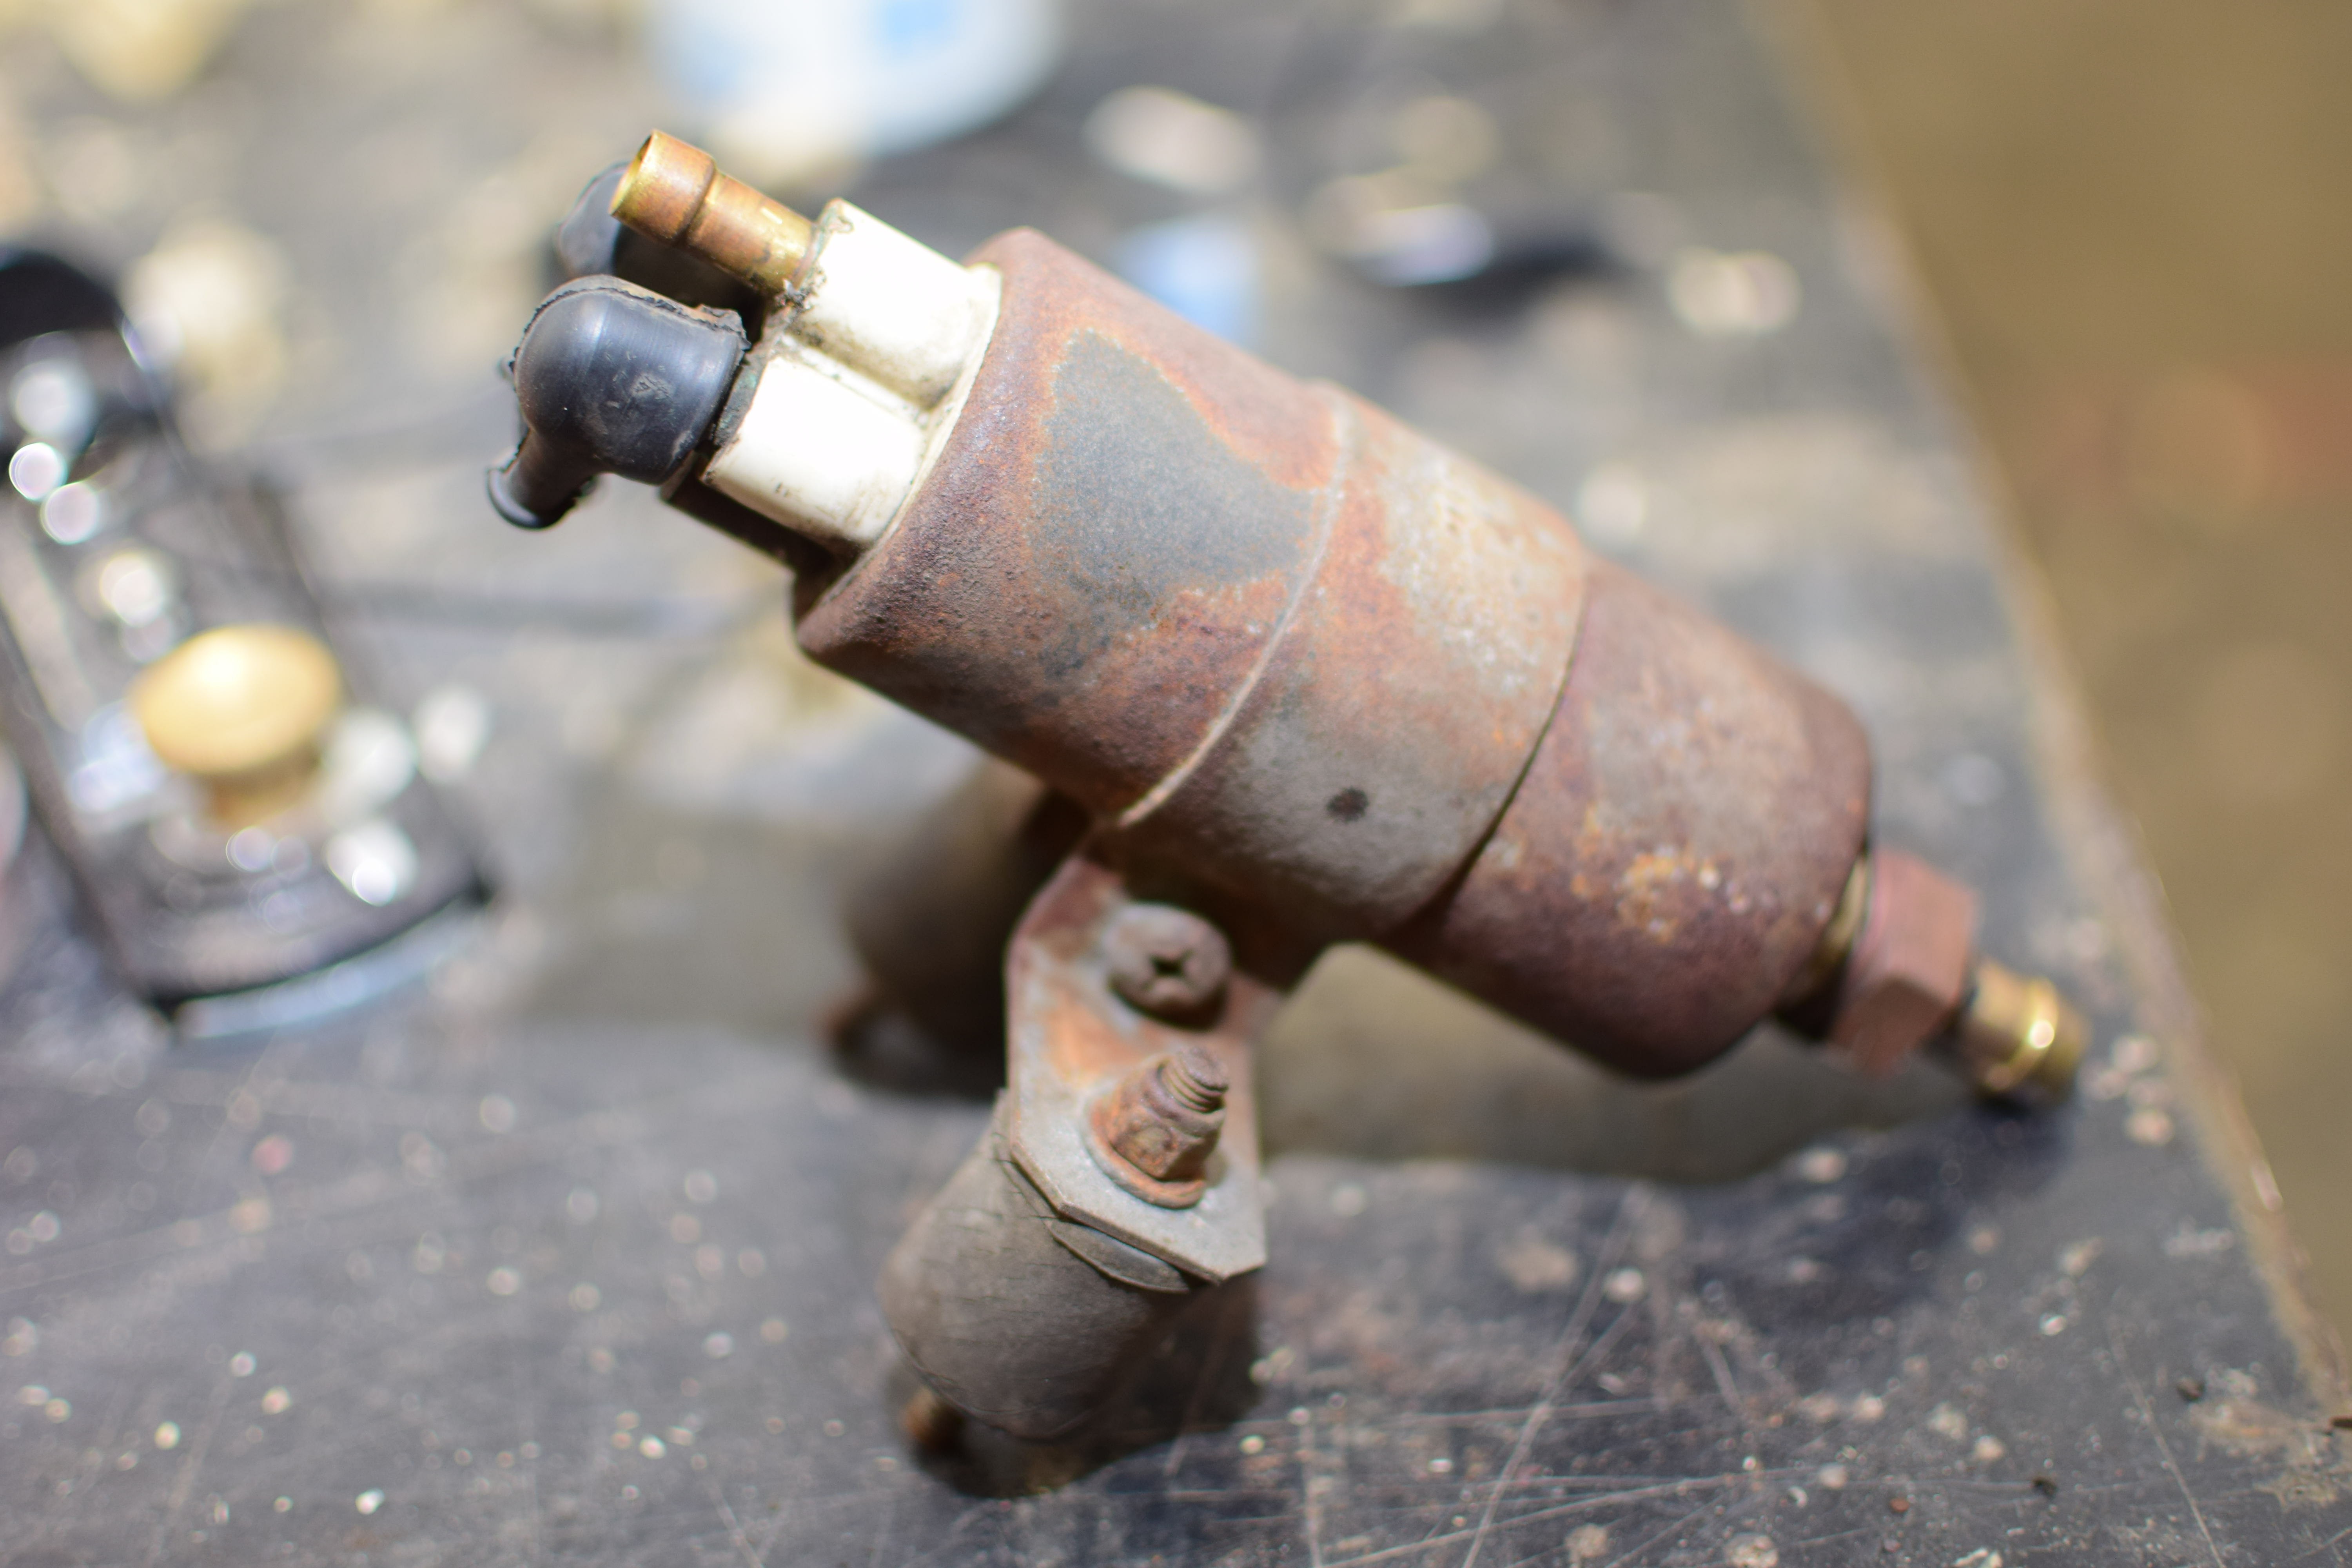
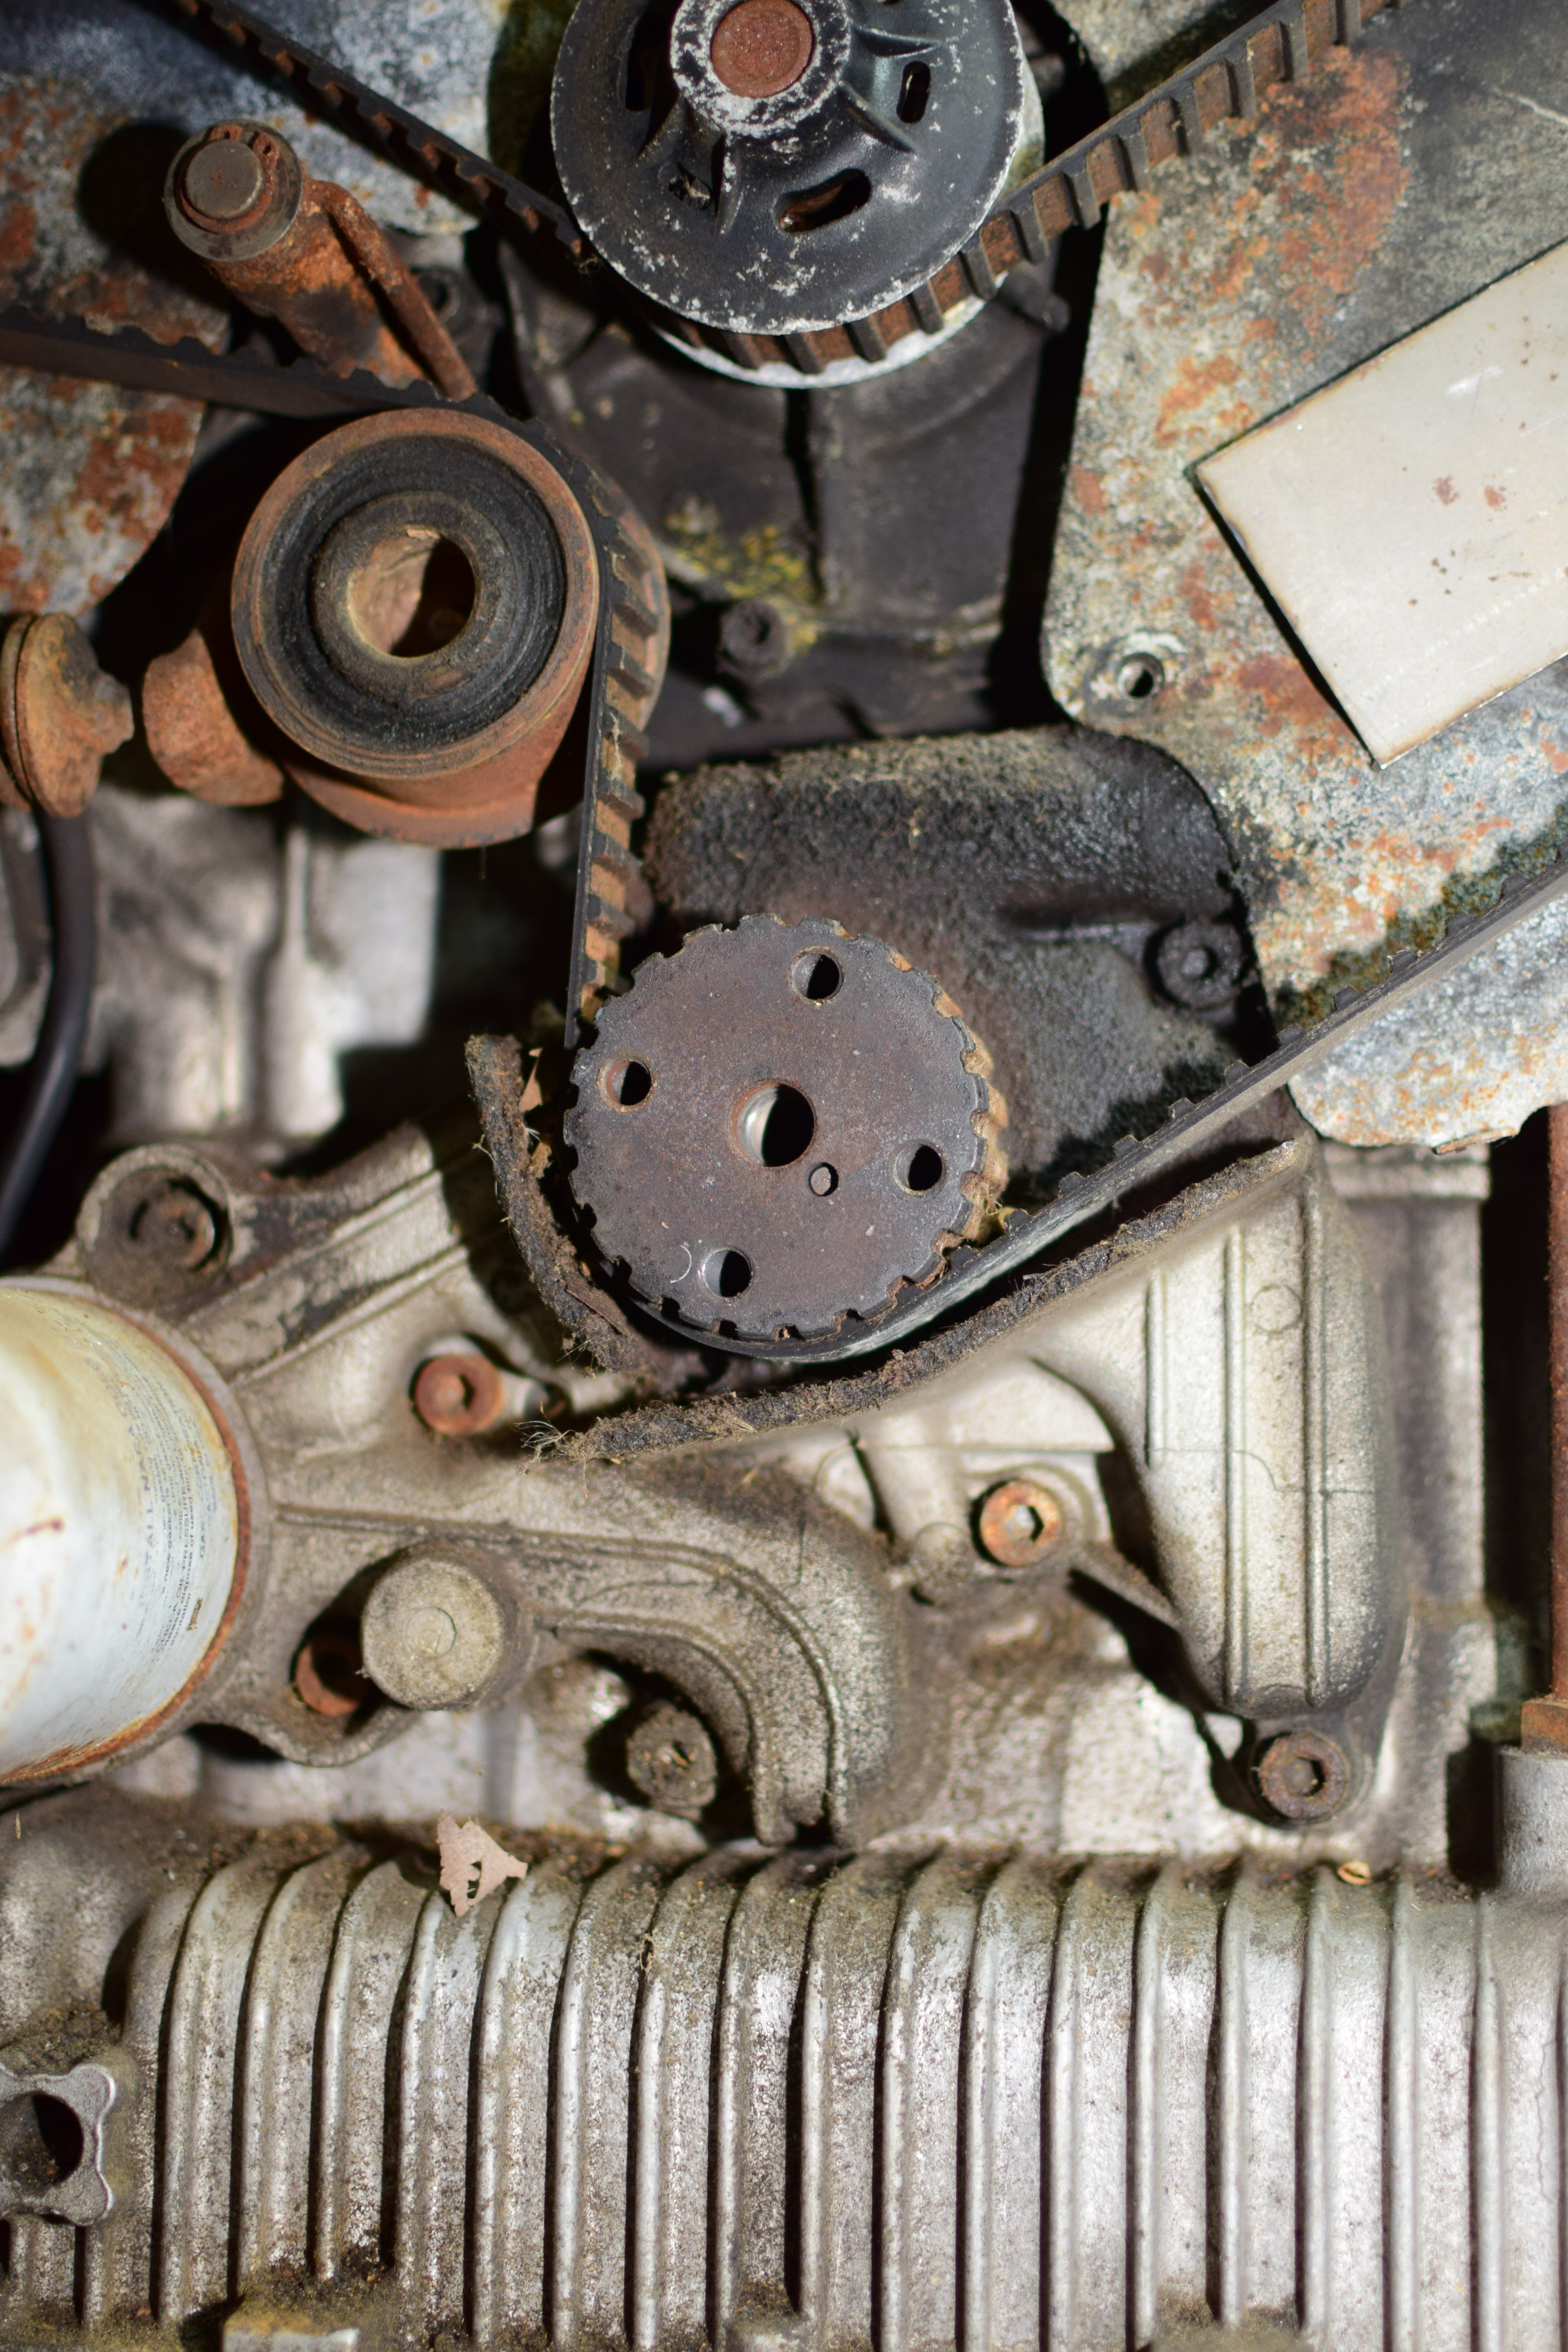
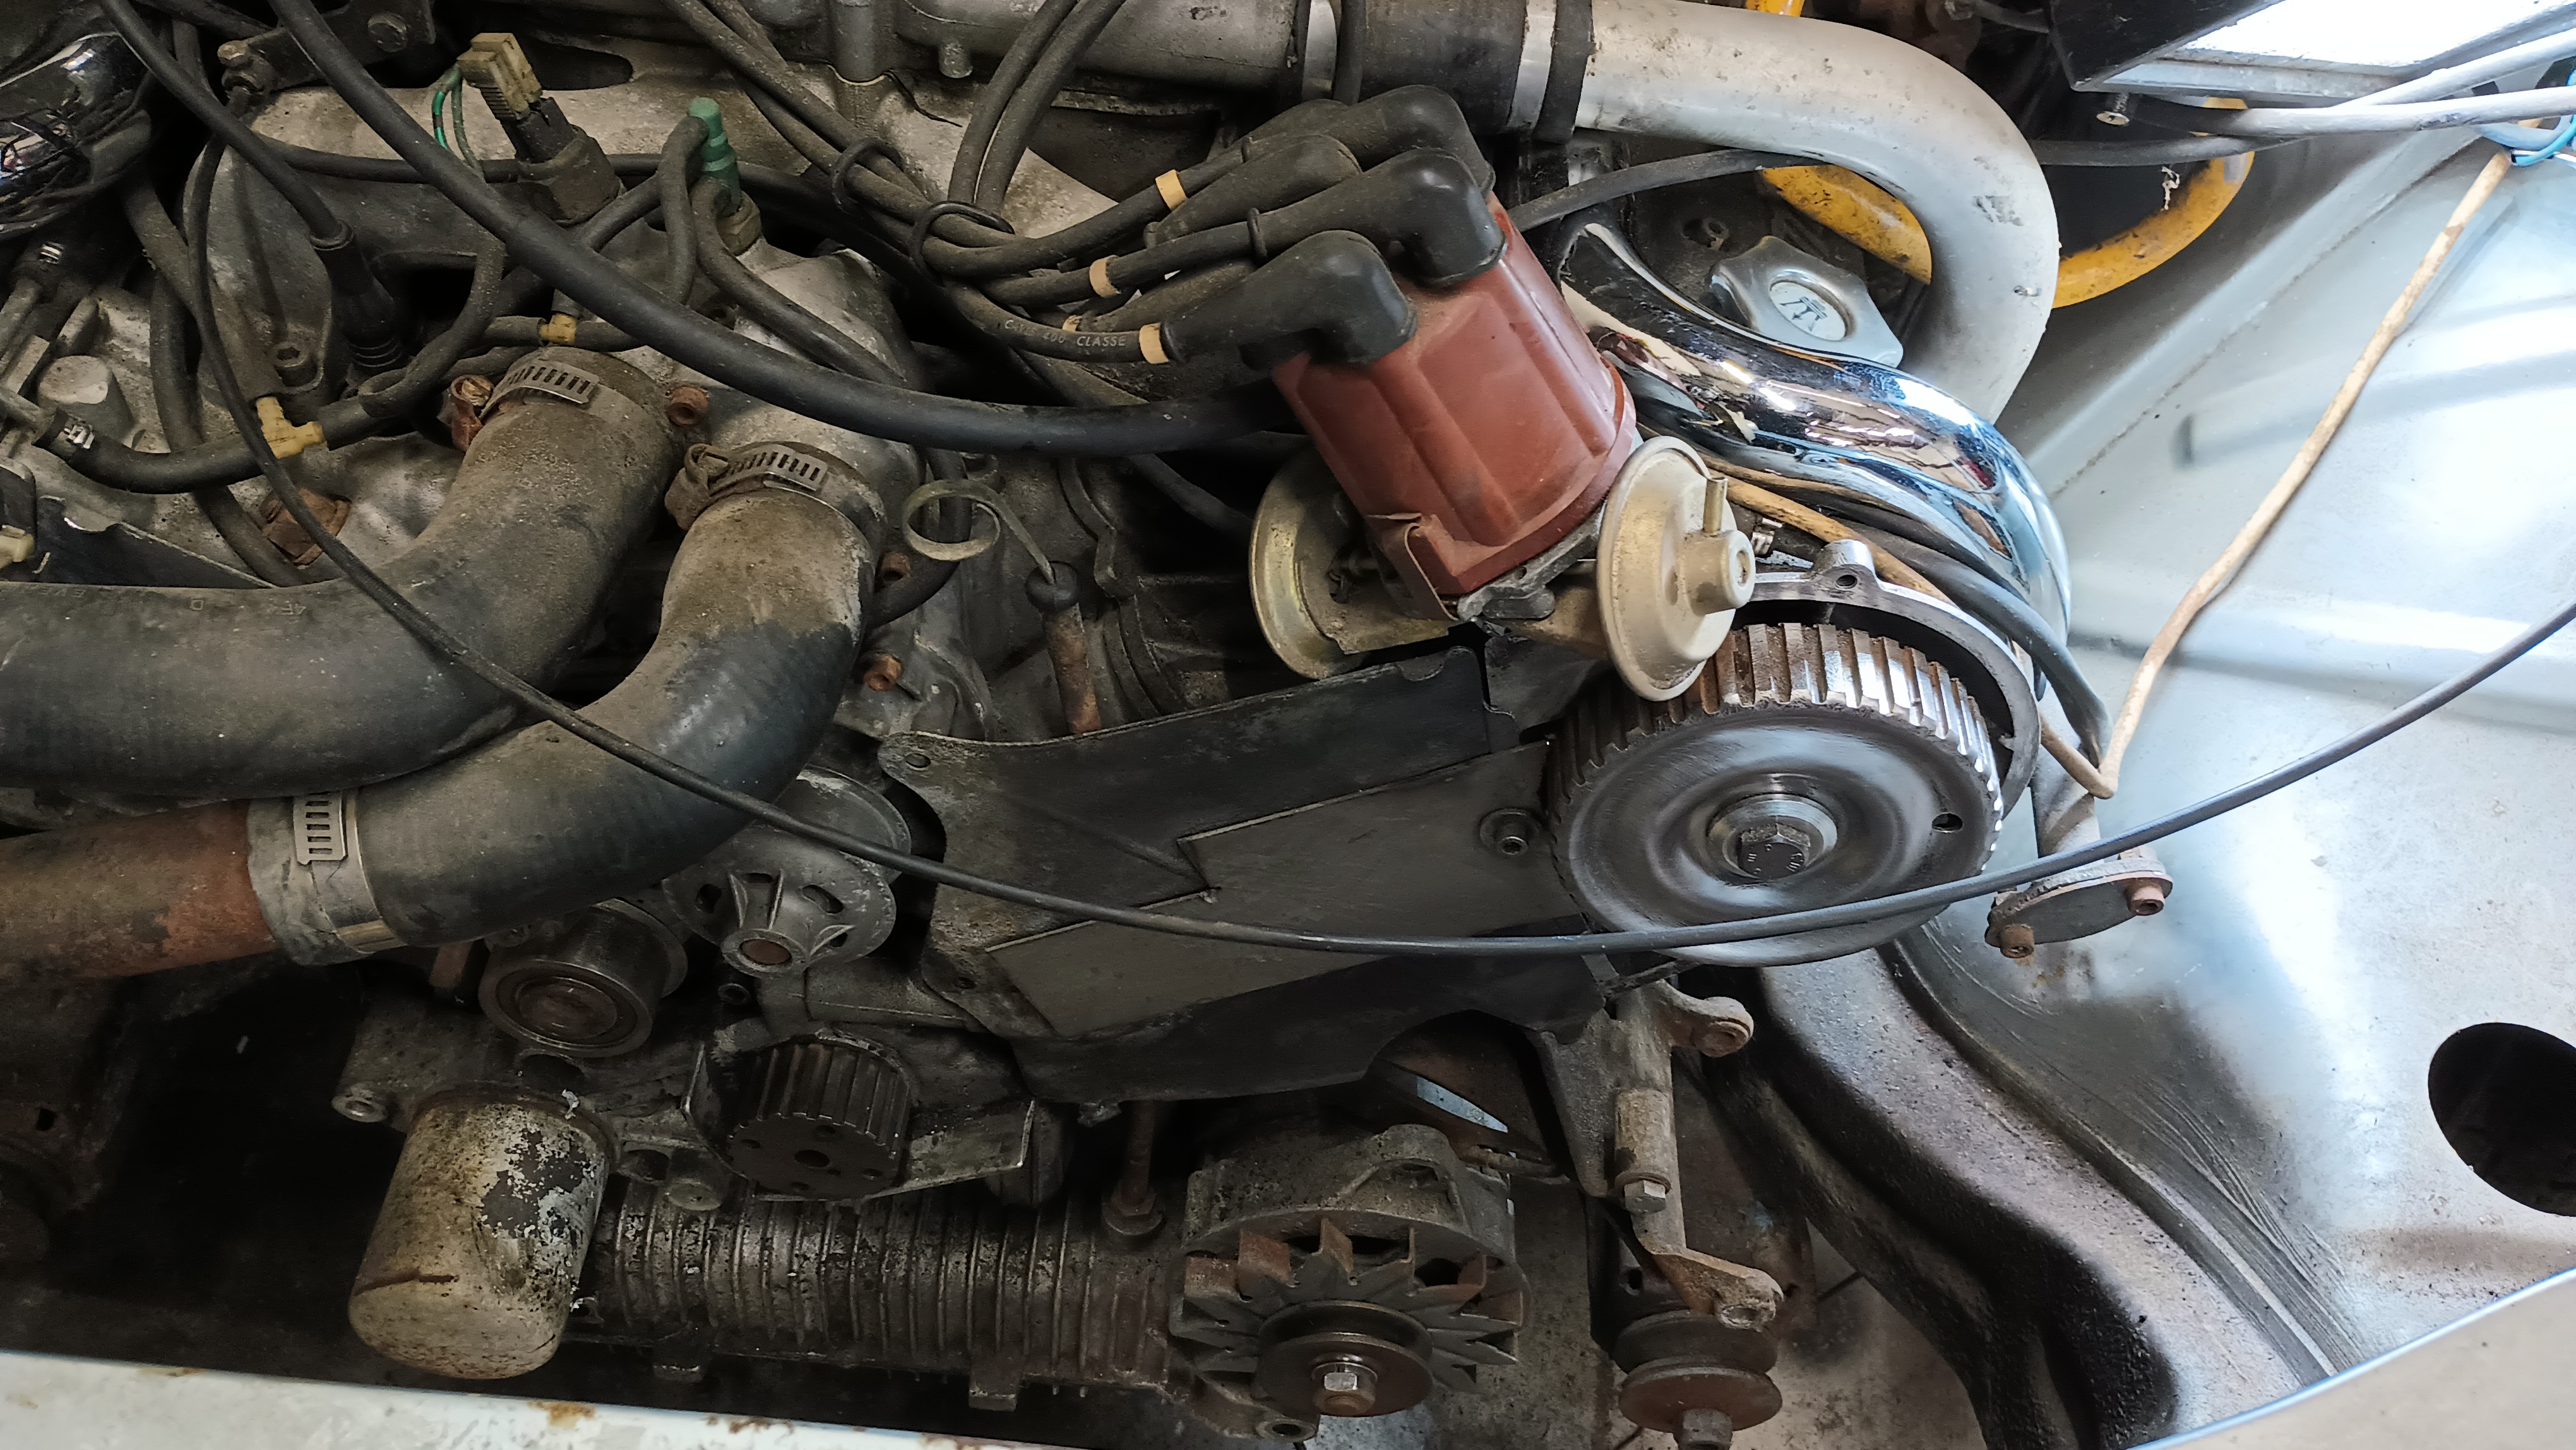
The cam pulley was spot on
We knew that the fuel pump was out to lunch, so I bought a new Mr. Gasket 42S fuel pump to install in its place. Before installing that, though, we set about to get the timing corrected. The timing was off a full tooth at the crank, so I retracted the tensioner and pulled the belt off again.
The crank pulley, however, was off a full tooth.
Following the service manual’s instructions this time, I got the belt on starting at the crank then looping around the left bank timing pulley. To do that, I needed to pull on it quite a bit to get it to stretch into place. With the timing set correctly this time, we threw a battery on the car to see what would happen. Once there was a good battery hooked up, the starter easily turned the engine over with no strange noises.
The next step was to remove the carb box, spray some starting fluid down the carb, and see what would happen. Sure enough, it coughed to life and sounded fantastic! Of course, it didn’t run very long and we didn’t want to keep washing it down with ether, but we definitely had a running engine.
From there, we moved our focus to that fuel pump. The fuel lines from the tank to the filter to the pump were leaking if you touched them wrong, so I’m going to need to put new fuel line in. The car was basically designed with a desire to catch fire and I don’t want to make it too easy. Interestingly, the fuel in the tank really didn’t smell all that old or bad, and there wasn’t a whole lot in there. Once things were drained out, the next step is to go get some fuel line and then work out how to mount the new pump.
We got together on Friday the 13th to make some more progress. While it feels like we got a few steps forward, we didn’t actually manage to finish anything yet.
Currently, we’re working on three tasks: Complete the timing belt change; catalog the spares and parts in and around the car; empty the fuel tank of the old gas. None of the parts got cataloged, but progress was made on the timing belt and problems were found with the fuel system.
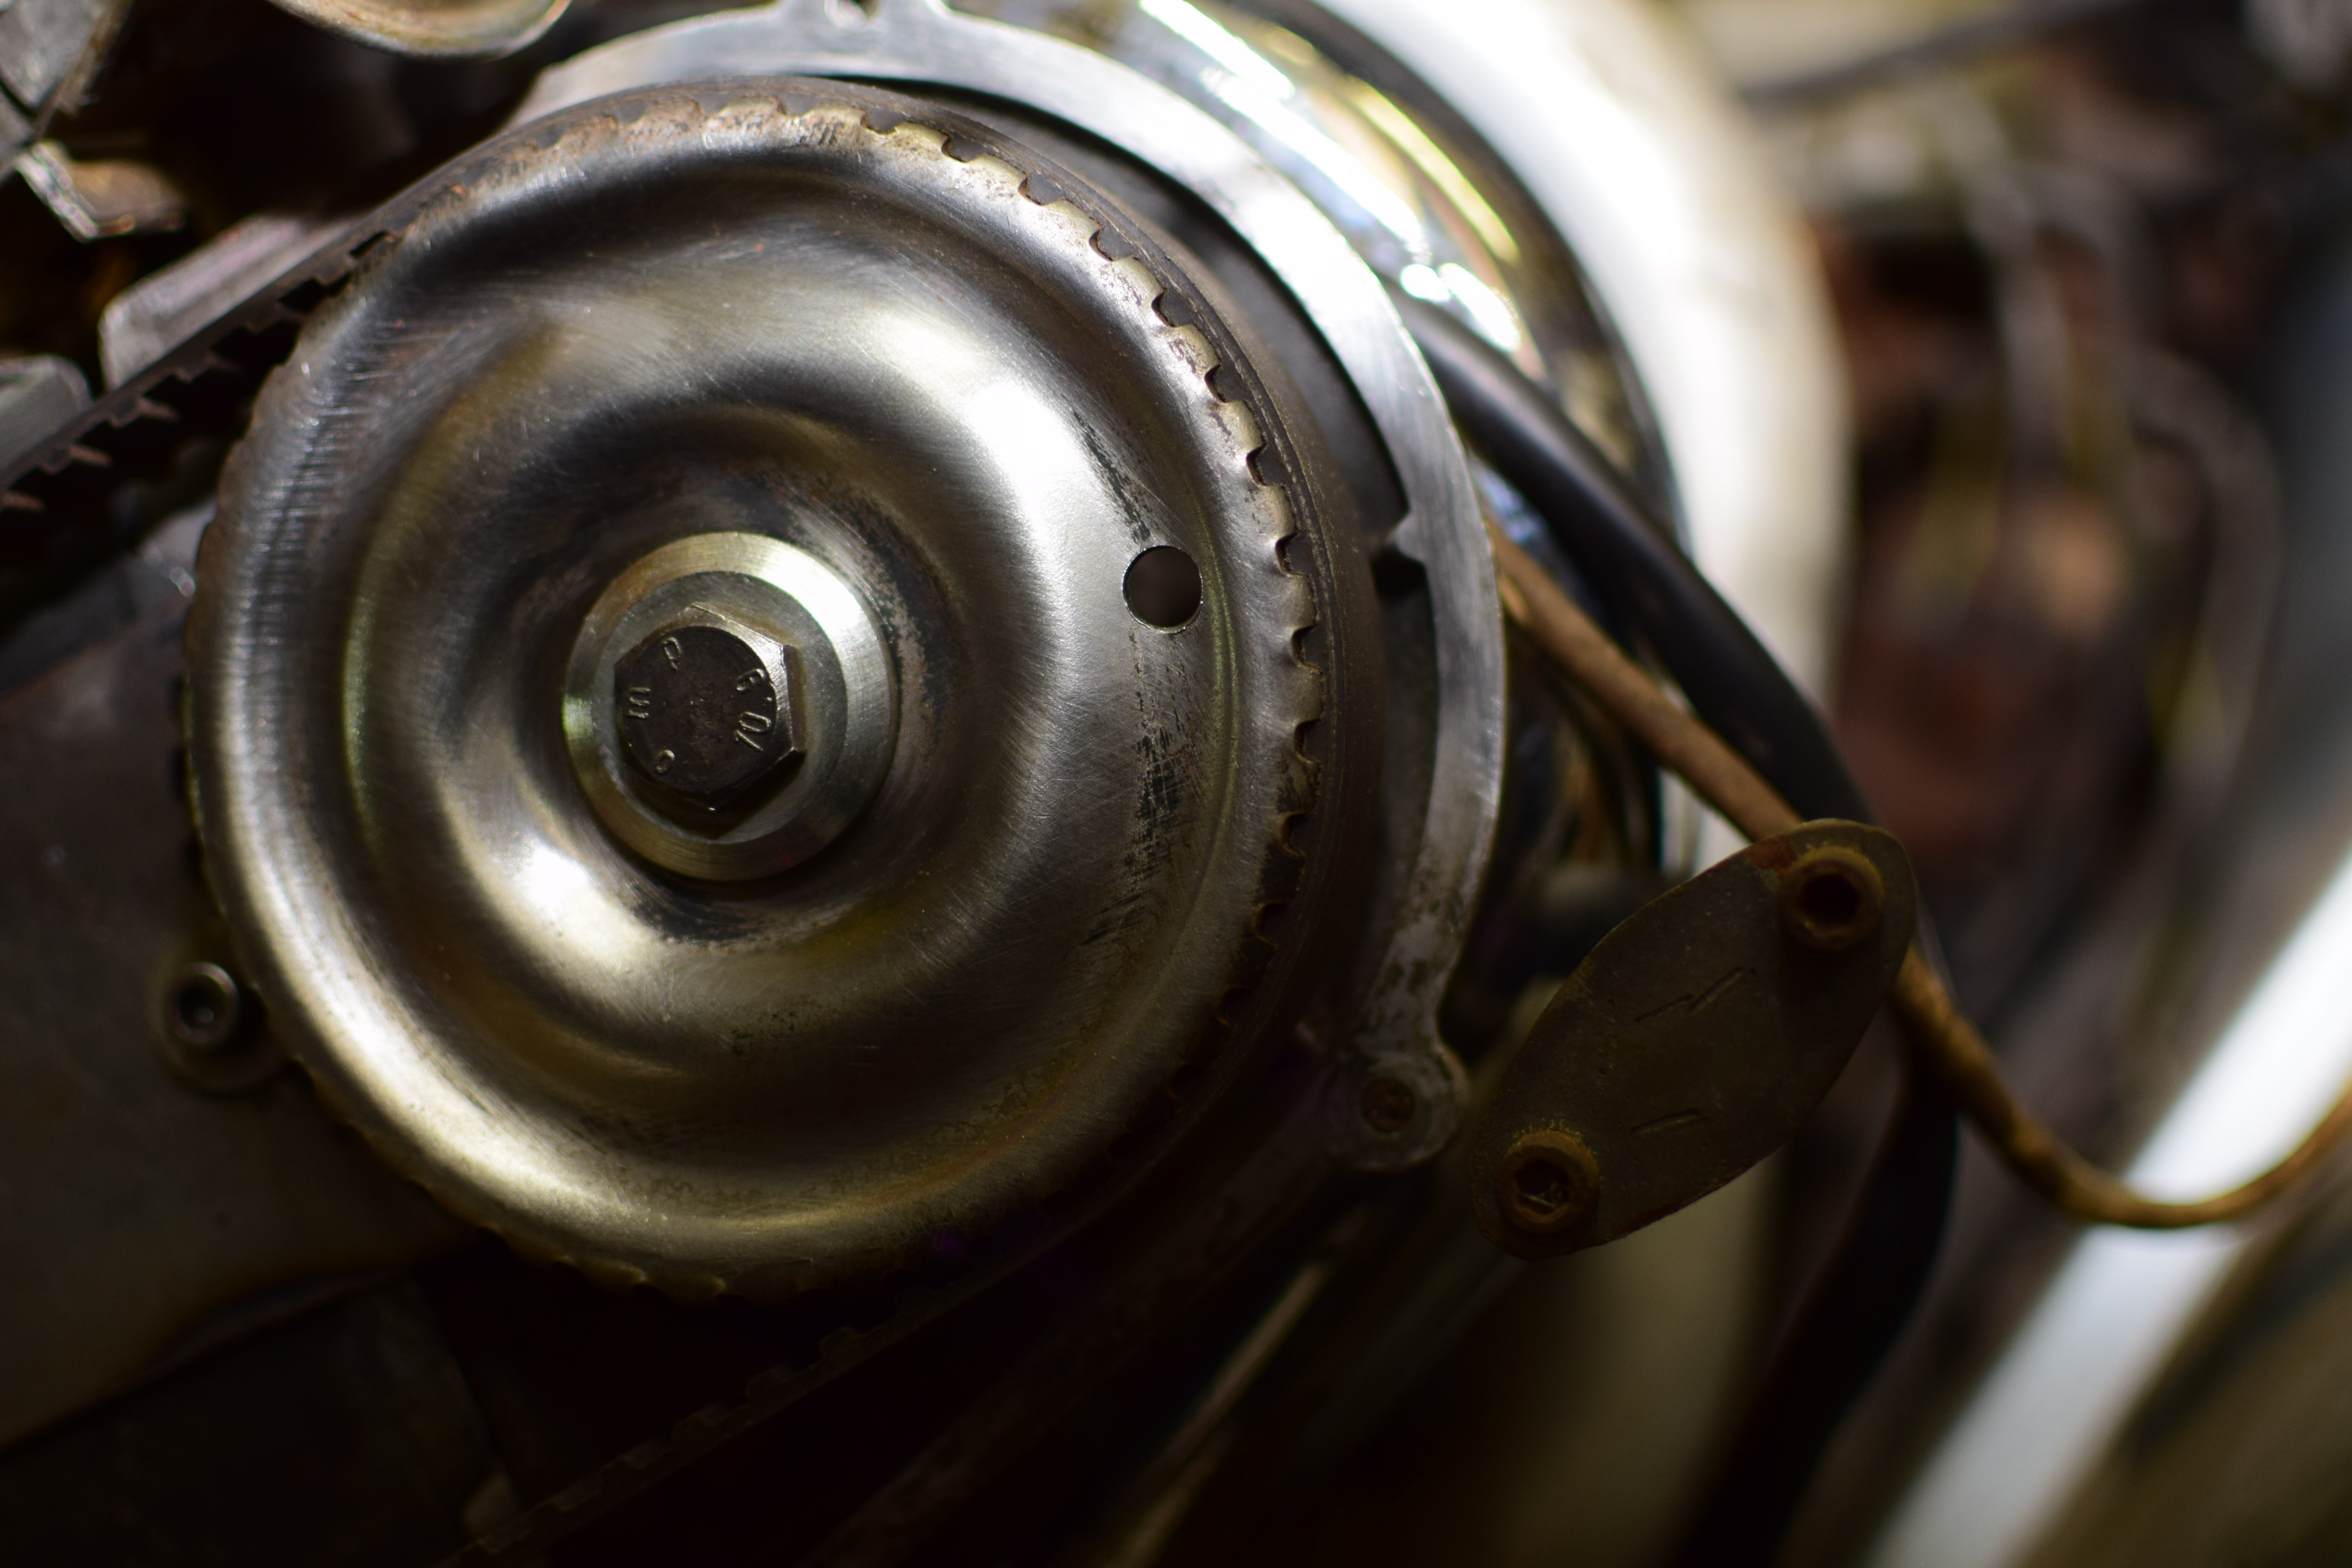
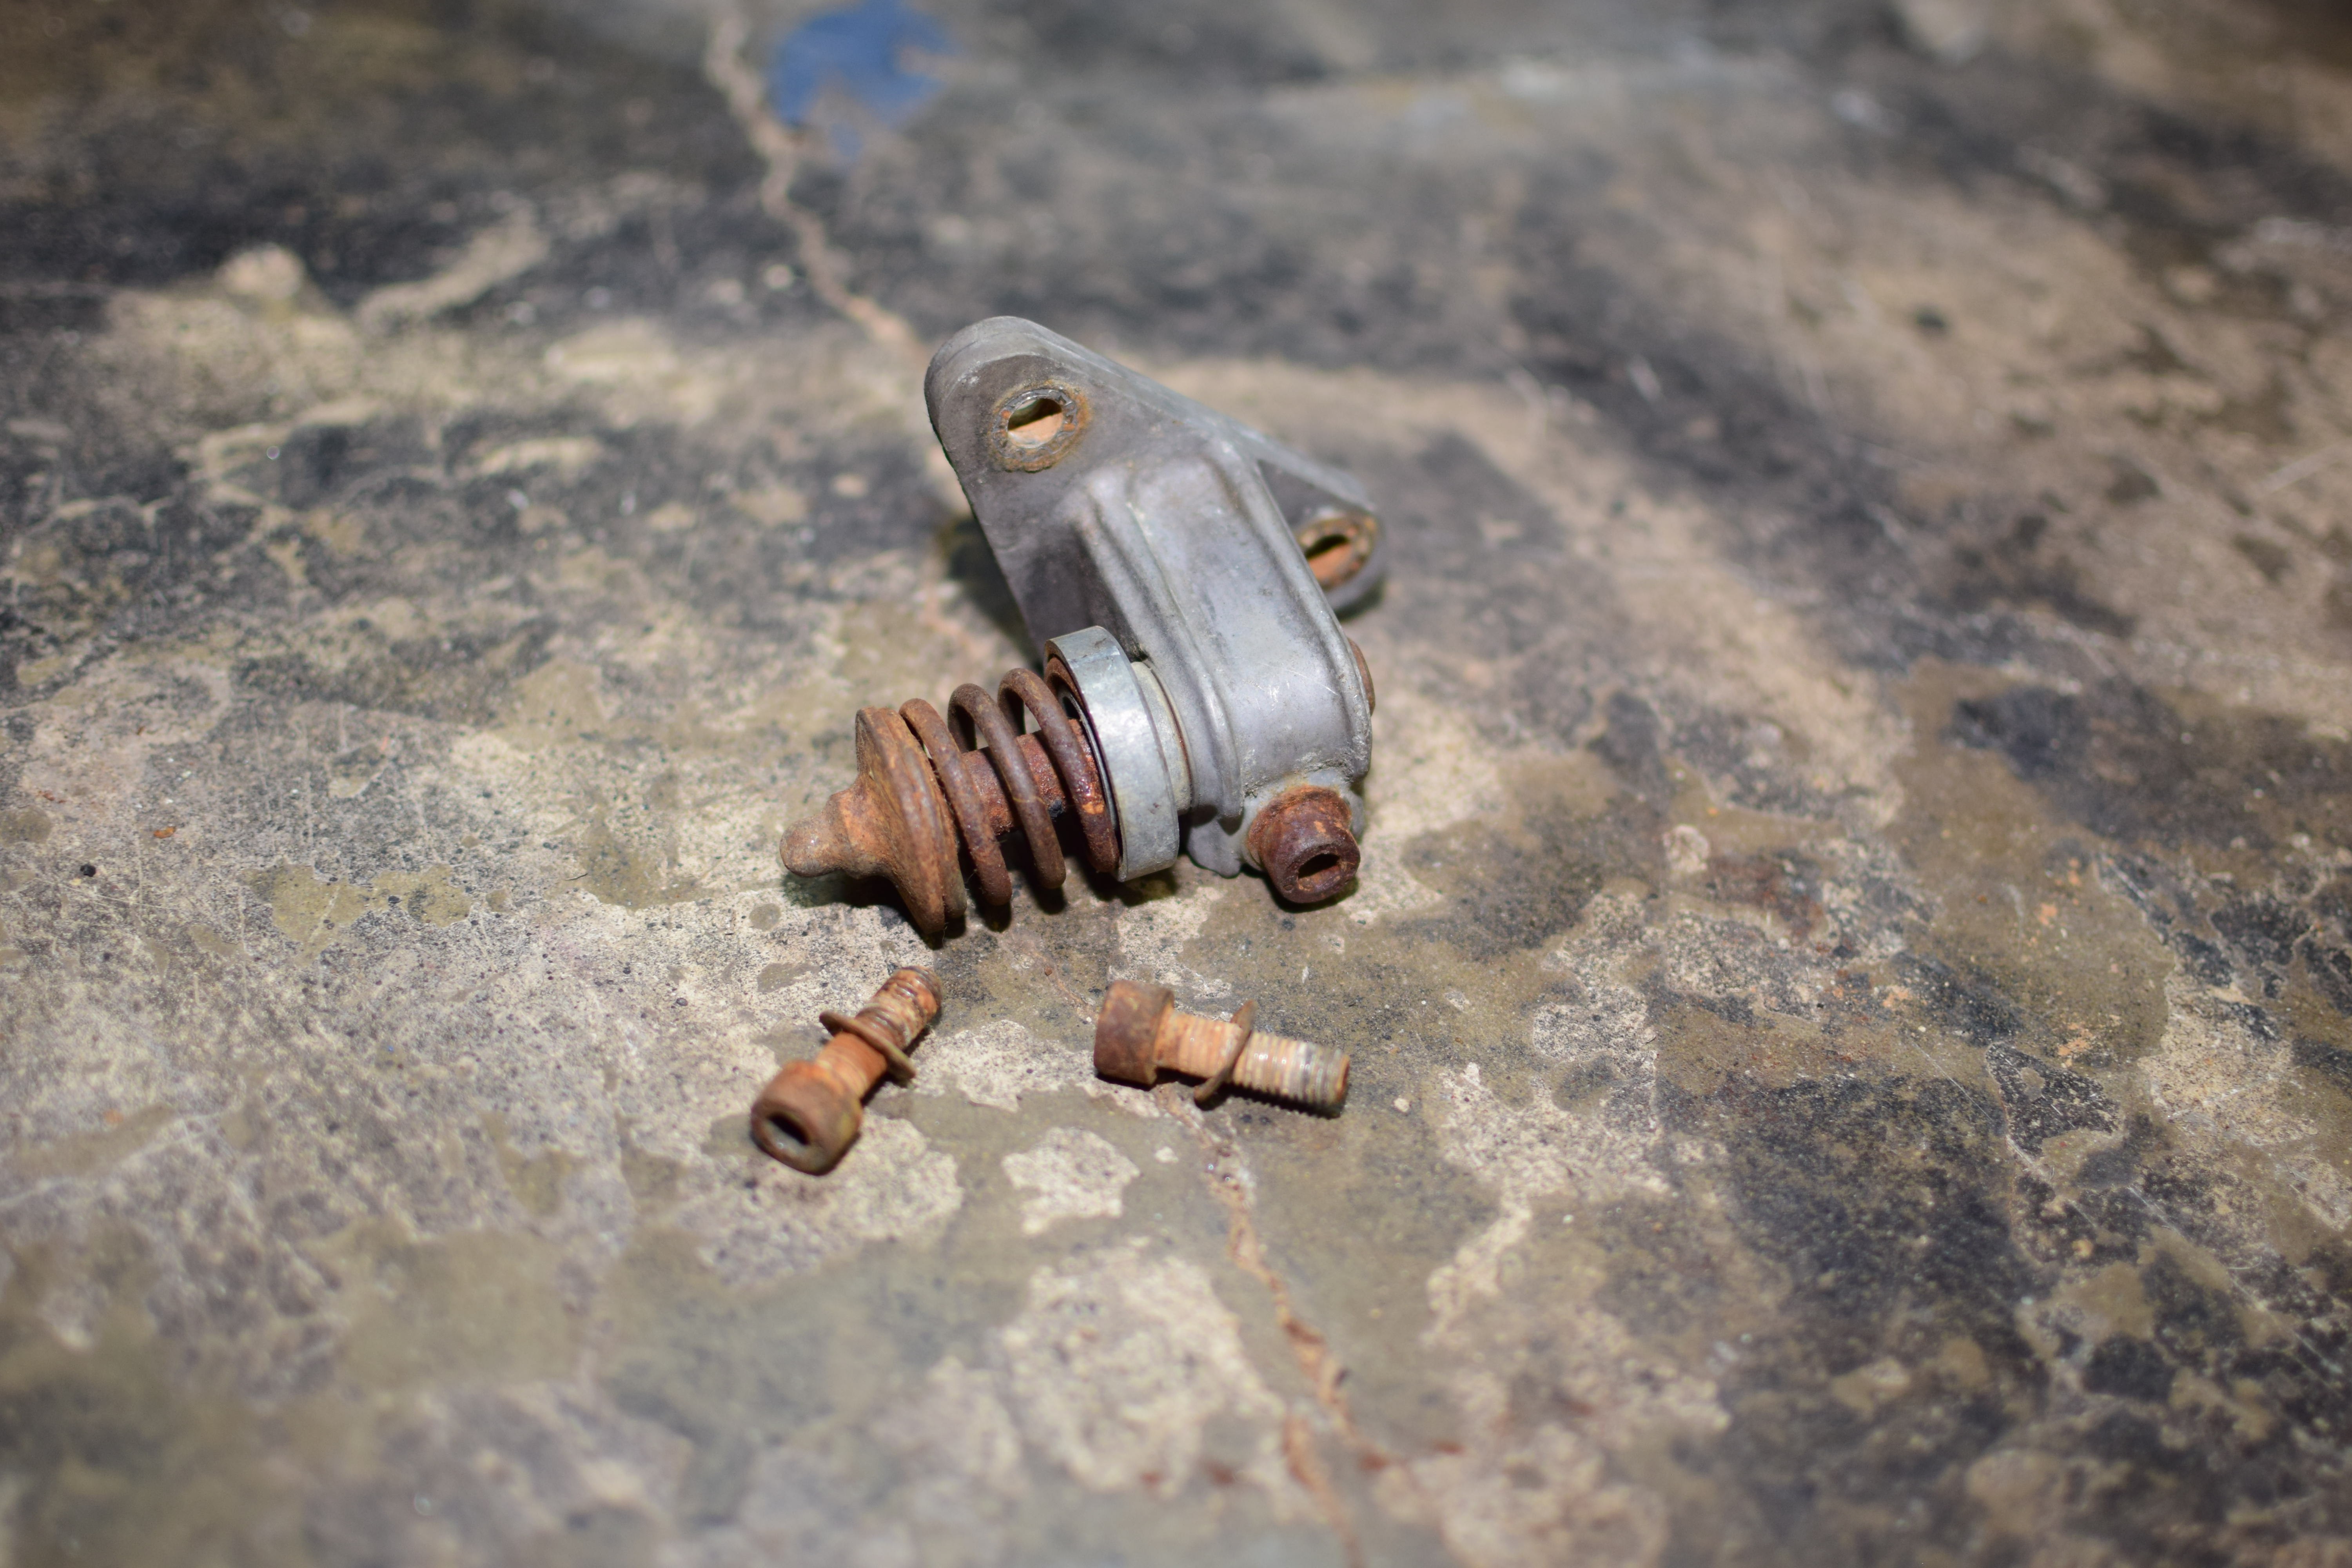
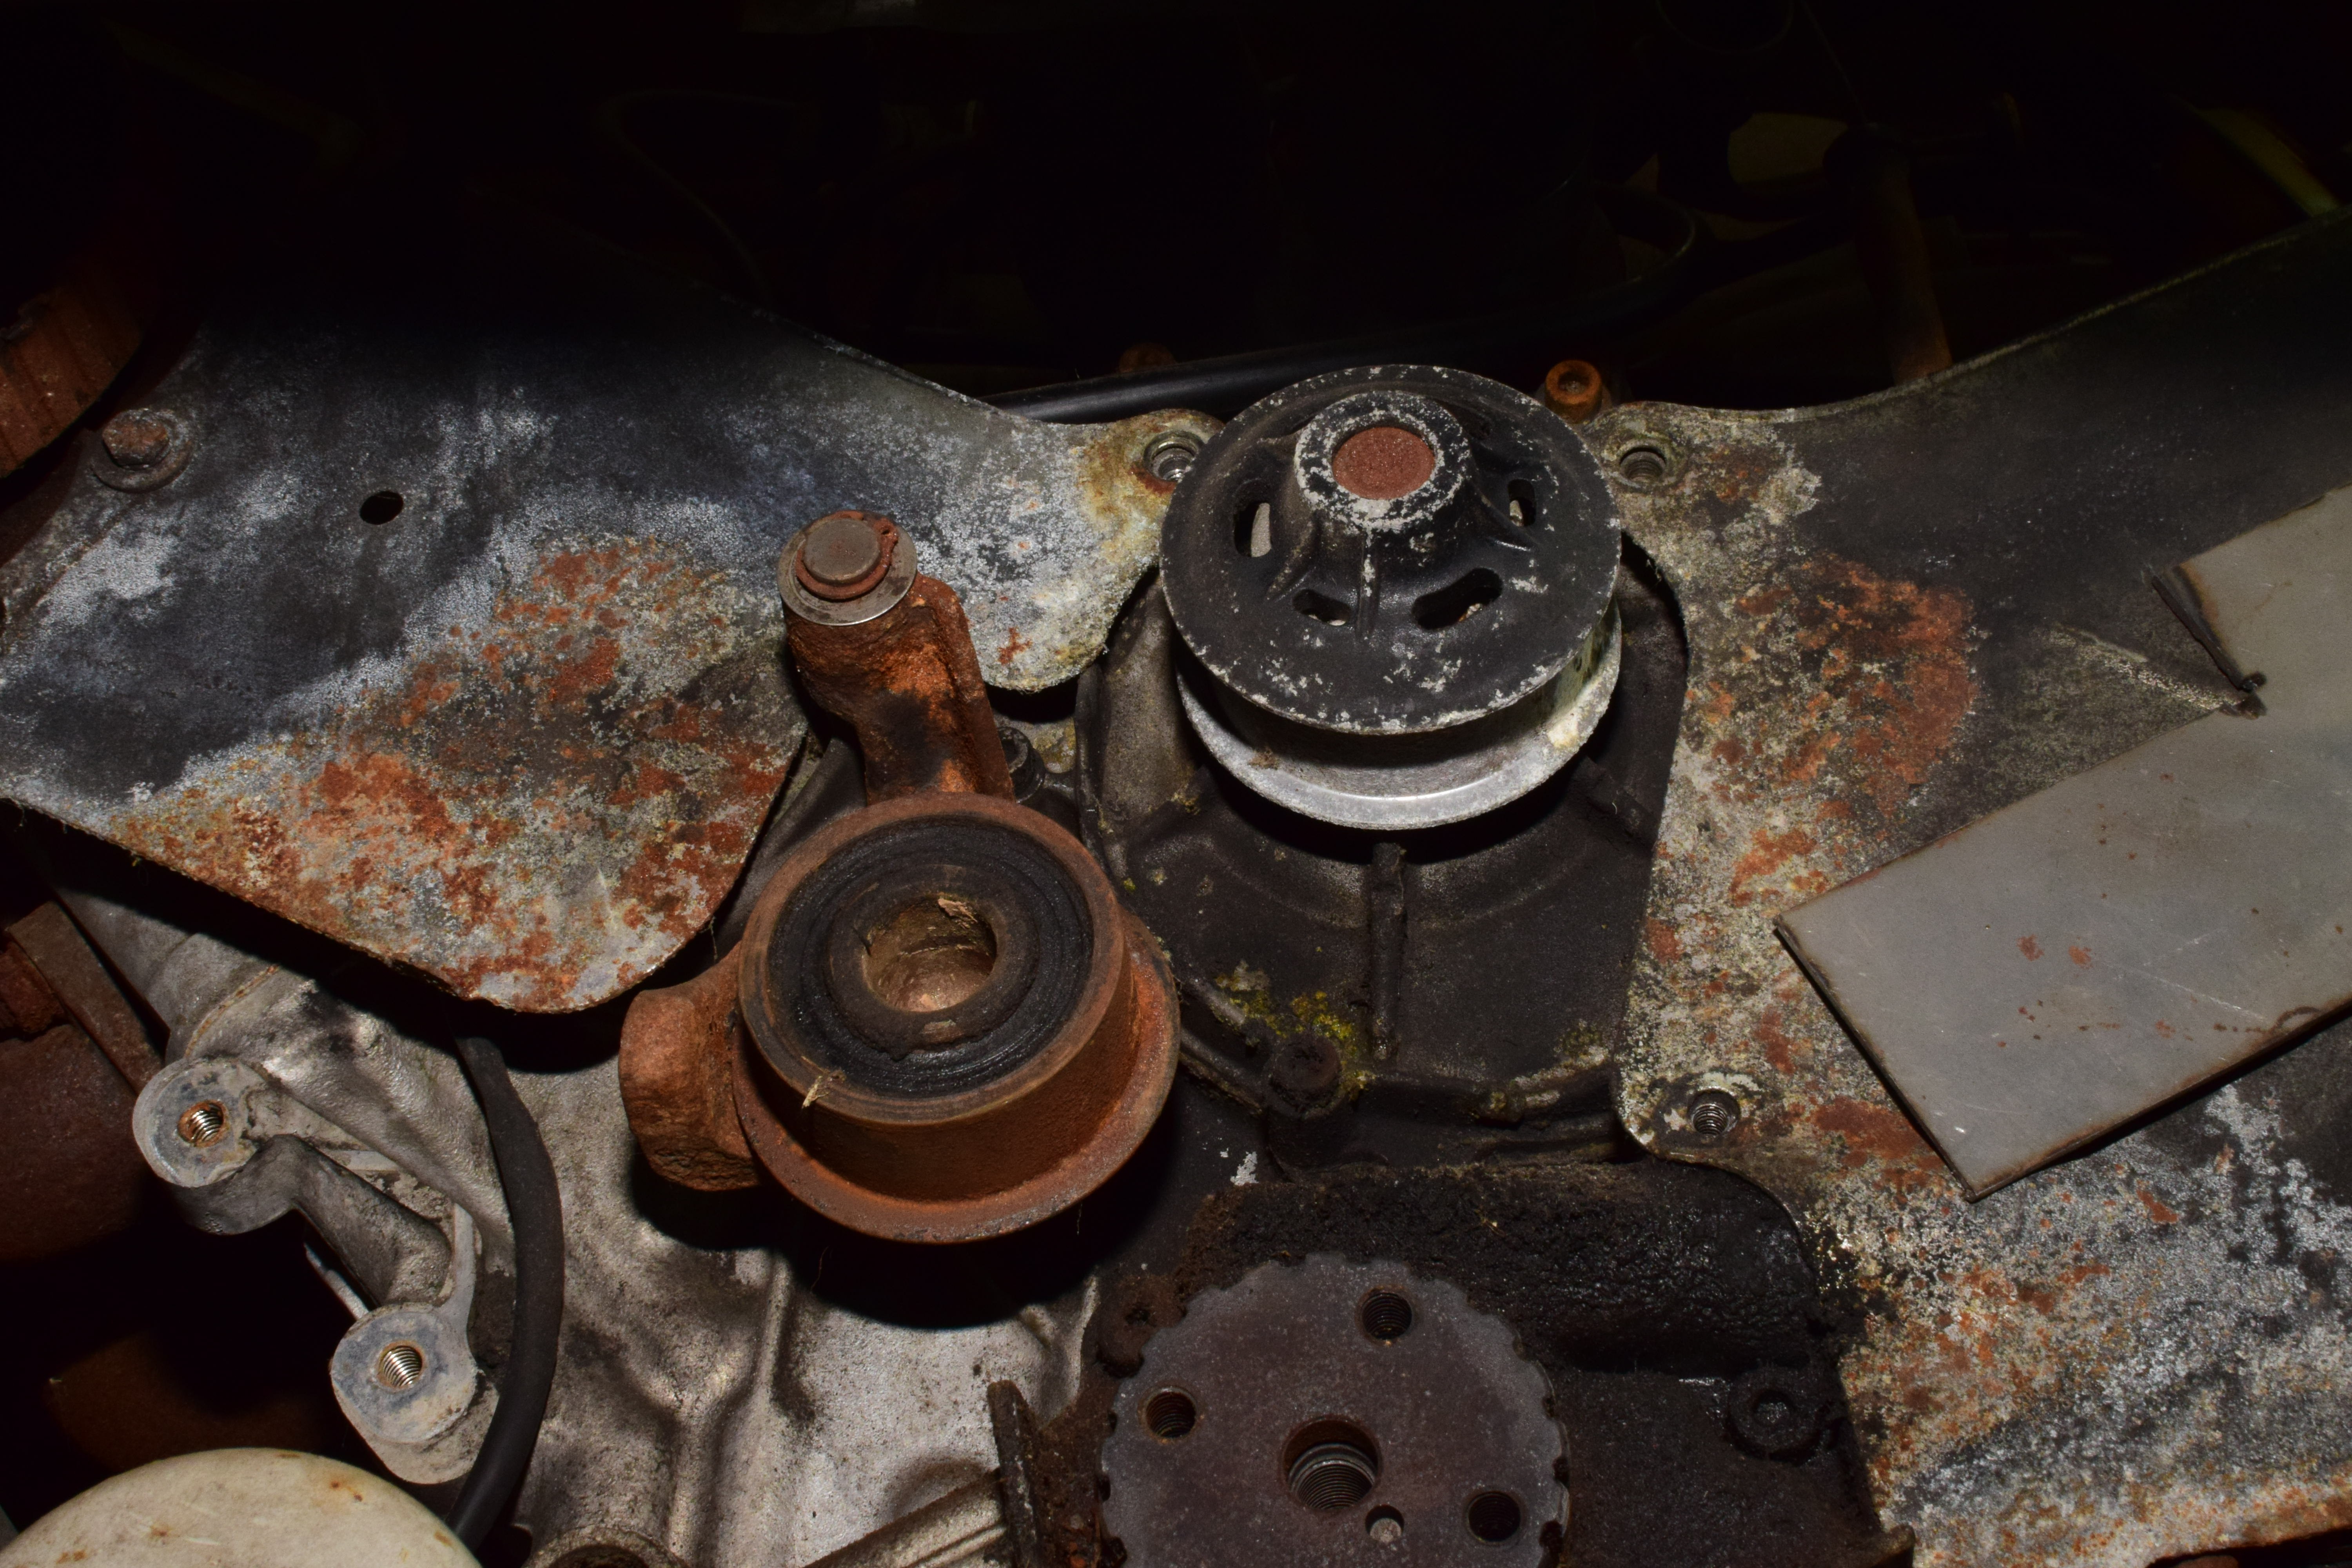
For the timing belt to be removed from the engine, the crank pulley needed to come off and the tensioner needed to be relaxed. Pulling the crank pulley was simple – the five bolts zipped out and the pulley easily slid off.
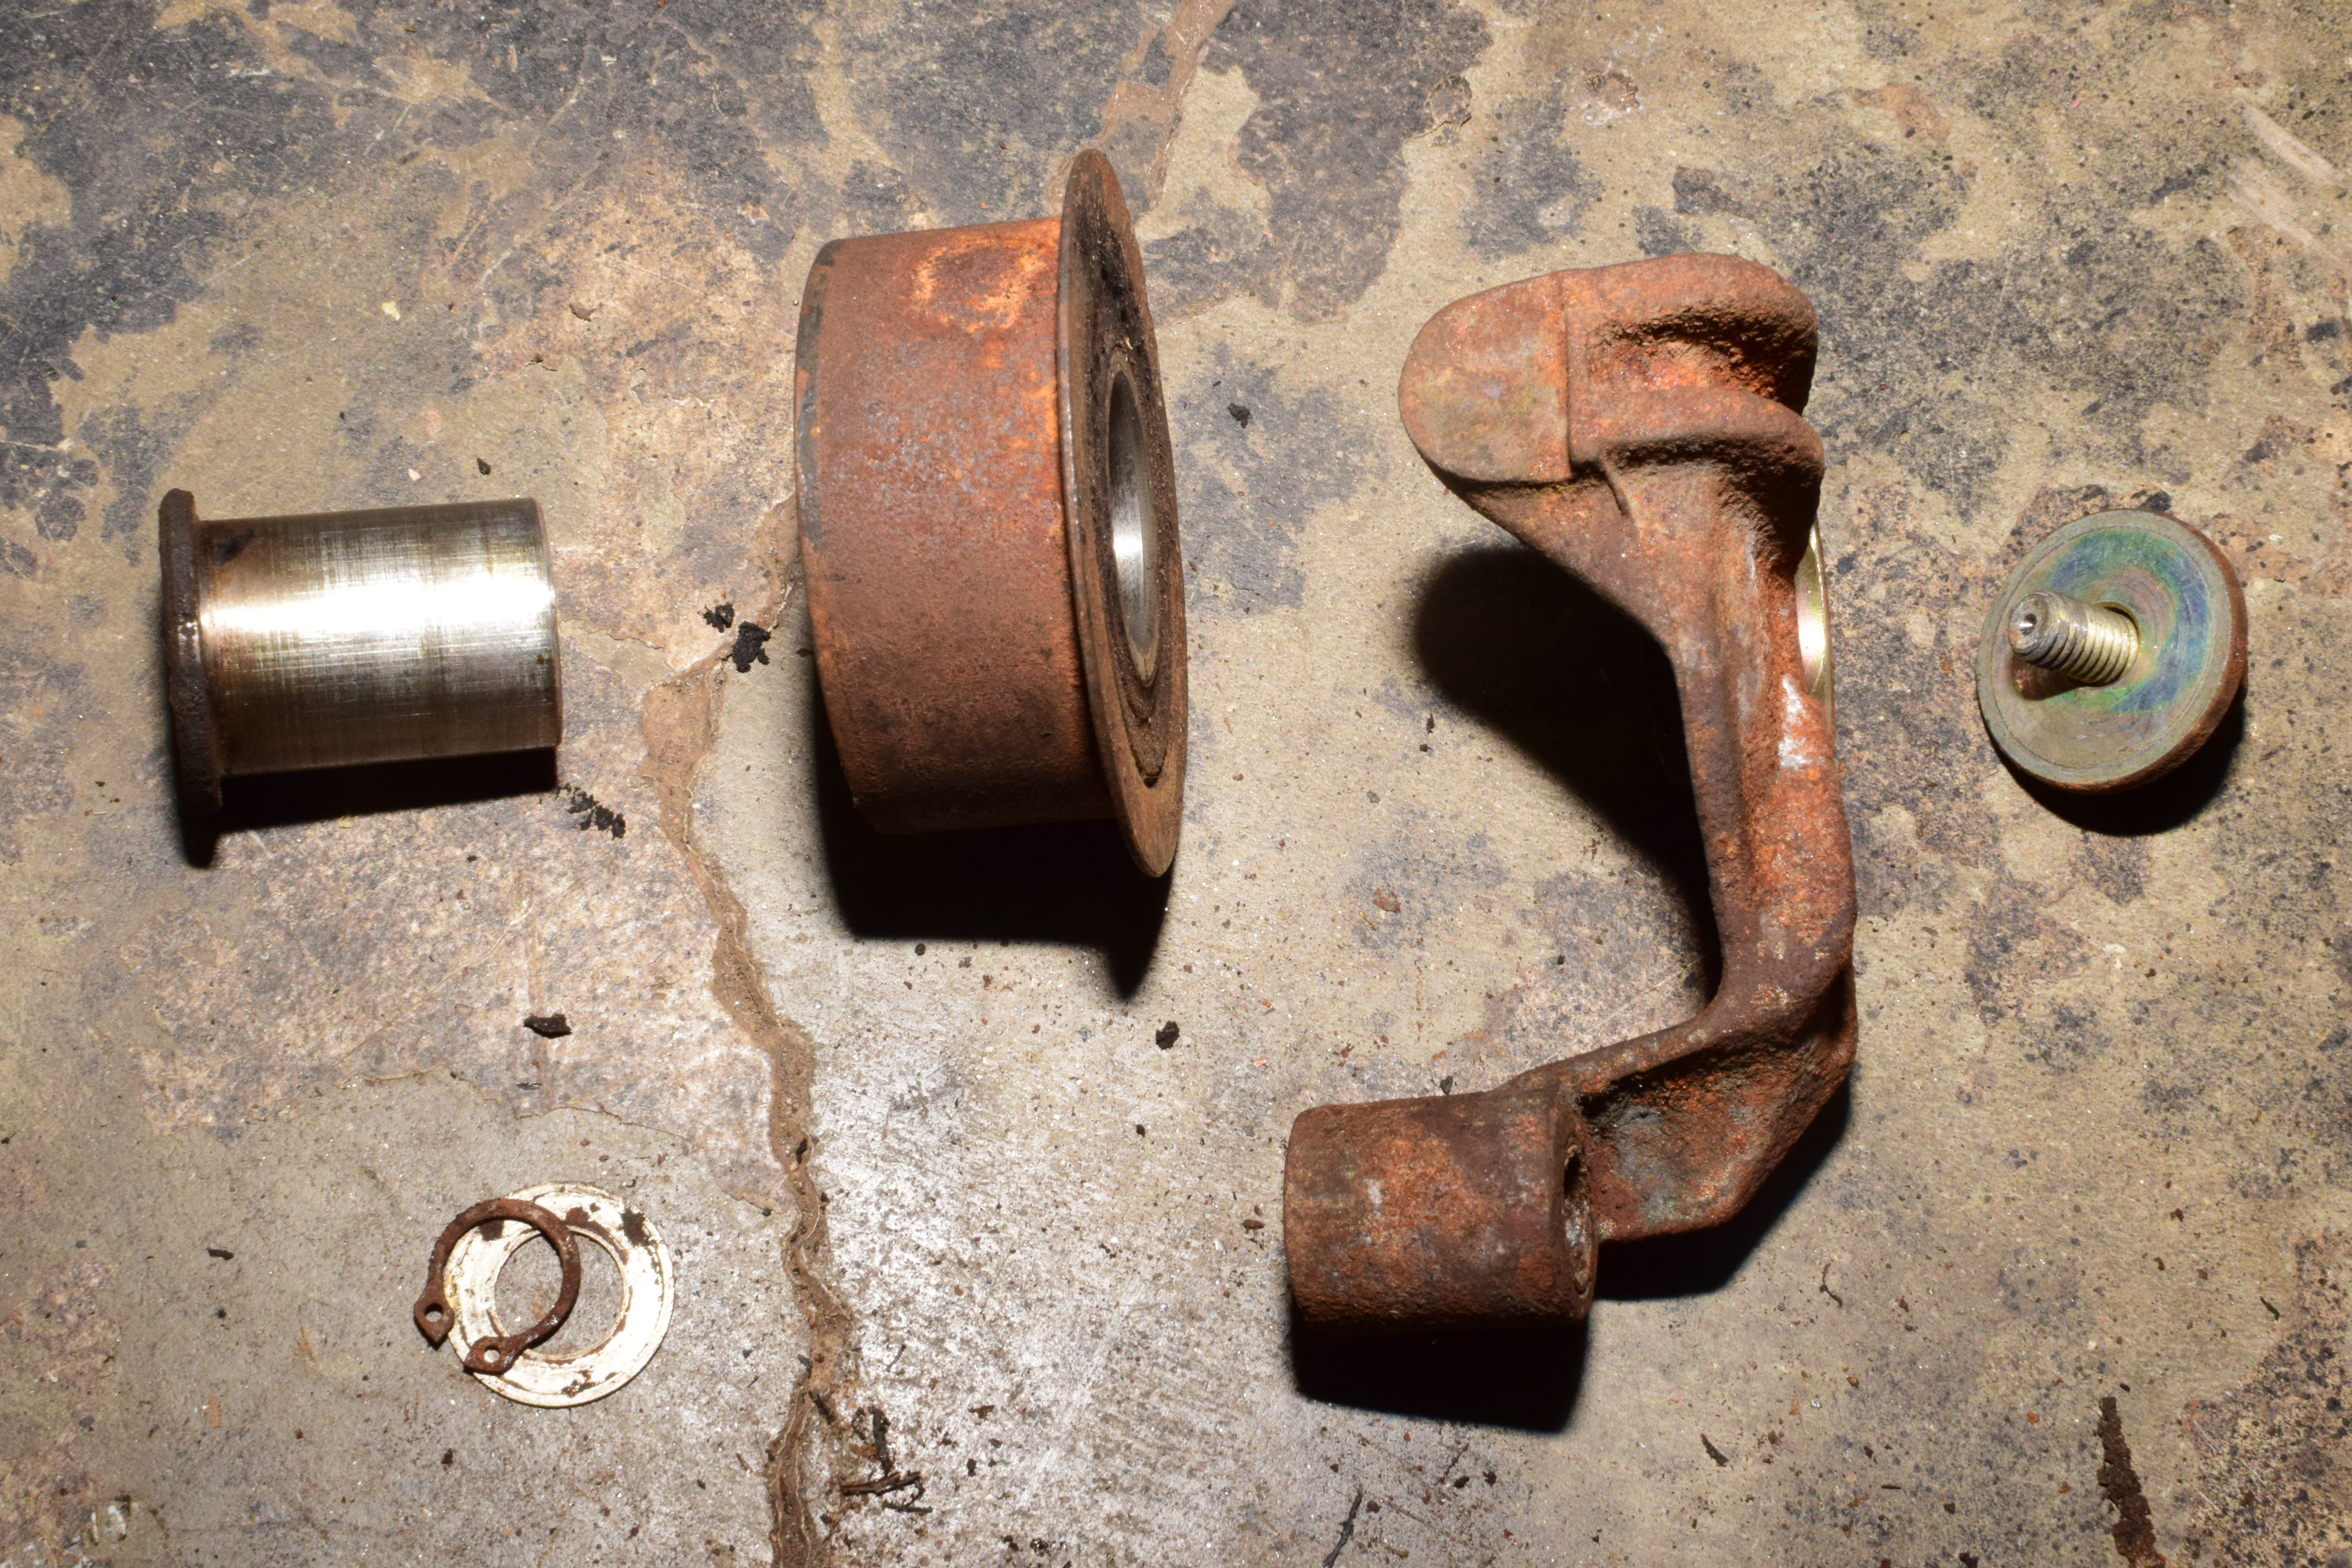
The service manual, translated from the Italian a couple decades before Google Translate became a thing, says that to remove the “belt stretcher” – by which they mean the timing belt tensioner – you’re supposed to loosen the cap locking bolt, compress the spring to release the tension, tighten the locking bolt, and then remove the tensioner and the “jockey pulley”. I, however, decided to try to remove the tensioner without re-reading the manual and didn’t remember any of that. Instead, I took the mounting bolts out of the tensioner to remove it and then slid the old timing belt off. Either way, the job was complete. Two bits of good news came from this. First of all, the water pump bearing feels smooth and is quiet. Secondly, the tensioner pulley bearing was a disaster!
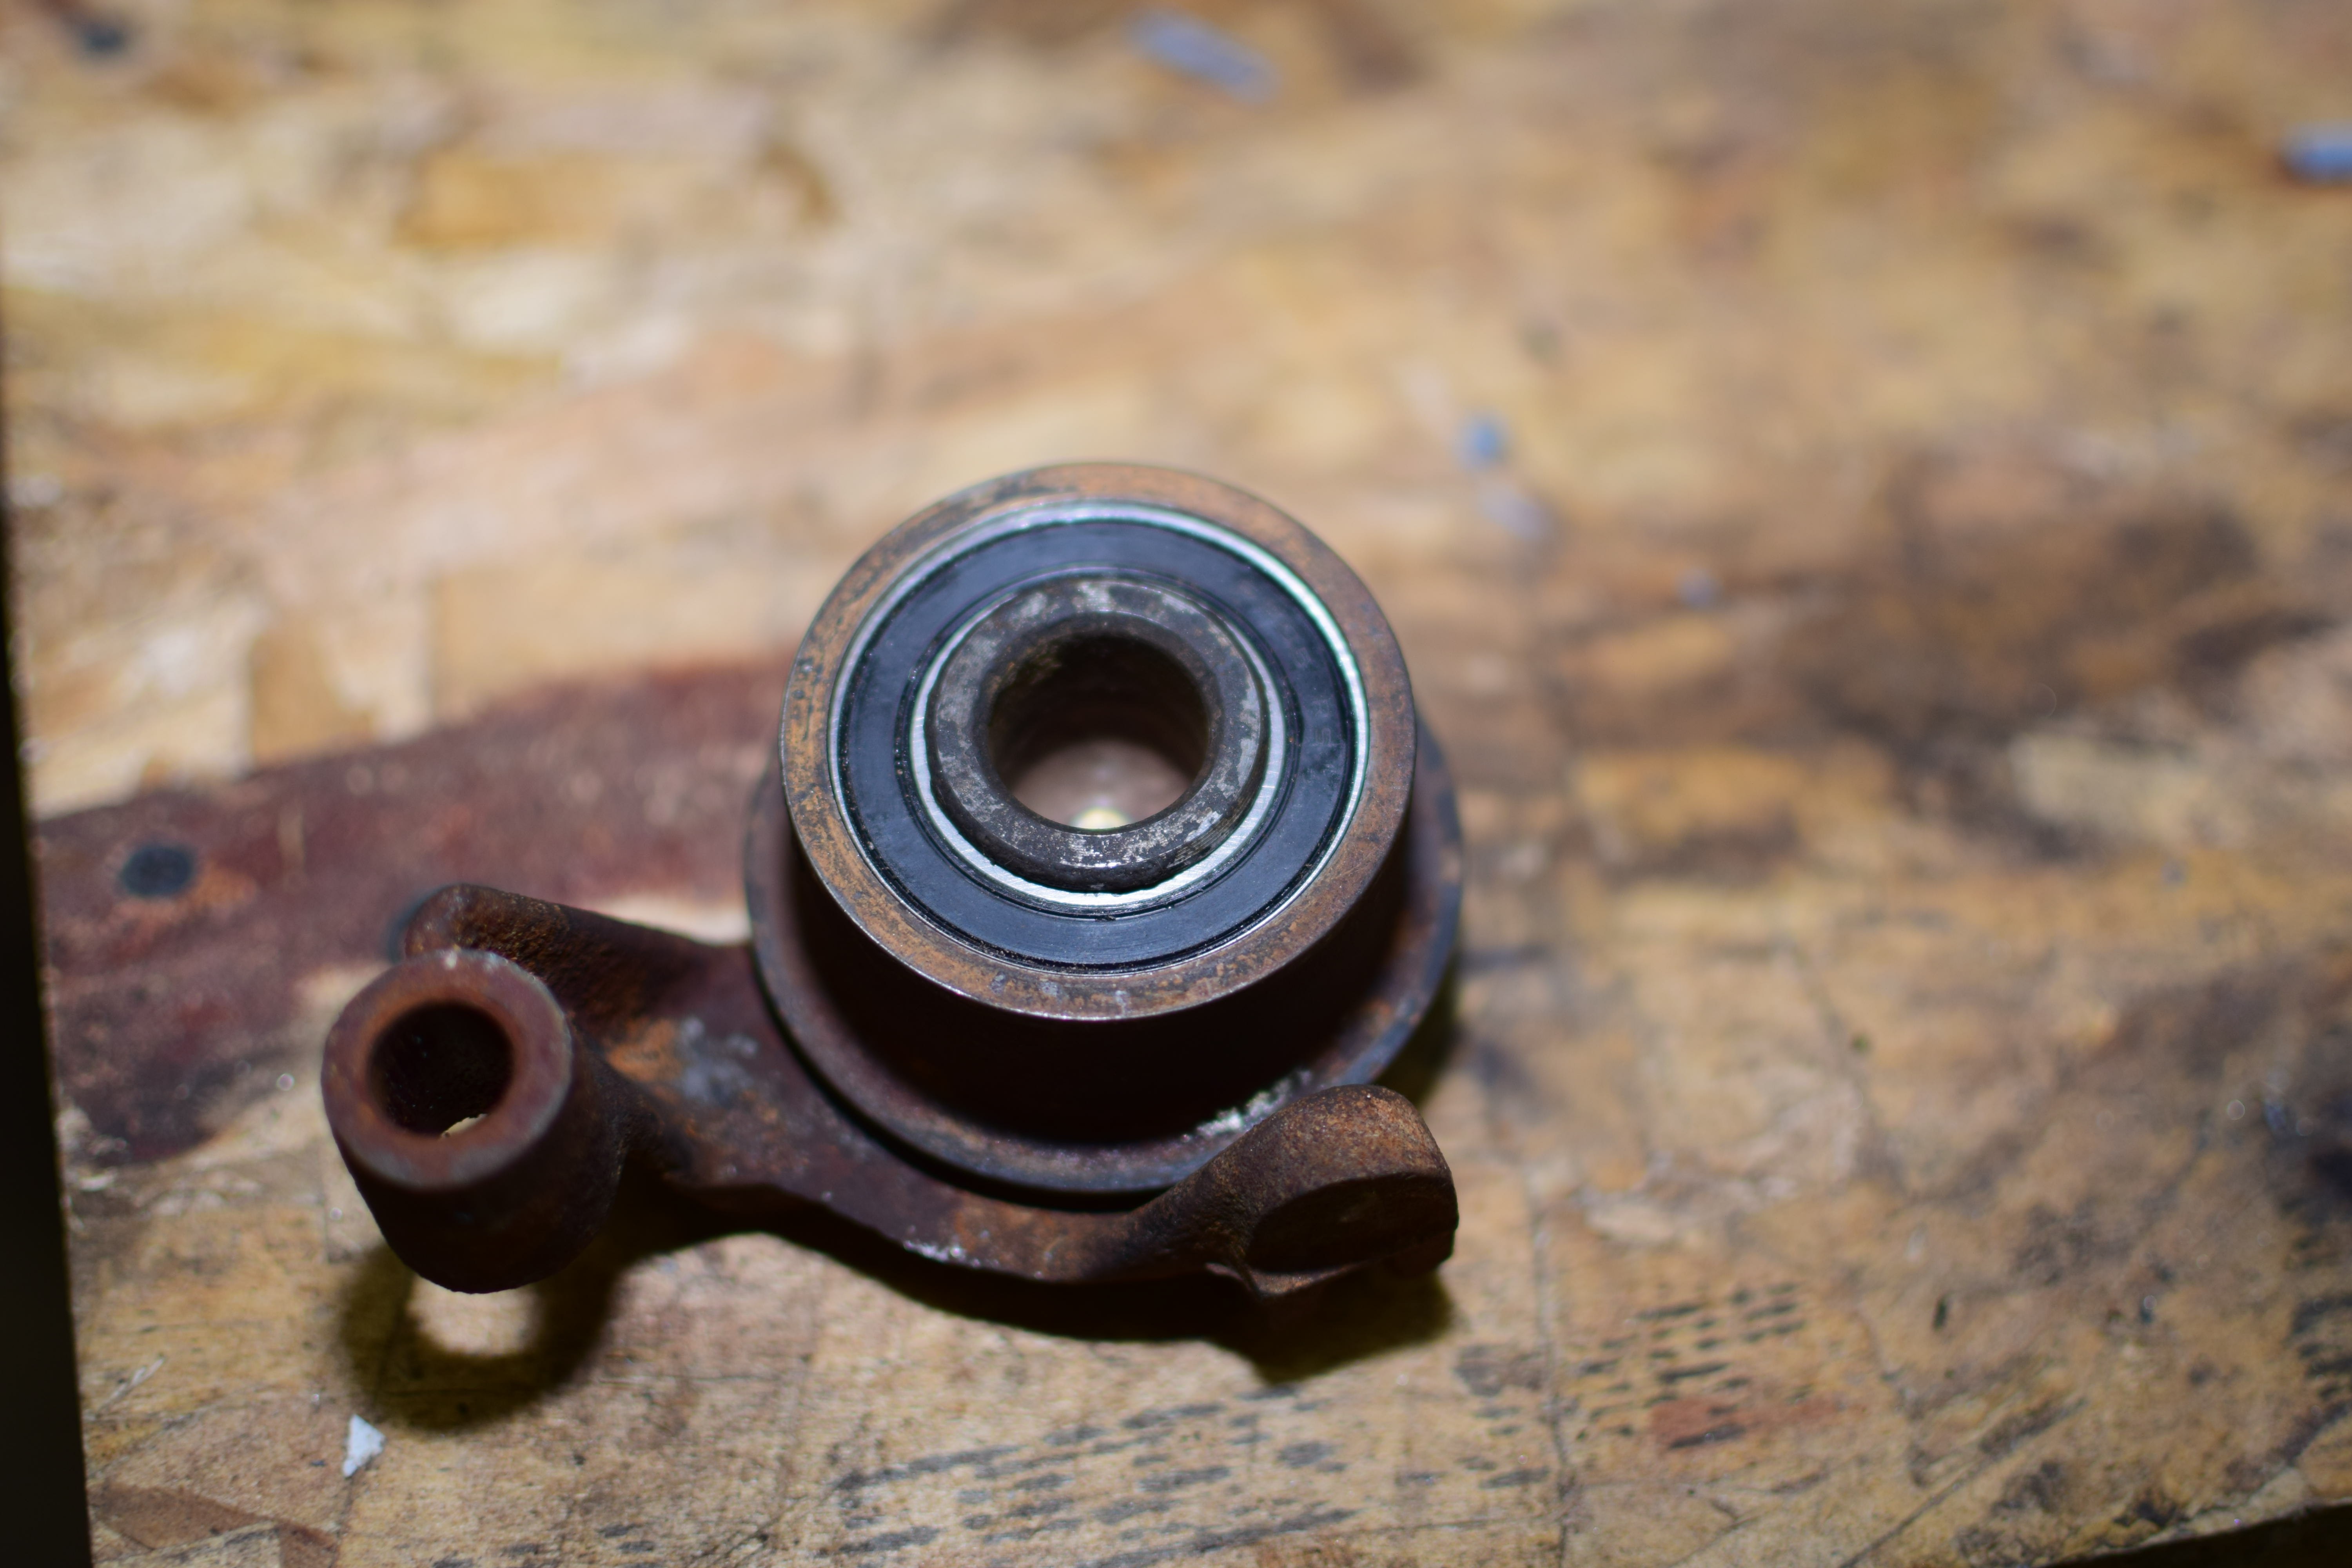
The tensioner pulley is removed by taking off the snap ring and sliding it over its mounting peg. The corrosion meant that it took considerable effort to remove the pulley, but once it was off, I could disassemble it so the bearing could be replaced.
Using the hydraulic press, I took the old bearing out and pressed the new one in.
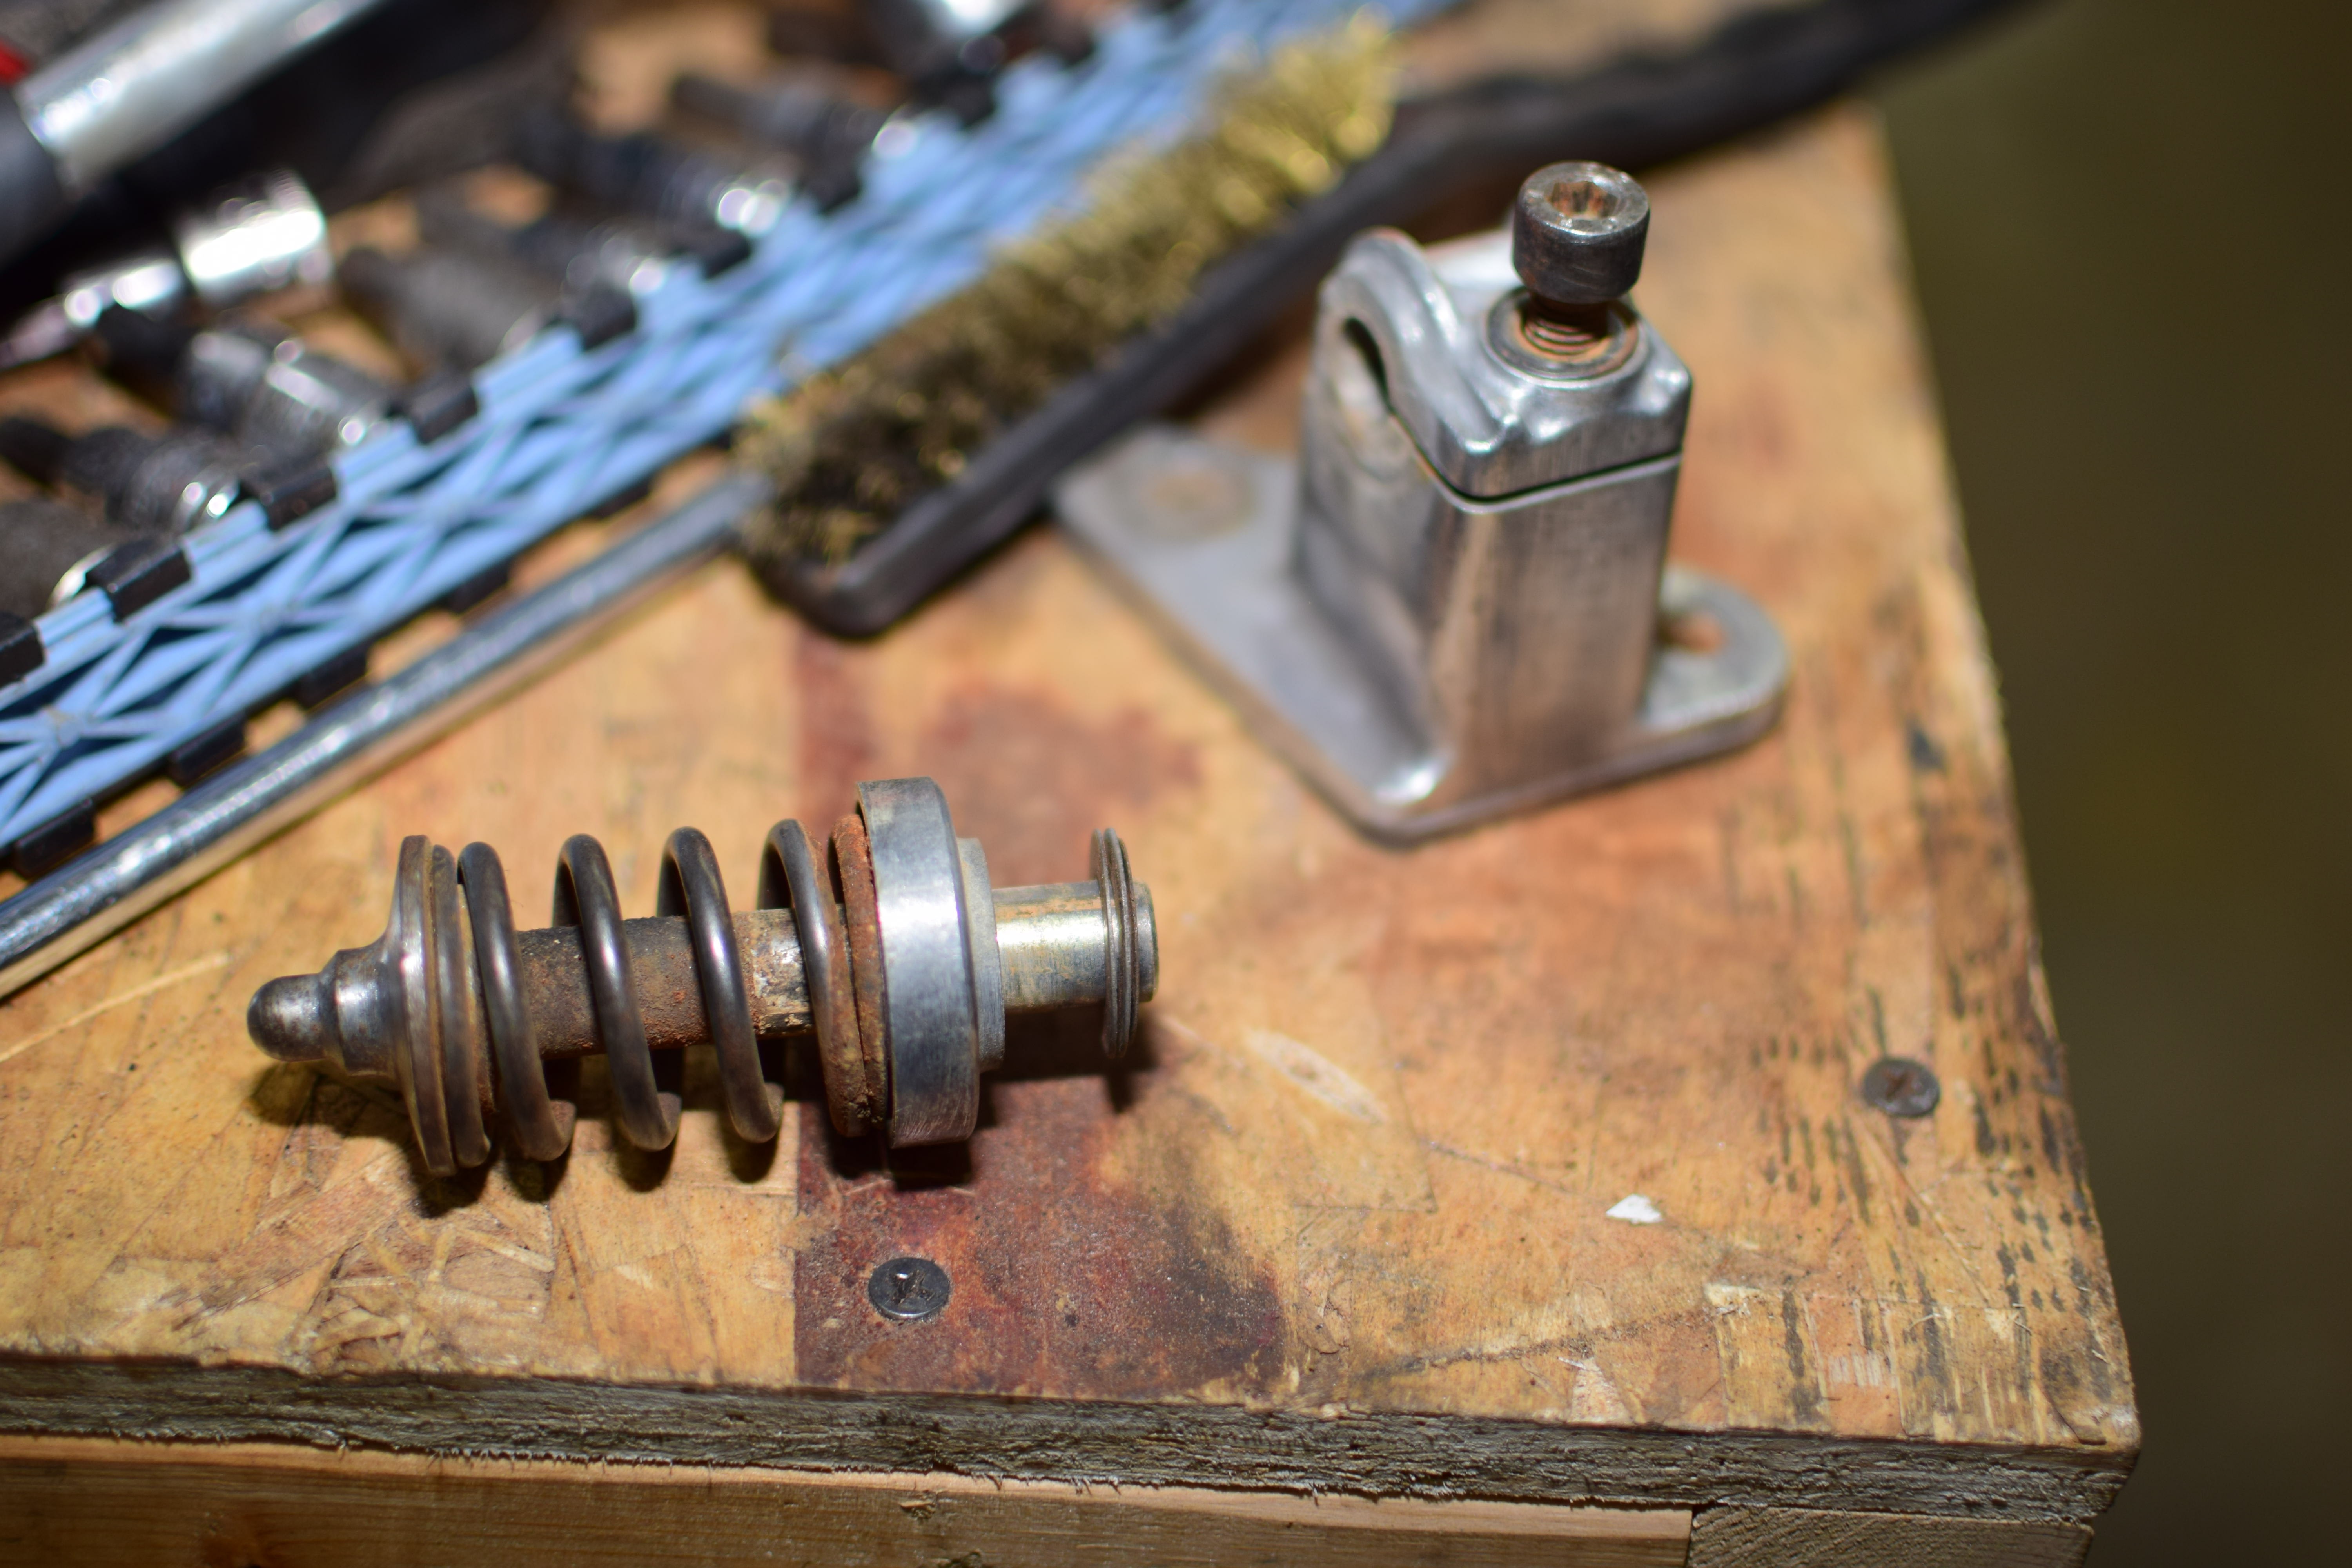
Once I figured out how the tensioner actually worked, I lubed that up as well.
Meanwhile, Dave got in there and cleaned up the pulleys. And the cold-side charge pipes.
Again, I failed to remember the specific instructions, so I got the belt on a tooth off. But I’ll fix that later on. In the meantime, Tim was working on draining the fuel. He was thinking that getting the fuel pump to do the work would be easiest, so we hooked up a battery and tried to get the fuel pump to run. Nothing. He tried connecting 12V directly to the fuel pump and still nothing. It looks like a new fuel pump will need to be sourced.