Cosplay Creations

Cosplay prop weapons

Riven: The Sword

Despite everything being cancelled for the foreseeable future, we’re still going to do a quick costume build! In this case, what I’ve been instructed to build is a sword and some other accoutrements for a character from League of Legends called Riven.

I’ve started by getting some foam glued together along with a 5/8″x5/8″ square dowel for strength.

That will be one half – the other half is yet to be built. I haven’t put the sword sandwich together yet because in the blade of the sword, there’s a cut-out section that glows green, so I’m going to use some LEDs to make that happen. Rather than trying to stuff that into a completed sword, I was going to go ahead and run all the wiring and everything through the foam first and then sandwich it all together.

Right now, I’m waiting on all the electronic bits to show up. The LEDs came today and next I need the switch and the battery compartment. In the meantime, I can go ahead and start cutting out the glowing part of the sword and getting the other half of the foam ready to be attached as well.

Dark Helmet – It’s a little bit better

Long story short… I cut up the fiberglass, reshaped the helmet, re-made the face mask, and a few other things and it’s a little bit better now.

The biggest mistake that I made was the original shaping of the helmet. Perhaps if I were a sculptor I would have had the requisite skill to create a plug that was even and perfect. That is not the case, however, and the helmet was very lopsided. The top of the helmet was just about perfect-ish, but the flare was all wrong. It was too short and it was lopsided. But since it was made out of fibreglass, the solution was pretty simple: Cut it off and make a new one!

I don’t seem to be able to find all of my pictures of that, but basically:

In order to make a good, uniform flare I decided to turn to my old friend, CAD – Cardboard Aided Design. After determining the line that the flare should take, I made a cardboard cut-out that reflected that line. I used that to make a couple dozen more that were all identical. After marking out the exact circle that I needed to follow, I attached those bits of cardboard in that circle and reinforced them. It looked a bit like building a cathedral with flying buttresses but when it was all done, I had a perfectly symmetrical form around which I could create the new flare from fiberglass.

In the background is the cardboard form that I used. Once that new piece was made, I trimmed it up and attached it to the existing helmet. It wasn’t a perfect fit, so some more fiberglass work was needed. To bridge the gaps, I just used a little newspaper to help hold the form while the epoxy dried.

Basically there was a bit of a dip between the top of the helmet and where I needed the flare. The newspaper bridged that gap and the fiberglass went over top of that to bond everything together.

Then some sanding and a little bit of Evercoat to smooth it out.

It also got a coat of gloss black instead of the more durable, but not as shiny Plastidip.

From there, I needed to get the facemask and the head-mounting portions sorted. I started with a new cardboard version of the facemask:

And from there I used some plastic sheeting to form the new mask.

A little bit of Evercoat and some paint got me a mask that wasn’t anywhere near as awful as the original. Not that it was a very high bar to jump, let’s be honest.

I used the head strap for an old welding helmet, but the mask still doesn’t want to clear the shell of the helmet. That’s something I still need to work on. Also, when it came to the visor bits, I tried using some clear plastic with tail light blackout spray to tint it. That doesn’t work. For the next attempt, I used a shaded face shield lens that came from Amazon and that worked perfectly.

The next problem that I had was trying to get the helmet to remain mounted on a human head. The first attempt at this was done at the RV in the campground the night and morning before the costume made its second trip to GenCon. Basically, I fiberglass-ed in the welding helmet head strap:

The problem is that the helmet’s weight was completely different now. The balance was way off and the whole thing wanted to roll backwards off the head, placing an inordinate amount of force against the forehead. The wearing experience could best be described as “hateful”. But it looked pretty good.

For DragonCon, my mission was to make the wearing experience a bit more tolerable. Taking inspiration from Colin Chapman, I decided to simplify and add lightness. Out with the massive amount of fiberglass that was holding the welding helmet head strap in place:

And I made a new inner hat out of plastic sheeting:

And using a little bit more of the plastic, I made a little bit of a post to offset the new inner hat from the shell of the helmet to keep it positioned correctly on the head.

Now there was an inner hat that was securely attached to the shell and that would also securely – but not painfully – attach to the head.

With the face mask re-mounted, the helmet is now lighter, the weight is more evenly distributed, and it is more firmly attached to the wearer’s head. The face mask is still not operational – that’s something that I still need to try to figure out – but version 2 is certainly a big improvement over the original.

Dark Helmet: Final Product

Finishing the project wound up becoming an all-consuming rush to the finish line that wasn’t actually completed until about 20 minutes after we got our badges at GenCon!

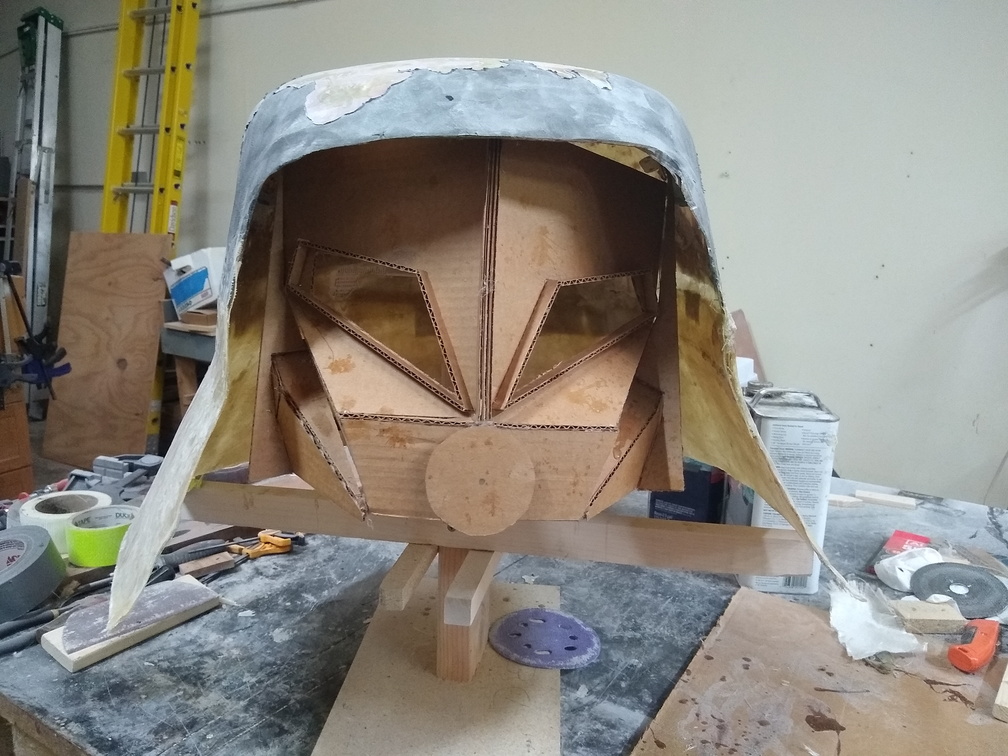
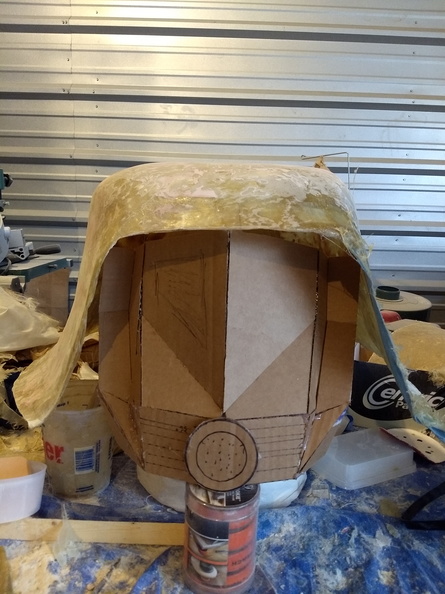
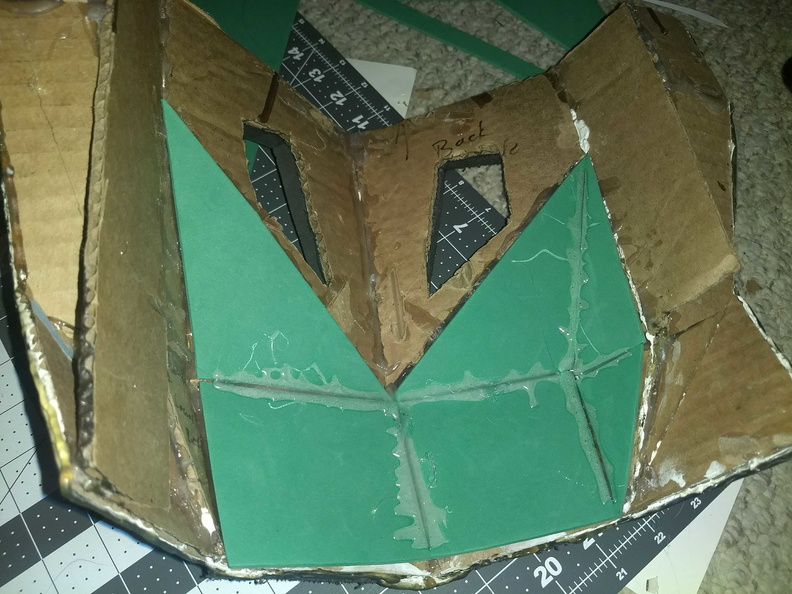
The original facemask was going to be resin over cardboard, but it just wasn’t coming out right.  My typical goal with these projects is that it shouldn’t look like a 3rd grade art project, and (with all due deference to the Third Graders of the world) this was looking pretty much 3rd grade.

Maybe it was the rush job, maybe it was enthusiasm that exceeded capability, maybe a combination of the two, but either way that wasn’t going to work.

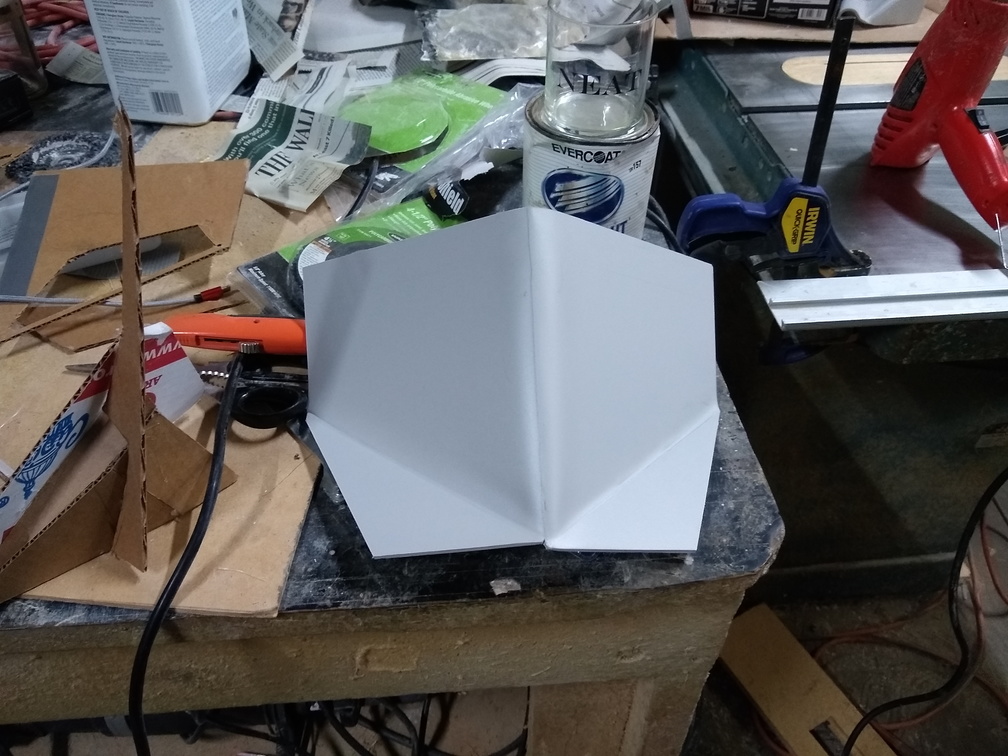
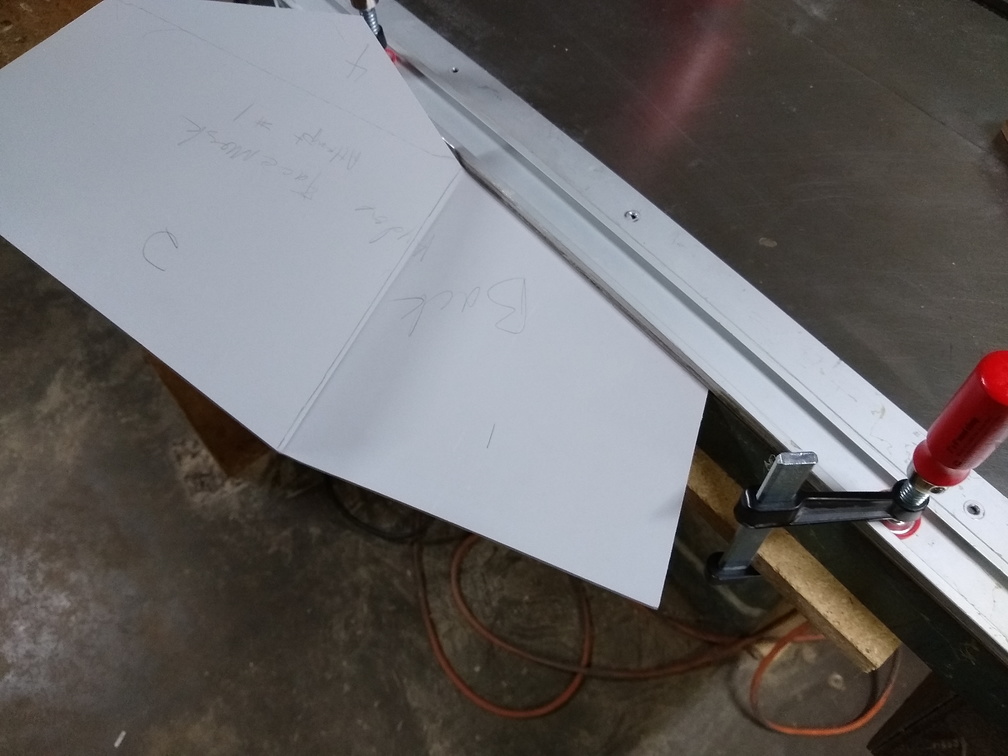
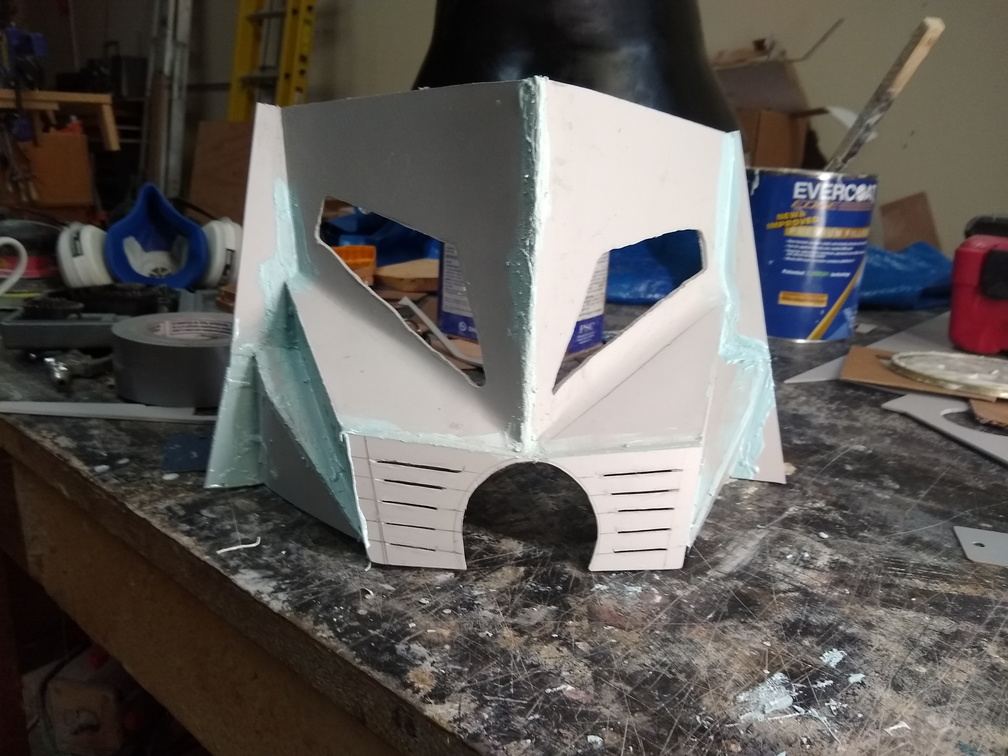
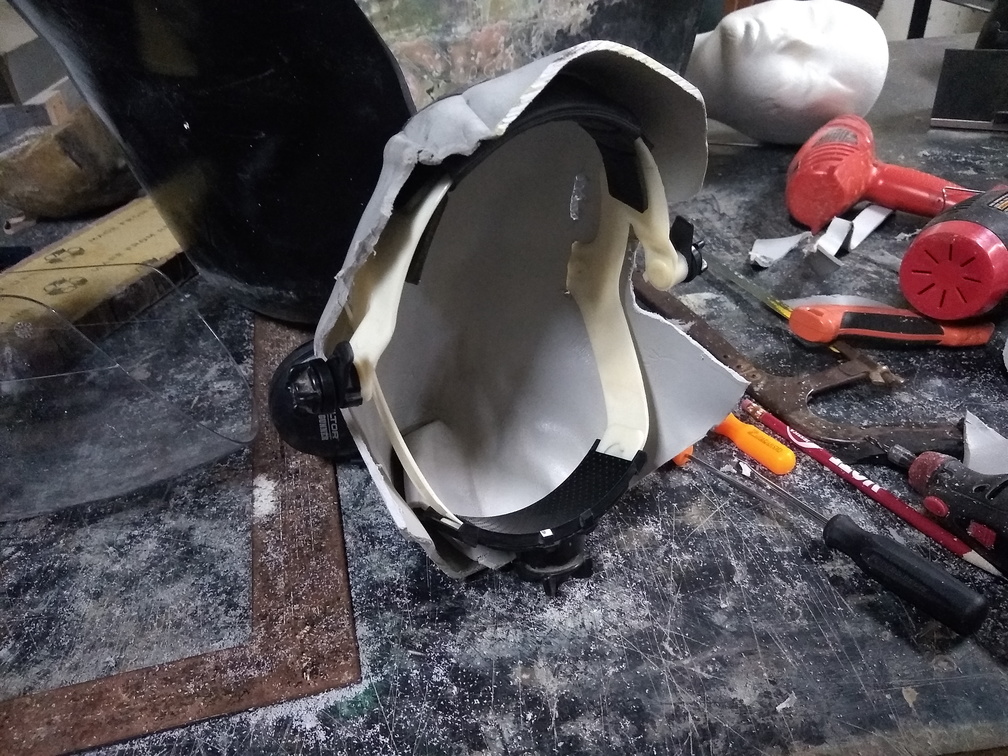
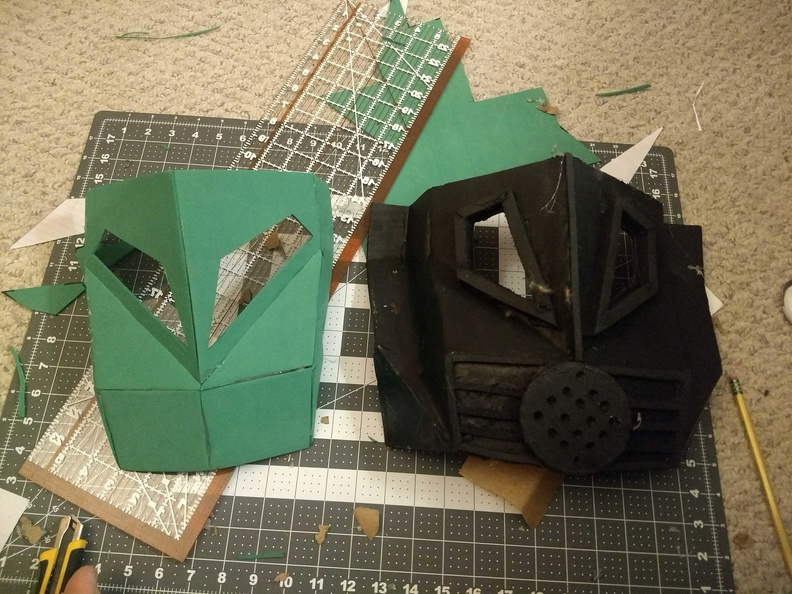
It was the day before we were to leave for GenCon that the cardboard mask wasn’t turning out and I had some volunteer work to do that night, so I had a while to think about what to do.  When I got home around 22:30, I had decided that the only possible direction to take was to start over on the facemask, so I pulled an all-nighter.  I wish I had saved my template bits from the original mask because it would have sped things up a bit, but I used paper to re-build the template pieces and then using some 6mm craft foam, I cut the new facemask.
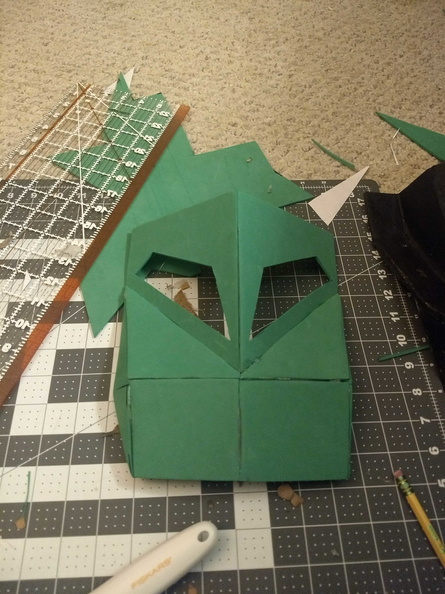
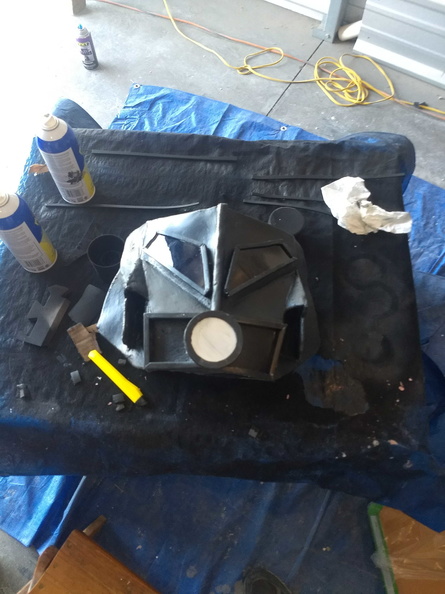
Before and after:

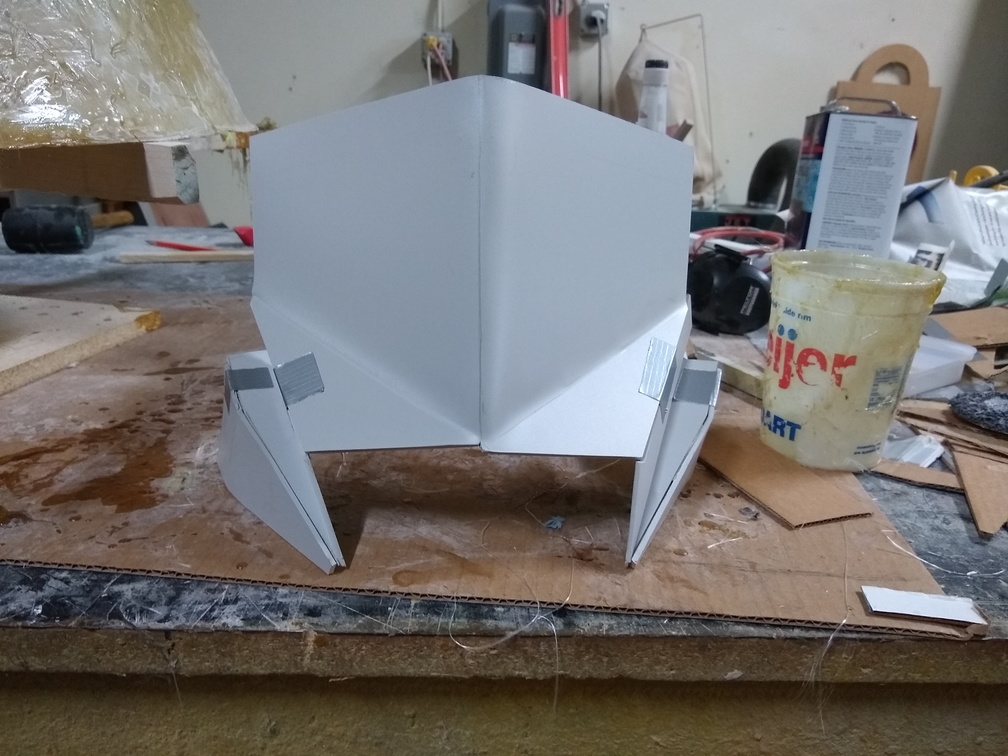
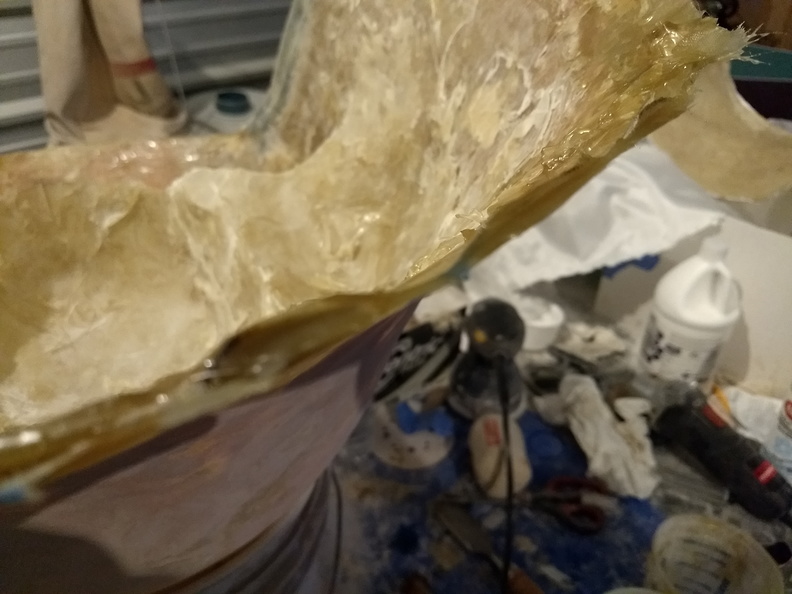
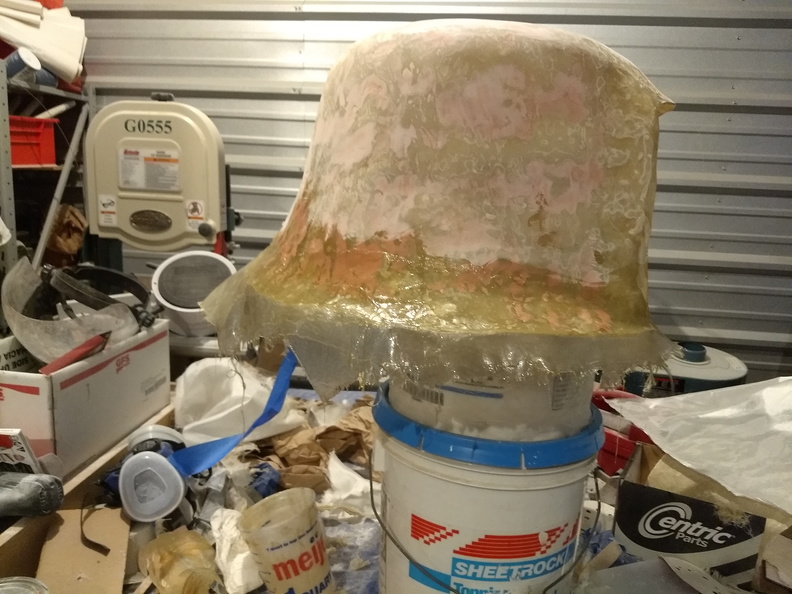
Once I had the craft foam mask built, I experimented with Worbla for the first time.  Thanks to a small bit of damage on the sheet, we were able to get a small length of the stuff from a booth at DragonCon last year for a discount, so I chopped off a bit and started to play.  Turns out the stuff is pretty easy to work with and doesn’t require a whole lot of heat to get very pliable.  Using the Worbla, I covered the mask to give it some form.

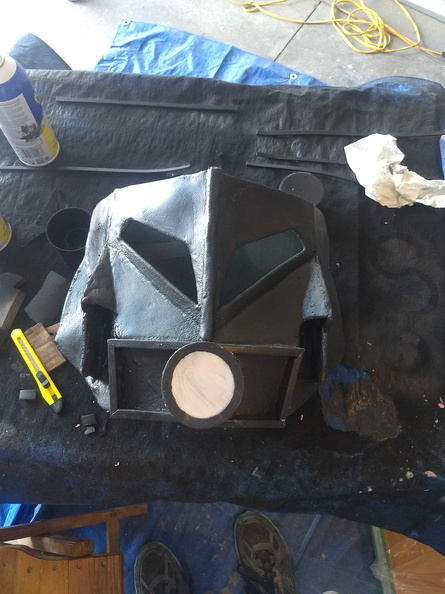
Honestly, still not looking too great, but at 0500 when I still had a full day of work to deal with plus leaving for GenCon in 12-14 hours, I was out of options.  I used regular floor tile foam to make the detail bits on the front, but what really stumped me were the lenses.  I searched high and low for some tinted plastic sheet in Office Depot, Party Town, and even Meijer.  Nothing.  Ace wasn’t any help, nor was Home Depot.  So I got some VHT Nite Shades spray and some clear plastic packing material from a kid toy and made my own.  That actually worked out pretty well, but I wound up putting on too many coats — it got a little too dark and there was a little orange peel in the coating from being so thick that it made it pretty hard to see with the facemask down.  But it looked okay from the outside.

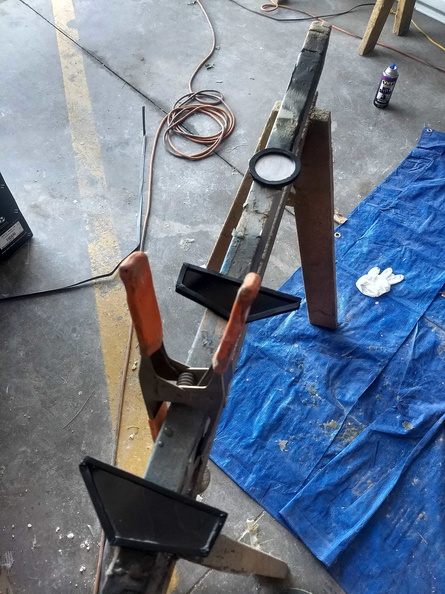
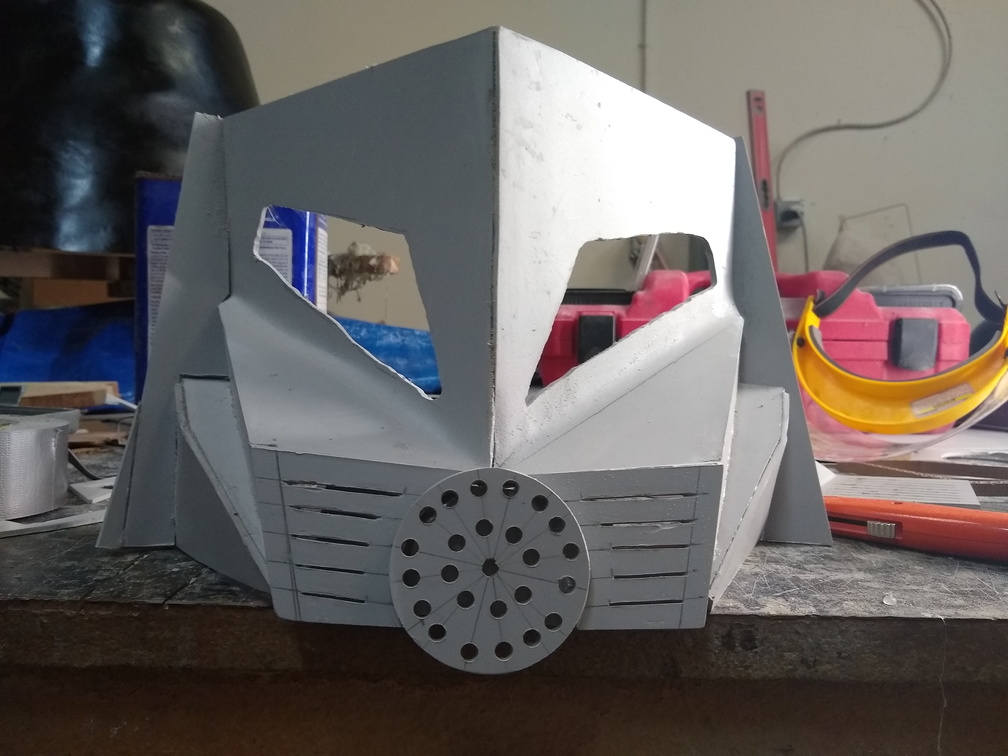
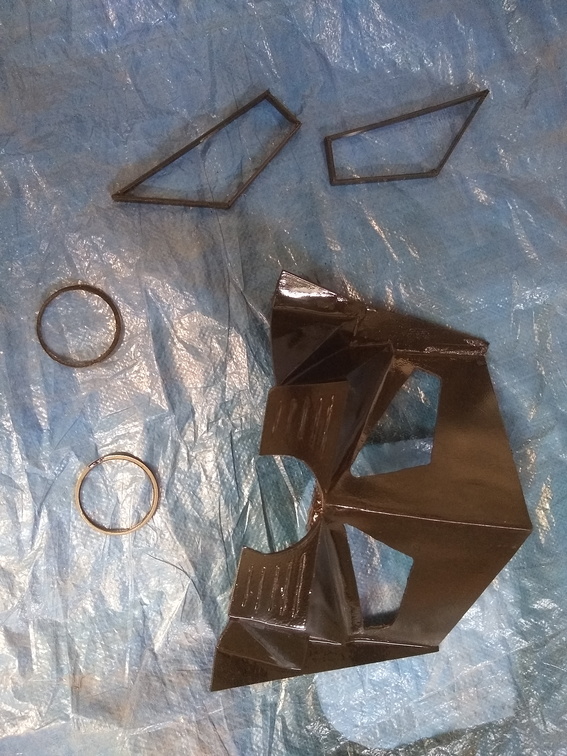
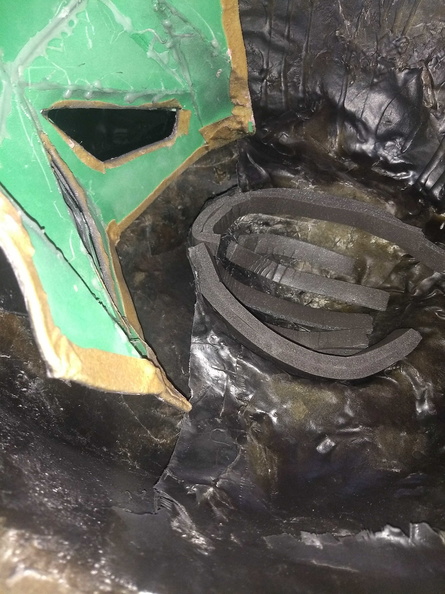
To make the lenses, I first made four frames from EVA foam and hot glue.  I cut the lenses to size and sandwiched them between two frames for each side and then filled in the rough spots and gaps with body filler and gave it some PlastiDip coating.

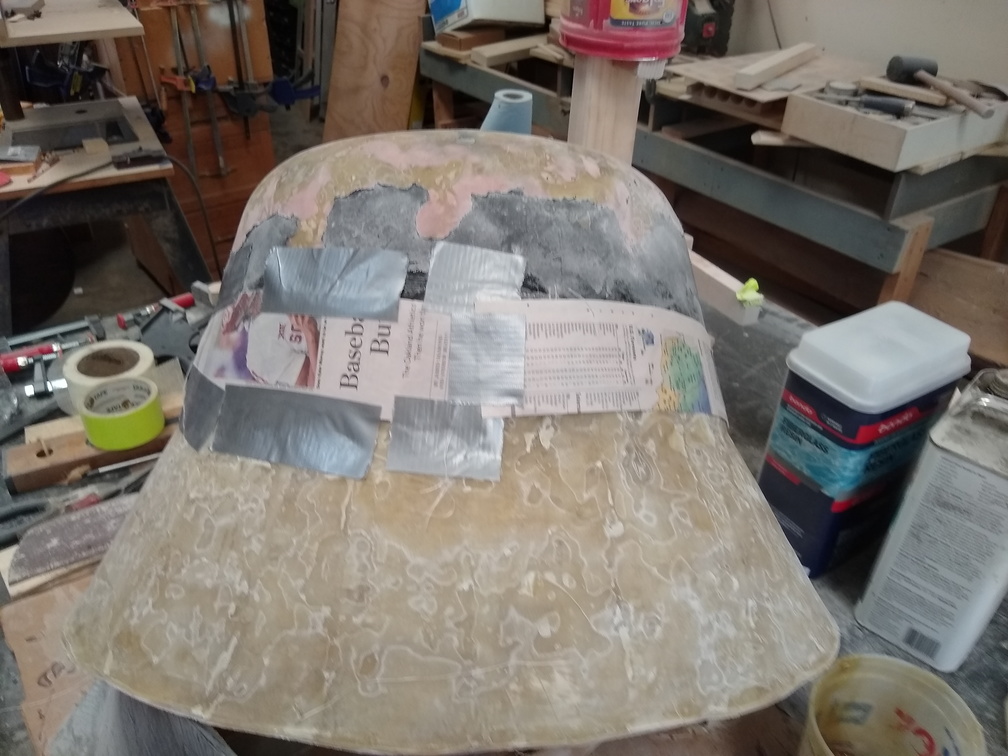
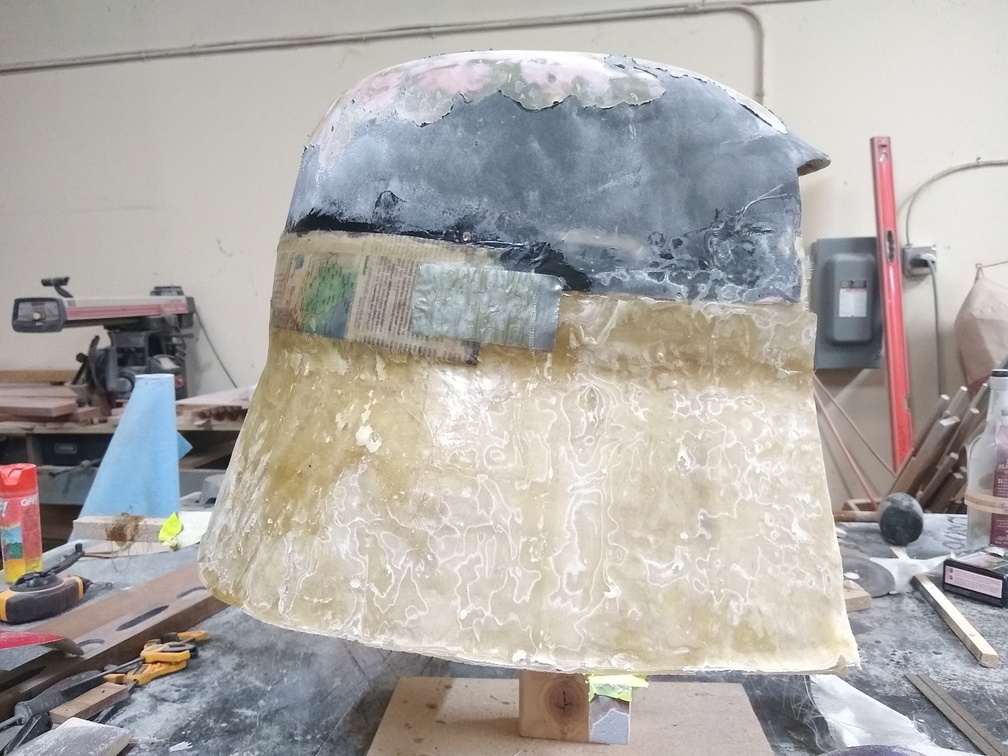
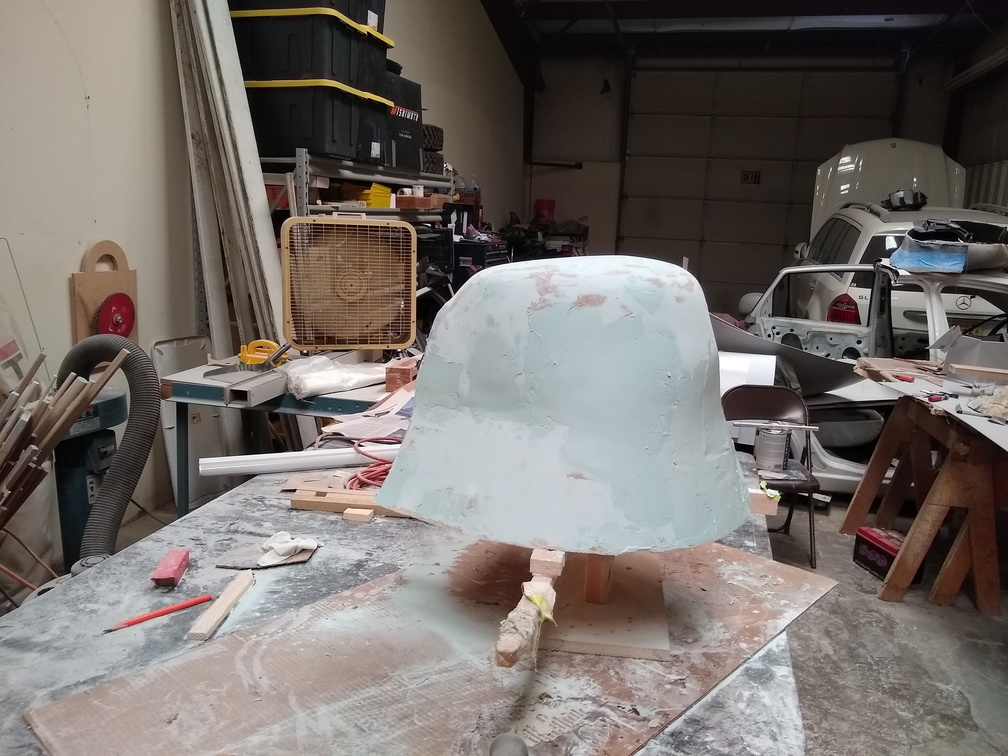
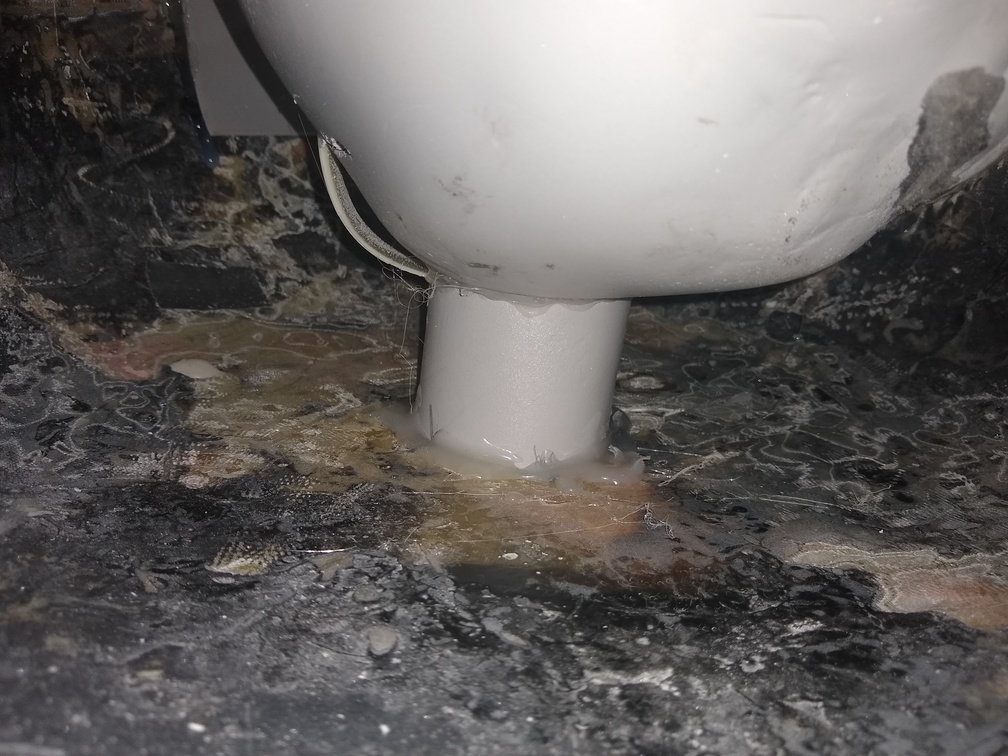
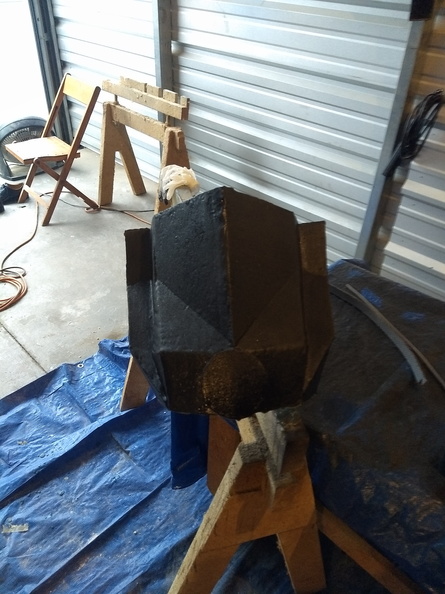
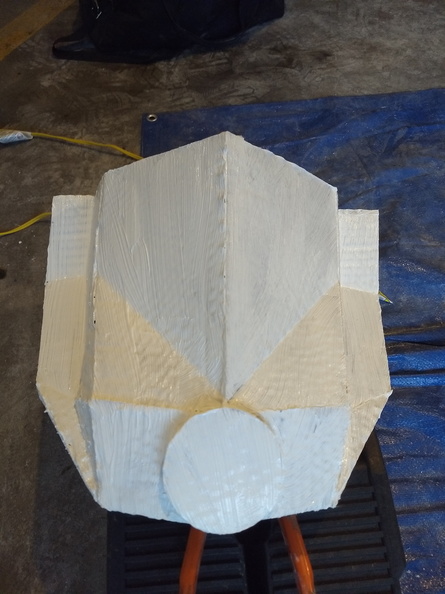
The rest of the facemask got PlastiDip and wound up not looking so great.

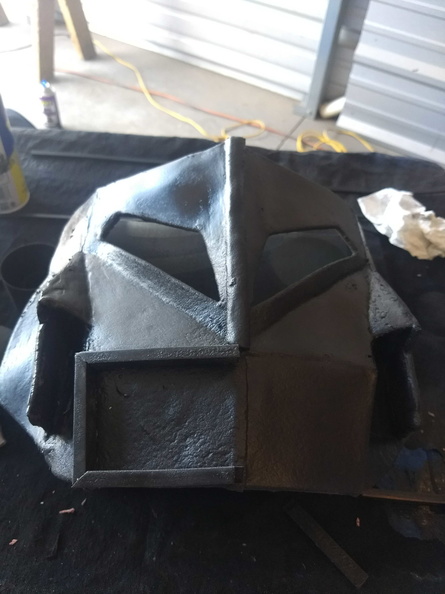
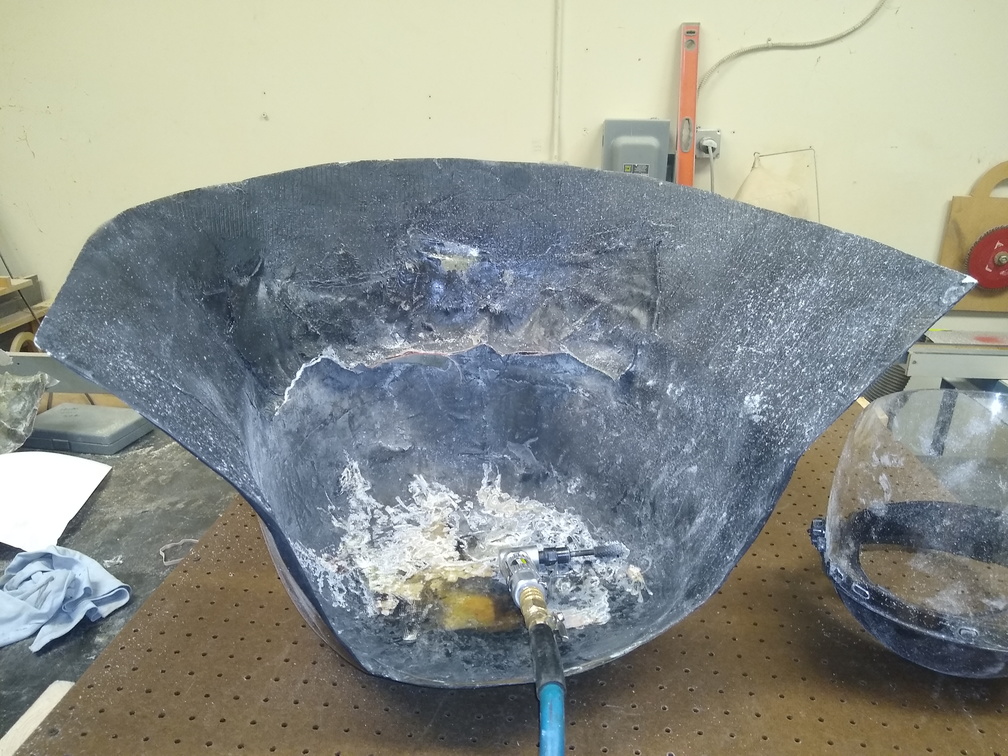
Between the Worbla not being very smooth and the PlastiDip having a rough finish, it looked pretty bad.  I had tried coating the Worbla with wood glue and sanding, but frankly I just didn’t have enough time to put on enough coats of glue and do enough sanding.  So, I sanded down some of the PlastiDip and applied body filler to smooth it out.

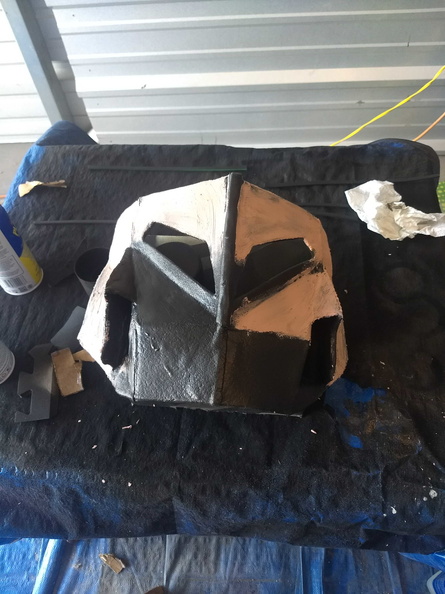
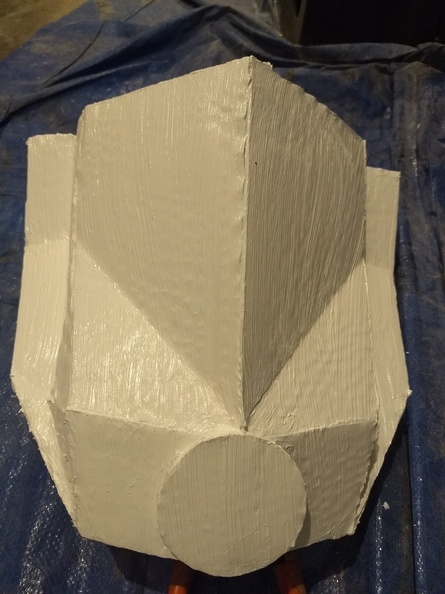
It started to look a little bit better, but not perfect.

At this point, I had to go ahead and call it complete so we could get on the road.

Did I mention that I had figured out how to hinge the facemask already?  No?  Well, that’s because that was still on my to-do list.  Here we were, about an hour or two from loading up the RV and heading West and not only was the hinge not working, I had no idea what I was even going to use.  I took a trip to Ace Hardware and picked up a couple different things that they had in stock and hoped for the best, and hit the road.

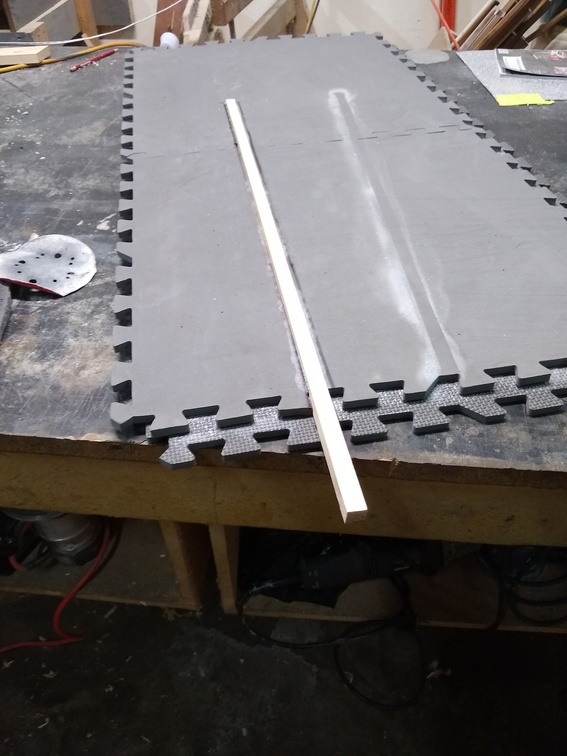
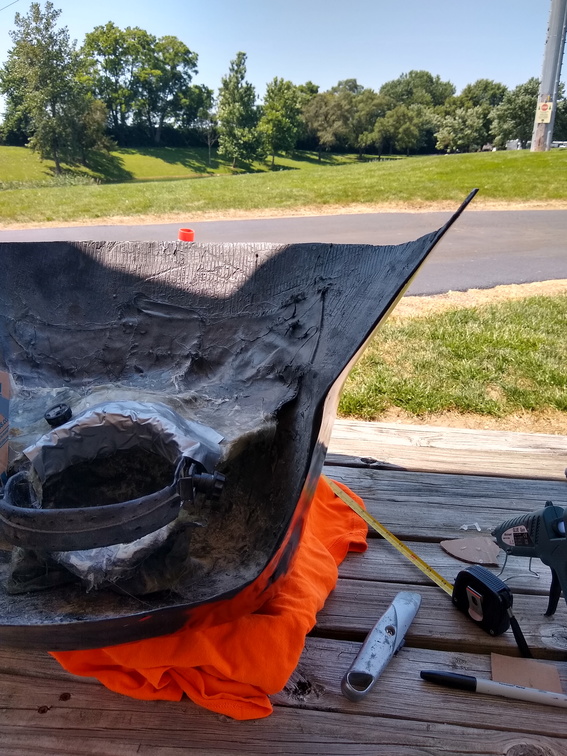
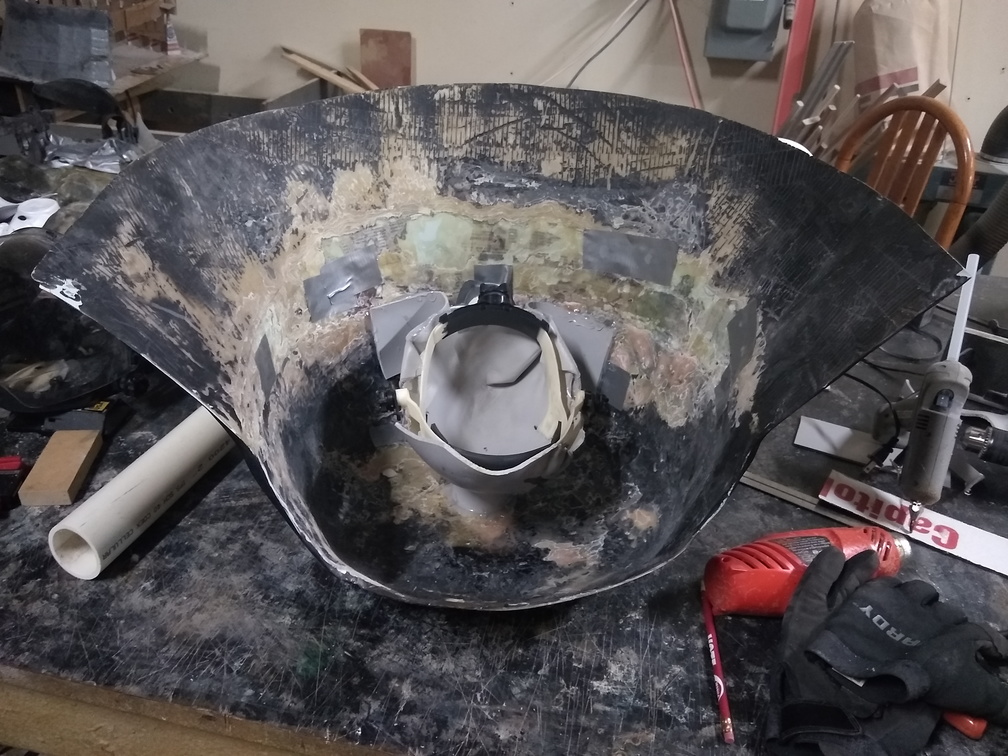
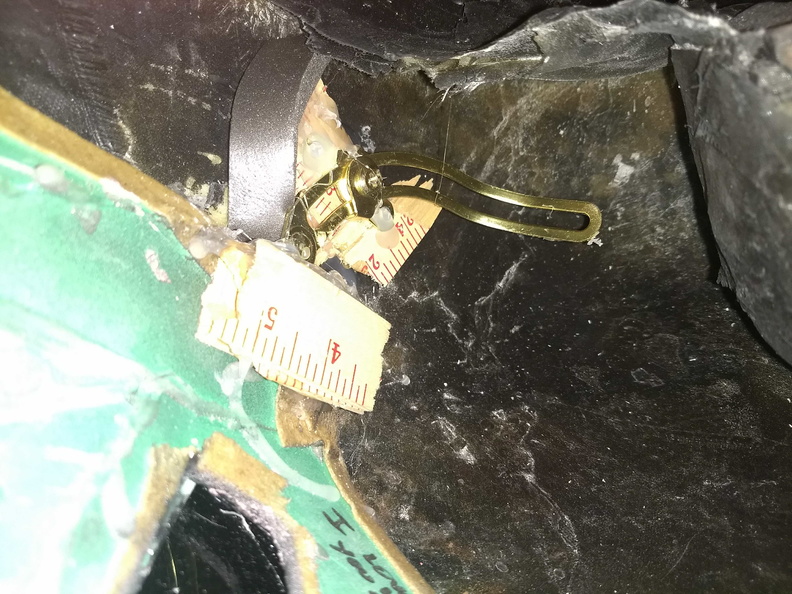
When we arrived at the campground, I grabbed a beer and started thinking this through.  One of the things that I got at Ace were a couple lid supports.  These were long, curved brackets with a hinge and a range of adjustability.  It took most of the night and a lot of time in the morning, but those were absolutely the ticket I needed.  In order to mount them in the right spot, I needed to build up the inside of the helmet a bit, so I found an old wooden yardstick that was on the RV when I bought it and I broke it up into little bits which I hot-glued together to make a mounting platform.  The brackets needed some adjustments and some bending, but eventually, I had a a facemask that would hinge up and down.

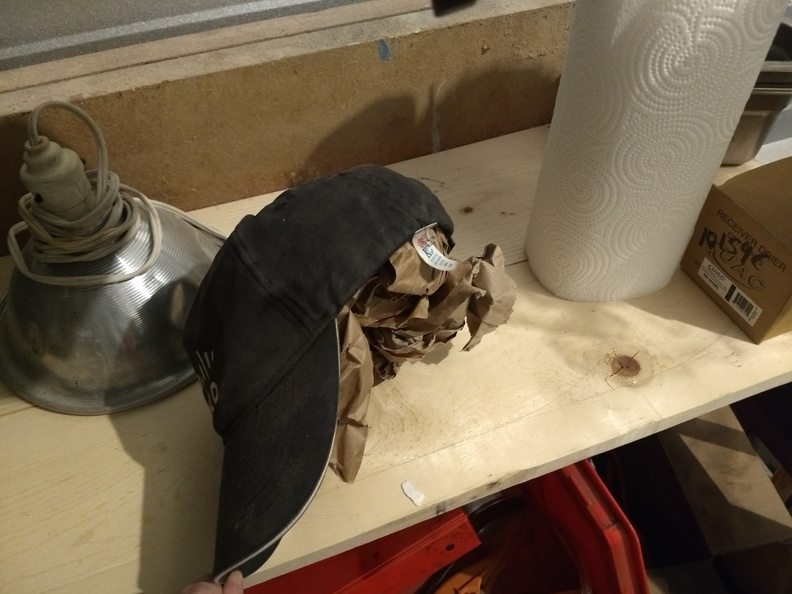
I also bought some weatherstripping from Ace that I used to cushion the inner hat for a less stabby wearing experience.

All said and done, we got in the car and headed to the convention center

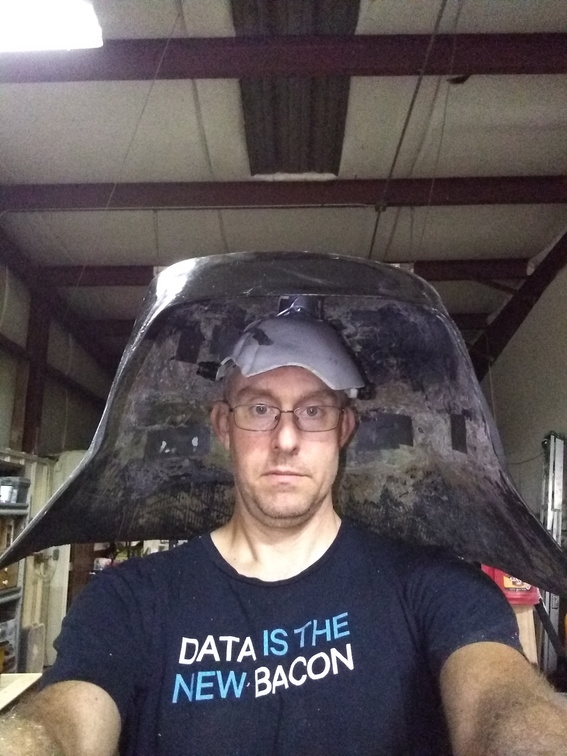
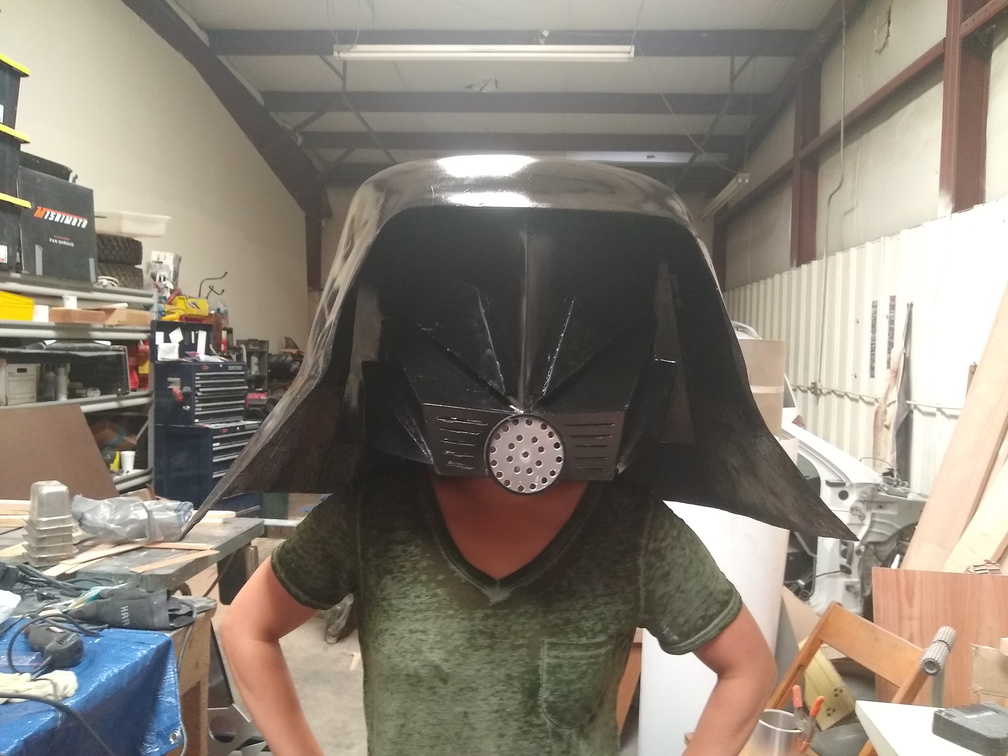
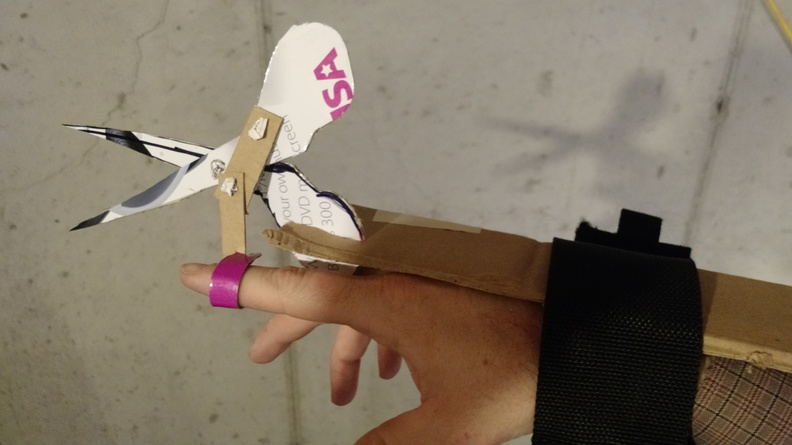
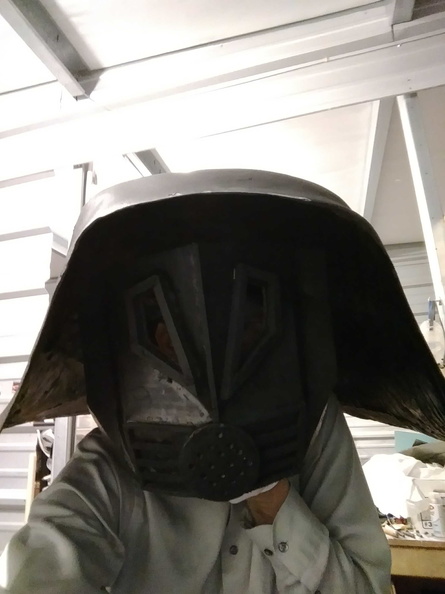
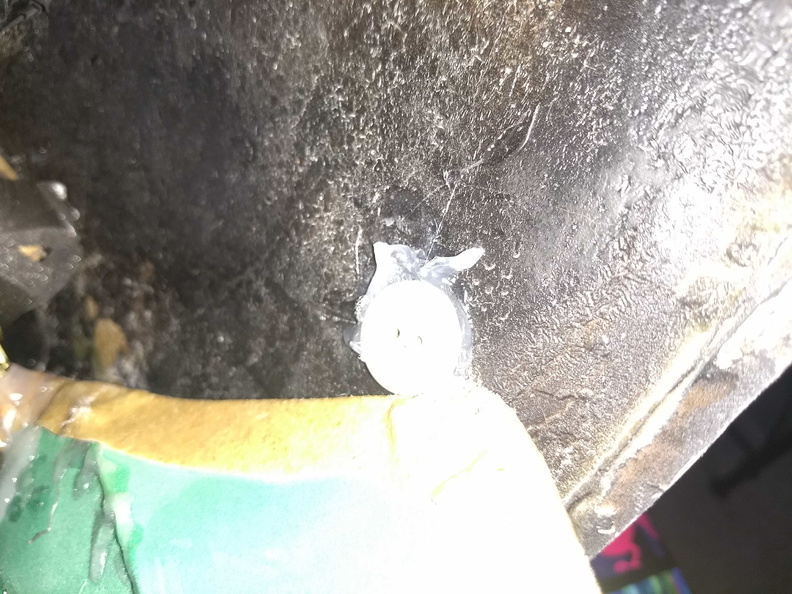
There was really only one problem that remained:  The facemask didn’t want to stay in the upright position.  I brought most of the tools with me and some supplies, so as we walked from the car to the convention center, I worked with the helmet to try to find a way to build a latch.  By the time we were finished getting our badges, I knew how to solve the problem, but I needed something to make the latch out of, some sort of material.  As I looked around, our friend handed me a button that was falling off of one of his shorts pockets anyway, and a little hot glue later, I had a latch:

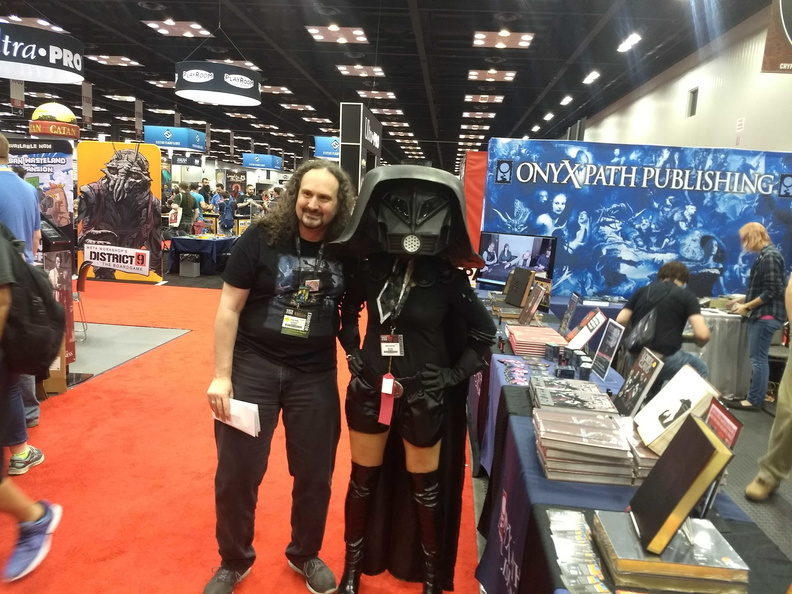
I’m still not completely happy with how it turned out.  The mask is a little bit out of alignment and it’s still pretty rough.  I also screwed up a bit on the detail work on the front, not having all the various surfaces and angles correct.  This was, however, the single most popular costume that we’ve done.  Through the whole convention center, there was a constant murmur that I could hear of people recognizing the helmet and pointing it out to each other.  We took a ton of pictures, and got many compliments.

Before it goes out again, there are some improvements that need to be made:

Take out the yardstick supports and build fiberglass supports to replace them and make them more aligned.
Build a stop in the hinge to keep the mask from being lowered too much
Replace the lenses with a material that is easier to see through
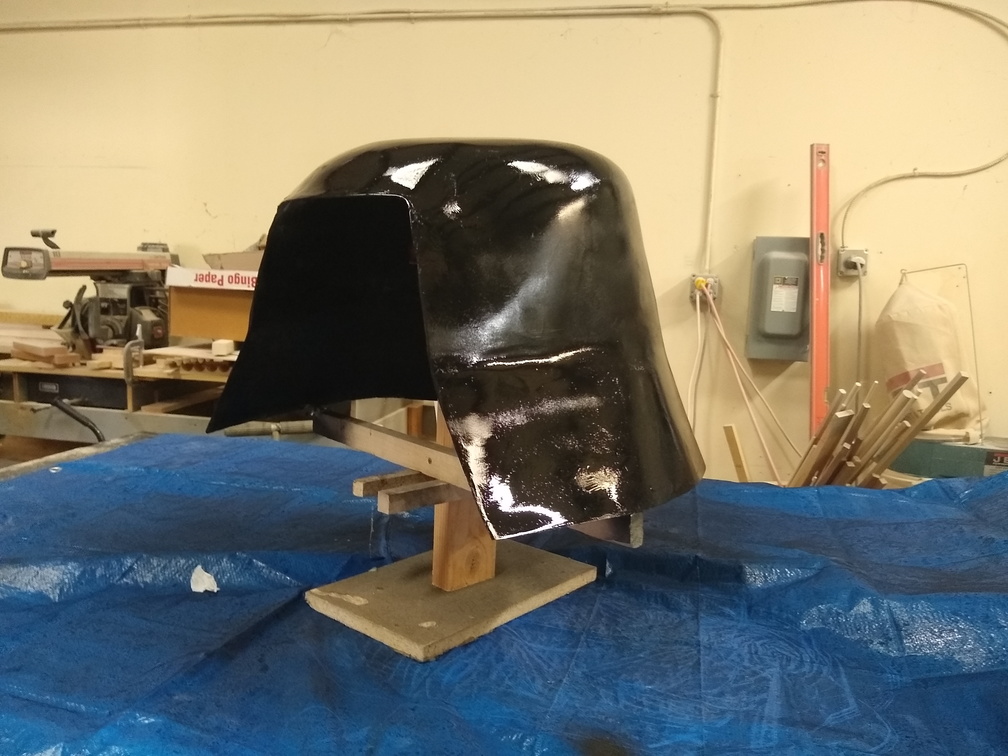
Clean up the finish on the mask with some more sanding and a paint with a little more gloss
Chin strap to hold the helmet on along with a little more padding
Cover the inside with fabric to soften the appearance

Long term, I’d like to cut the bottom of the shell off again and re-form it so that it matches the real thing a little better.  I also want to re-do some of the lines on the facemask to make them match better as well.  But, in the meantime, there are more projects to be done!

Dark Helmet – Final Prep (pt. 2)

The part that seemed like the easiest has turned out to give the most trouble.  The flare at the bottom edge of the shell has been very difficult to shape properly despite adding layer upon layer of new fiberglass.  The basic problem is that it is too wavy, so I’ve been attempting to build up the inside and outside so that I can sand it smooth without creating any holes or gaps, but we’re talking about needing to add about 3/4 inch of fibreglass.  Last night, however, provided a lightbulb moment.

I inverted the shell and used painter’s tape to approximate what I wanted the outside level to be.  It needs to bump out so it can be sanded smooth, but not by much.  Once the tape is in place, resin was poured into the gap between the fiberglass and the tape.  After the resin cured and some quick sanding, there was a nice smooth curve where previously it was super-wavy.

Early this morning, I hit the workshop and finished things up, getting some resin into a gap that I missed last night.  The shell is on target for getting paint tonight.  On my way home from work, I’ll stop by the shop to sand down the resin patches and put a final coat of Bondo over the helmet.  After dinner, I’ll give it a final sand and then start applying paint.

The face mask has already gotten its first two coats:

So far, so good, although I can see some of the artifacts of the cardboard construction still.  I might cover that with trim.  Speak of trim, the band saw made quick work of the foam floor tile that will make up the trim bit that goes down the middle.  I need to cut the parts that will make up the grill at the bottom and then get it all attached and painted.

Dark Helmet – Final Prep (pt. 1)

The deadline is rapidly approaching:  I need to have the helmet in paint by bedtime on Wednesday night and the face mask attached by Thursday afternoon.  The first step in getting to that deadline met is to mate the face mask with the shell.  Good news:

The top of the face mask will need to be trimmed down a little bit for sure, and I may need to trim the sides as well, but even with the bracing the rear of the mask, it fits between the hat and the shell.  This is great news, so I can move forward with the rest of the project!  With that sorted, I added some fiberglass along the bottom so that I can straighten out the edge.

Finally, I put a couple layers of gesso on the mask to seal it up so I can give it a quick sanding and then put the resin on it before paint.

Getting in to the home stretch now!  Tonight, my tasks are:

Sand the shell as smooth as it will get
Apply any additional fiberglass necessary
Sand the face mask
Apply resin to the face mask

Tomorrow night I have to get the paint applied (in this case, it will be Plasti Dip of course!).  If additional fiberglassing is required tonight, then tomorrow morning I will need to get up early to sand down the fiberglass and put filler on those spots.  If additional fiberglass is not required, though, I can go ahead and trim it down, sand it, get the filler put on and probably have time to give it a final sand and maybe some coats of plastidip yet tonight.  It’ll all be based on the fiberglass requirements.

Dark Helmet: Spaceballs the Face Mask

With under a week to go, I focused my attention on making the face mask.  Honestly, I’m not entirely sure how the whole thing is going to work at this point, but the basic idea will be that there will be some sort of hinge so that the face mask can be lifted into the void of the shell over the hat.  First things first, though:  I have to make the mask.  Out of…  something,.

Instead of doing this at the workshop, the floor of the living room became the base of operations.  Keep in mind through this whole process, though, that the shell is at the workshop and the face mask production is a couple miles away in the living room. What could possibly go wrong?

Sitting on the floor, I put Spaceballs on TV and paused it at part of the first entrance scene for Dark Helmet.  As it turns out, this gave me an actual life-size picture to work off of!  I broke out the glue gun, a couple Rock Auto boxes, a box cutter, and a rotary cutter and got to work.’

It took me a couple tries and I had to tear apart the mask and put it back together a couple times.  No picture to add here at this time of what I think is the finished product, but I made it so that the sides and the top will be cut down to size to match the shell.

Now that the basic mask is created, the gaps will be filled in with hot glue and I’ll sand everything down to make it smooth.  After a couple quick coats of some sort of sealant (gesso? poly? Don’t know yet), I’m going to coat it in polyester resin to harden it.

I also need to make some of the trim bits, since the mask is more two-dimensional right now.  I think there are some left over strips of floor foam from the Shark Gun project that I can use as the edging.  I’ll need to get some tinted plastic to make the visor ports, and the center grill will need to be trimmed out.  The metal port in the center will just be painted with a metallic paint after drilling some holes through.

Dark Helmet: Free from the plug

So far, things hadn’t gone to plan, so it shouldn’t be surprising that the finally-released product wasn’t quite right.

First of all, there is far more flaring around the bottom than there needs to be.  That isn’t a huge problem as I will trim that off and can easily add new fiberglass if necessary.  More concerning is that the left side of the helmet (that would be on the right side of the picture) flares out way more than it should and is very uneven.  When I was making the plug, I noticed that the proportions were off a little bit, but I couldn’t quite put my finger on it.  Off of the plug, the difference was painfully obvious.  I kicked this around for a bit before deciding on a course of action that involved cutting the shell in a couple places.  Since I didn’t have a plug any more and the deadling was rapidly approaching, it took a while to build up my nerve to touch the cutting wheel to the helmet.

I put two slices into the side so that I could tuck in the side and reduce the flare to match the other side.  Clamps held everything in place while I laid down some glass and let it cure.  When everything hardened, I was left with some ugly bumps, but the shape was much better.

The basic shell was completed, but it needed finishing work.  More on that later, since those problems are labor-intensive, but don’t require any real creativity.  The big parts now are creating the face mask and creating a way to get the helmet to sit on a head.  Of those two, the face mask sounds harder so that will be put off until later.  Solving the hat part, however, was easy to start on: Step one is to make a hat and I have a ton of fiberglass supplies, so that was the way to go.  I “should” have gotten a bowl or something that was roughly head-shaped, but impatience is my virtue so I looked around the shop for something that I already had right there.  I grabbed an old ballcap, stuffed it full of packing paper to give it (a very lumpy) shape, covered it with plastic wrap, and hit it with fiberglass.

Once that cured, I pulled it out and trimmed it down to a basic hat shape.  It isn’t very smooth, but it is very oversized.  It will get self-adhesive foam weatherstripping in order to ensure a firm fit and to be a little more comfortable.  If the helmet seems unstable, a chinstrap could be added to stabilize it, but we’re not there yet.  In order to attach it to the shell, I was originally going to make fiberglass tubes that I would cut to length and attach to the hat and the shell with resin, but there were a couple challenges with this.  The biggest challenge was that there needed to be room above and in front of the hat for the face mask to rotate up and store.  That means that the supporting mechanism would have to be off to the side which would put some shear load on the supports – likely more than they would be able to support.  So, plan B:

With the whole operation inverted, I rested the hat on a small box to space it out from the shell and then laid fiberglass in to attach the hat to the inside of the shell.  After a couple layers, I had a pretty solid platform.  Now that this is figured out, it was time to turn my attention to the face mask.

Dark Helmet: Begin the Fiberglassing

Because of its strength and the ease with which it can be formed, I chose fiberglass as the medium for the helmet shell.  I have worked with fiberglass in the past, but only as a tool to repair an existing structure.  I’ve never tried to fabricate with it.  So, I had a pretty good grip on the basics, but not a lot of practical knowledge.  That in mind, I decided to try some small-scale tests:

On the left, I had some plaster that had hardened inside a water bottle.  I covered it with polyurethane and using that as a test plug, I went ahead and wrapped the fiberglass around it.  The right side is a water bottle that I wrapped in fiberglass with no prep. When it all dried, the fiberglass was pretty well stuck to the plaster plug as well as to the bottle.  I expected the bottle’s results, but the plaster was disappointing.

New game plan was to cover the plug in many layers of poly and then wax it heavily, so that was the next step.

Once the plug was sealed and waxed, I started putting layers of fiberglass on.  I would let a layer dry and then put on another until there were at least 4 layers across the whole helmet.  Once that dried and cured, I attempted to pull the helmet from the plug.

That’s the plug after the shell was removed.  Total disaster.  The fiberglass didn’t want to release, even with the sealer and the wax so I was stuck using a hammer and chisel to break up the plaster and the foam and dig it out of the shell.

Dark Helmet

For the 2018 costume, Debbie decided to do Dark Helmet from Spaceballs.  My task has been to make the portion of the costume from which it derives its name: the helmet itself.

The helmet needed to be fairly sturdy and is curved, so the material needed to be fairly easy to work with in that regard.  Because weight was also a concern, I decided that fiberglass would be the material for the shell of the helmet.  My plan was to first sculpt a plug out of some other material and once I had the plug the way I wanted it, I could lay the fiberglass on it, pull it off the plug, and have my shell.

Since the plug was something that was just going to be set aside anyway, the material needed to be inexpensive but it also had to be something that I could easily work with hand tools.  Those criteria led me to start off with spray insulation foam.  It’s cheap and once it is dry sanding it is pretty easy.

This started as a much taller pile when I sprayed it out, but as it dried it collapsed and spread out a bit.  I got another couple cans and piled it on a little more slowly.  Once I had a good stack, I got to sanding.

As I was getting in to the finishing stages of the sanding, I realized that I was going to need to build up some areas and smooth out some others.  I chose plaster of Paris for that job and went through about 30 pounds of it.  Definitely not the right tool for the job, but at the time it seemed to make sense.  I built up the plug and then sanded it down.  And then built it up.  And then sanded it down.  And then built it up….  etc etc

Finally, I was left with a plug that was roughly shaped like the helmet I was trying to form.

Next Project: Edward Scissorhands (with a twist)

The next project that my wife has decided that I will undertake is to make the fully functional (but not actually sharp) scissorhand gauntlets for her Edwina Scissorhands cosplay.  I’ve done a little bit of sketching and drawing, but today I built a couple prototypes.

My first prototype didn’t survive long enough to get its picture taken, but it served its purpose very well by teaching me a little bit about things like scissors and how they articulate.  Based on my experience with that, I was able to whip up a new prototype that seemed to actually work quite well.

The prototypes were made from cardboard with bread ties as the hinge pins.  The second prototype utilized a push rod with an articulation point.  The first prototype seemed to indicate that it would be required, but upon some testing it was obvious that the additional hinge was simply going to be a place for things to go wrong.  Regardless, here it is, mounted on a length of cardboard and Velcro-strapped to my arm:


I took out the articulated push rod and replaced it with a straight bit, then mounted the apparatus up my sleeve to simulate a hand more closely:

This seemed to actually work pretty well, and seems to fit the overall design for the costume, according to The Boss.  I envision this existing at the end of a long sleeve, loose enough and long enough to be able to get the hand all the way to the end, with the scissors being somewhat close to where the hand would normally be.

Roughly speaking, I’m trying to build towards this:

Once I have the mechanism down, I’ll start trying to replicate the look of the individual shears.  And as I review this post, I see that I need to re-adjust how the shears mount since they appear to be at a right angle to the wrist such that when the arms are held straight out, the shears point down.